
Overview
If your organization tracks worked time, the final recommended setup step is to configure ActivityTimeline as your Jira Time Tracking Provider.
This replaces Jira’s default time tracking dialog with ActivityTimeline’s enhanced worklog experience, allowing users to log time more efficiently while giving managers additional visibility into worklogs.
Set ActivityTimeline as the Time Tracking Provider
To change your time-tracking provider, follow these steps:
-
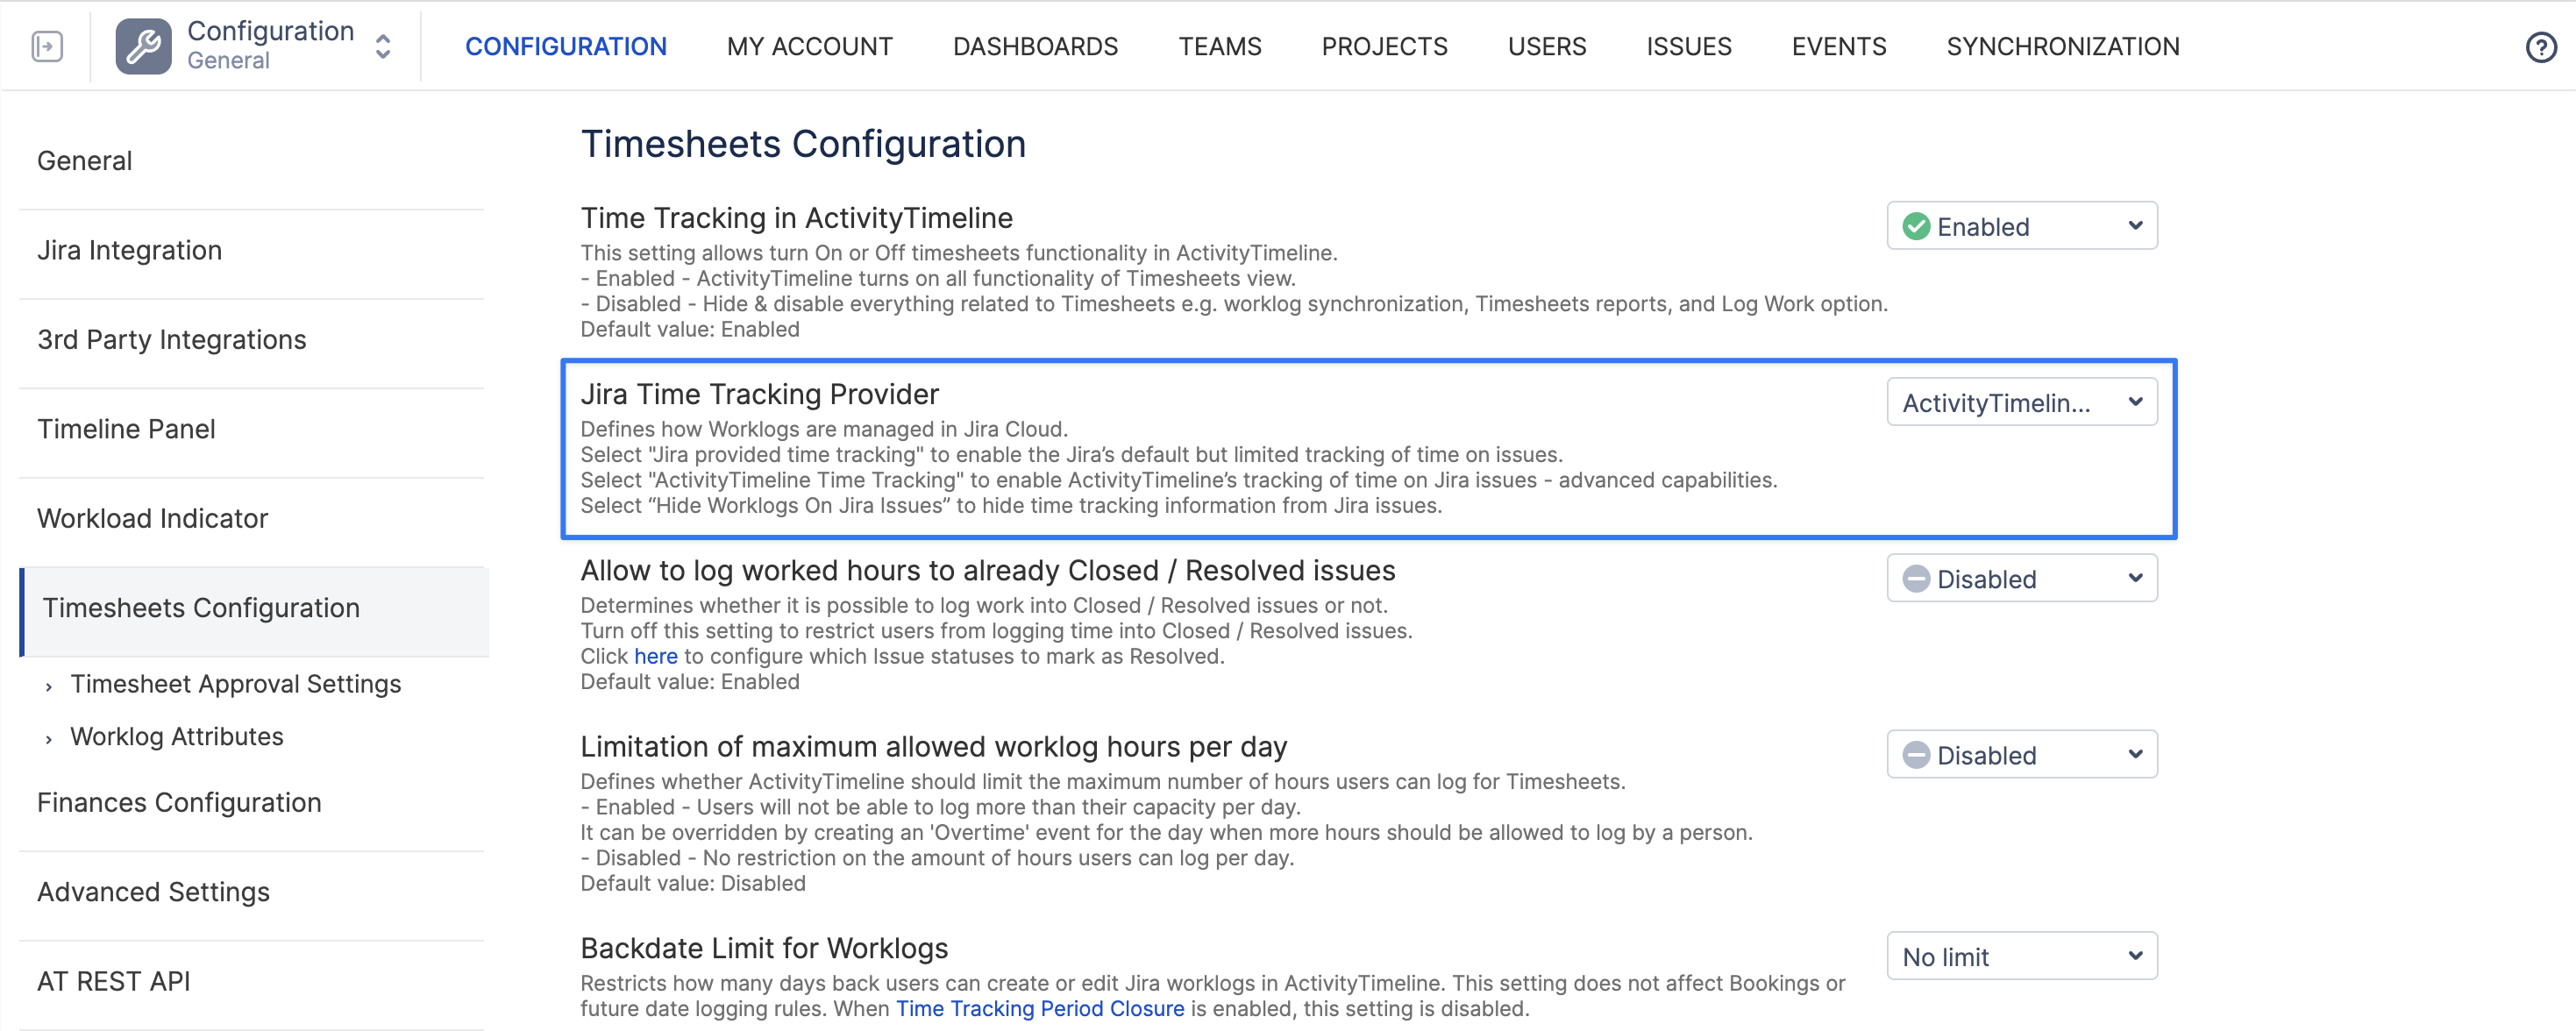
Navigate to ActivityTimeline Configuration → Timesheet Config
-
Under Jira Time Tracking Provider choose ActivityTimeline → Click ‘Update’
Logging Time from a Jira Issue
After ActivityTimeline is configured as the Time Tracking Provider, users can log work directly from the Jira issue page.
There are two ways to open the ActivityTimeline Log Work dialog:
-
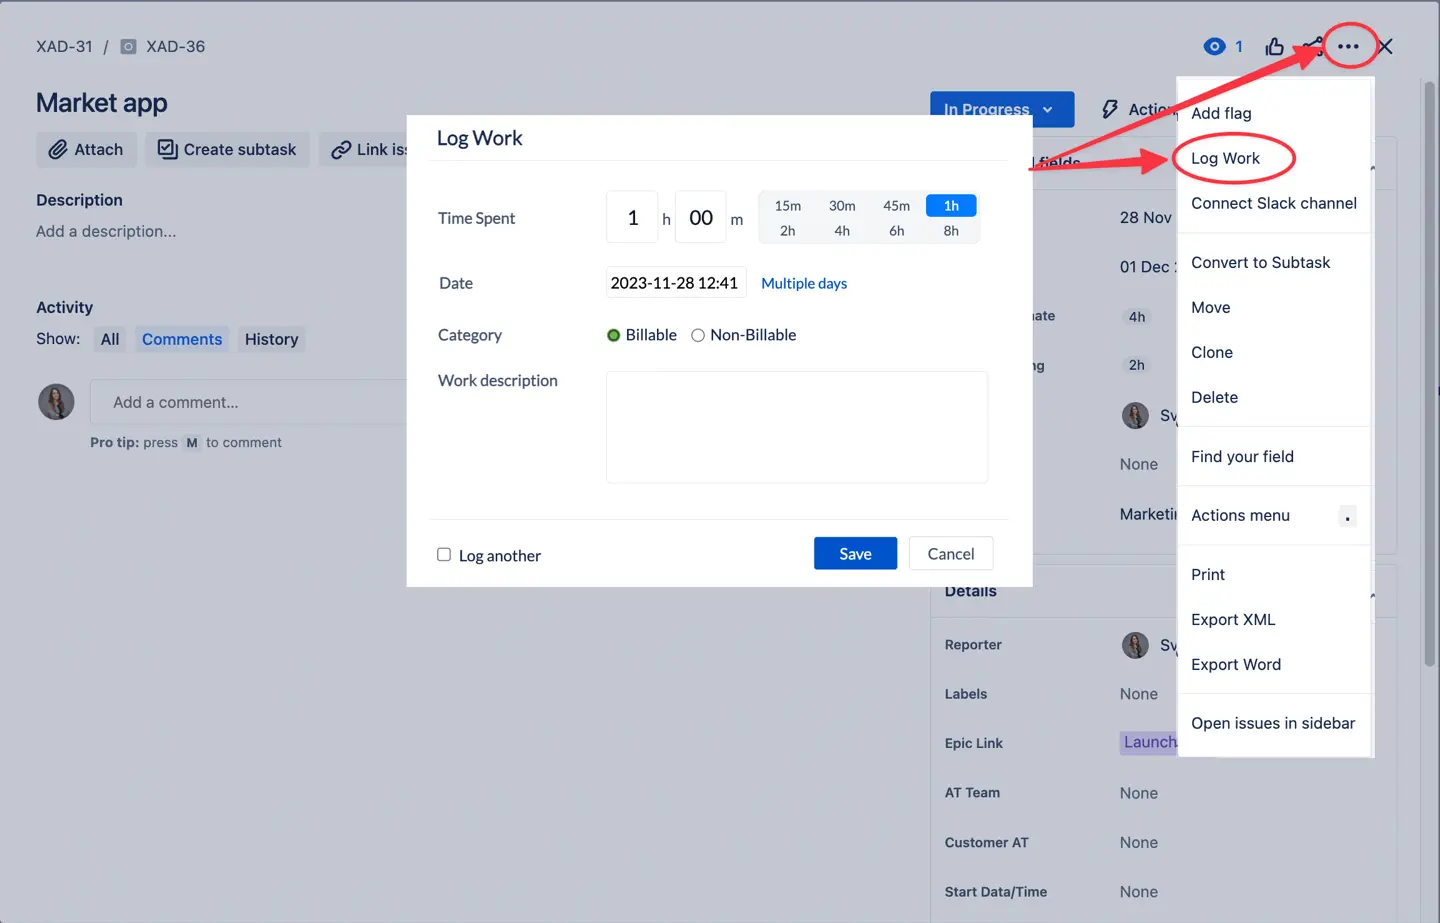
Click on the 'Actions' icon located at the top right corner of the issue page → Choose the 'Log work' option. → The ActivityTimeline Log Work dialog will then open.
-
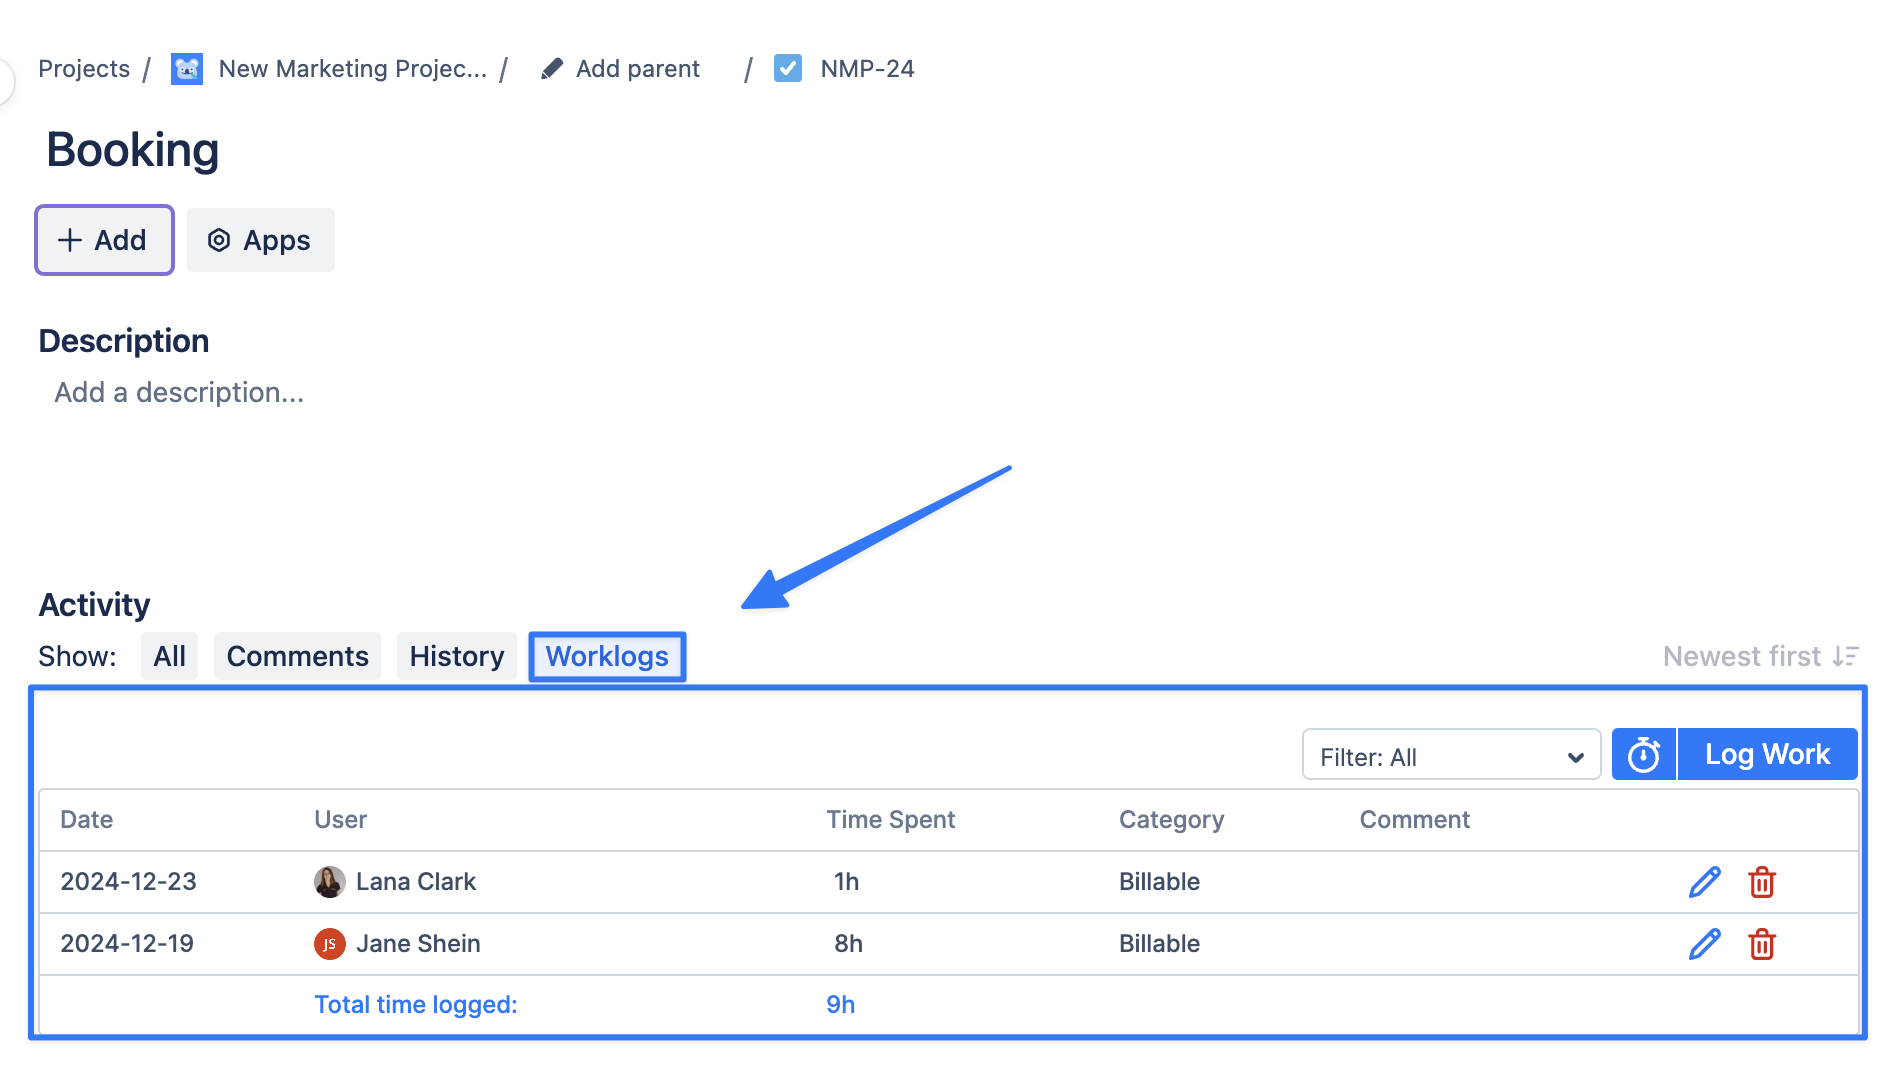
Starting From V.9.9.4 Click on the show ‘Worklogs’ tab → Then click ‘Log Work’ or on a timer icon to log time:
Benefits of ActivityTimeline Time Tracking
Compared to Jira’s default time tracking, ActivityTimeline provides several additional capabilities.
-
Selection of Worklog Categories: When logging time from a Jira issue page, users can now choose from different worklog categories. This makes it easier to organize and understand where your time is going.
-
Logging Time for Multiple Days: Users now have the flexibility to log time for tasks that extend over multiple days in a single entry. This functionality is particularly useful for longer tasks, reducing the complexity and increasing the accuracy of time reporting.
-
Viewing Worklogs in a Table View: The manager now can see the total time spent on the issue as well as the breakdown per user directly from the Jira issue page.
What’s Next?
Your initial ActivityTimeline setup is now complete, and your managers and team members can start planning work, tracking time, and exploring the application’s main features.
This Quick Start Guide covered the essential configuration required to get started. However, ActivityTimeline offers many additional capabilities that you can configure as your organization grows, including:
-
advanced planning and scheduling,
-
timesheet settings and approvals,
-
workload and capacity management,
-
reports and analytics,
-
financial planning and cost tracking (Advanced Edition),
-
integrations and synchronization settings,
-
and many other administration options.
To explore all available configuration options, continue with the
https://help.activitytimeline.com/at/administration