
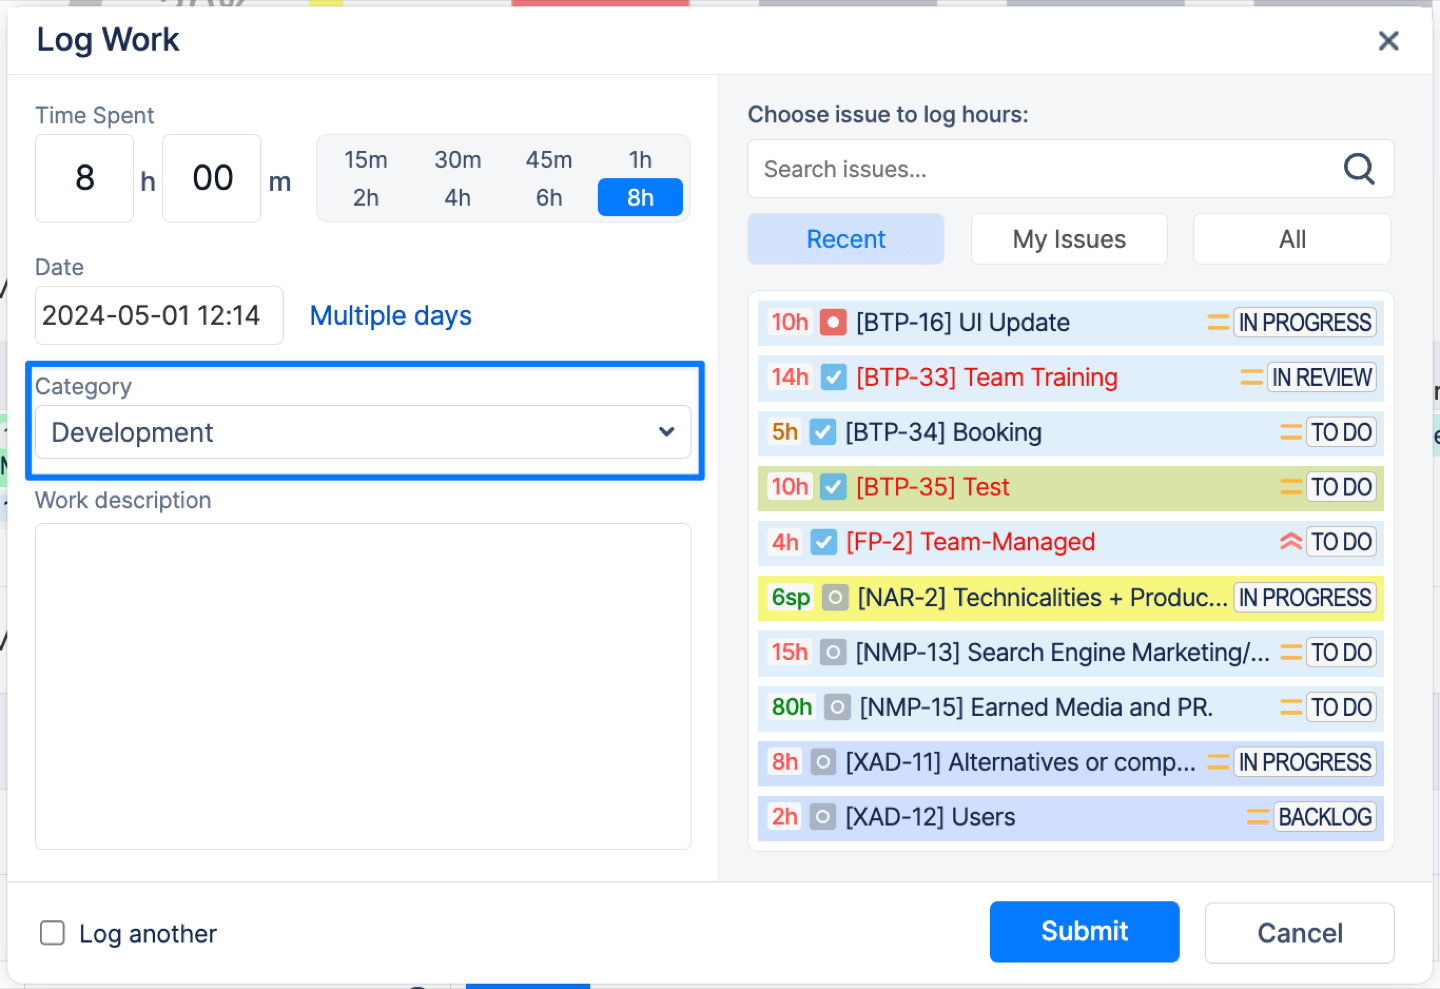
In addition to standard time logging, ActivityTimeline allows users to assign each worklog to a Worklog Category.
Categories help organizations better understand how time is spent and provide more detailed reporting in Timesheets.
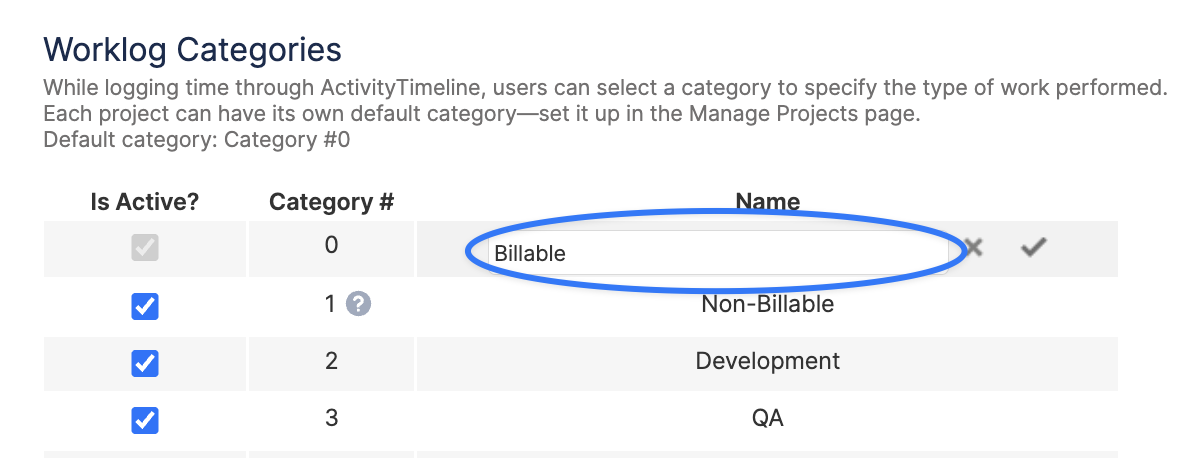
Default Worklog Categories
By default, ActivityTimeline includes two worklog categories:
-
Billable
-
Non-Billable
Administrators can add up to 100 worklog categories under:
ActivityTimeline Configuration → Timesheets Config → Worklog Categories
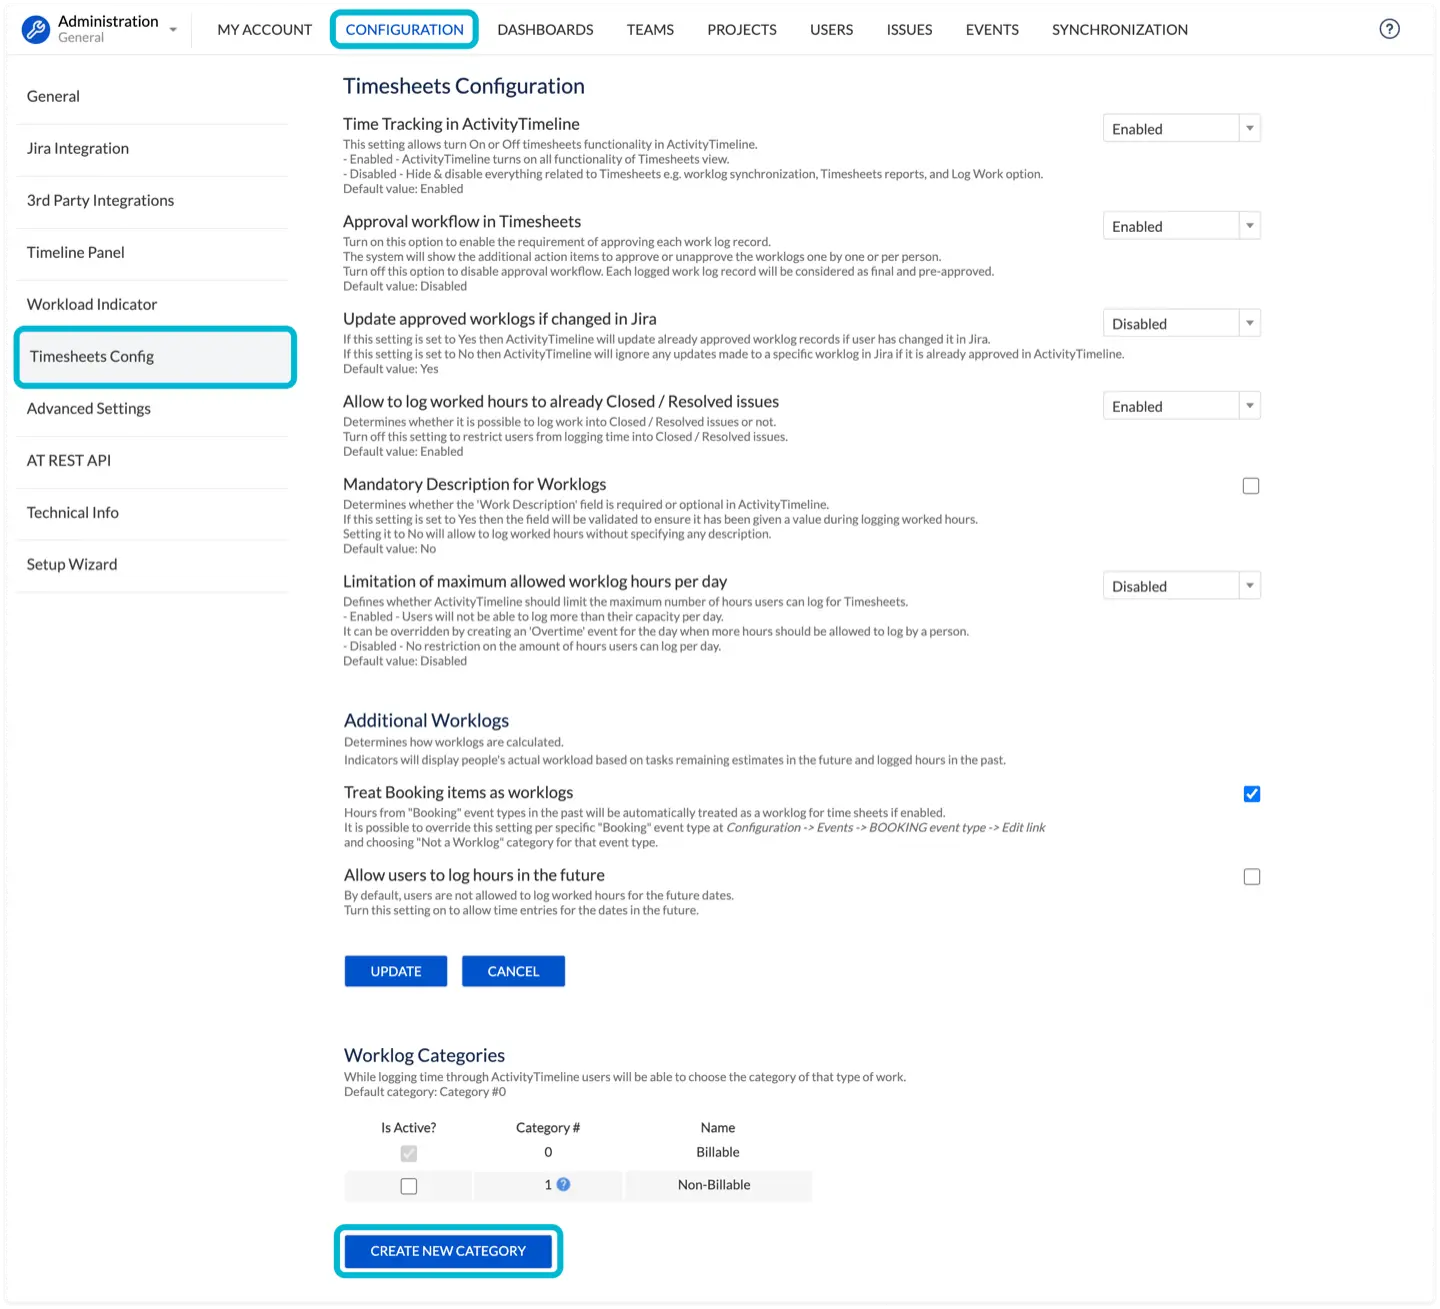
By default, worklogs submitted through ActivityTimeline, Jira, or third-party apps are displayed as Billable in ActivityTimeline.
If you want to use a different default category name, you can rename the Billable category to match your organization’s terminology.
Default Category per Project
You can define a default worklog category for specific Jira projects.
This is useful when different teams, departments, or project types follow different time-tracking rules.
To configure a default category for a project, go to:
ActivityTimeline → Configuration → Projects → Manage → Default Worklog Category

Once configured, worklogs created within the selected project will automatically receive the chosen category unless the user changes it manually while logging time.
Logging Time in Jira Using ActivityTimeline as the Time Tracking Provider
Jira Cloud allows administrators to select a custom time tracking provider.
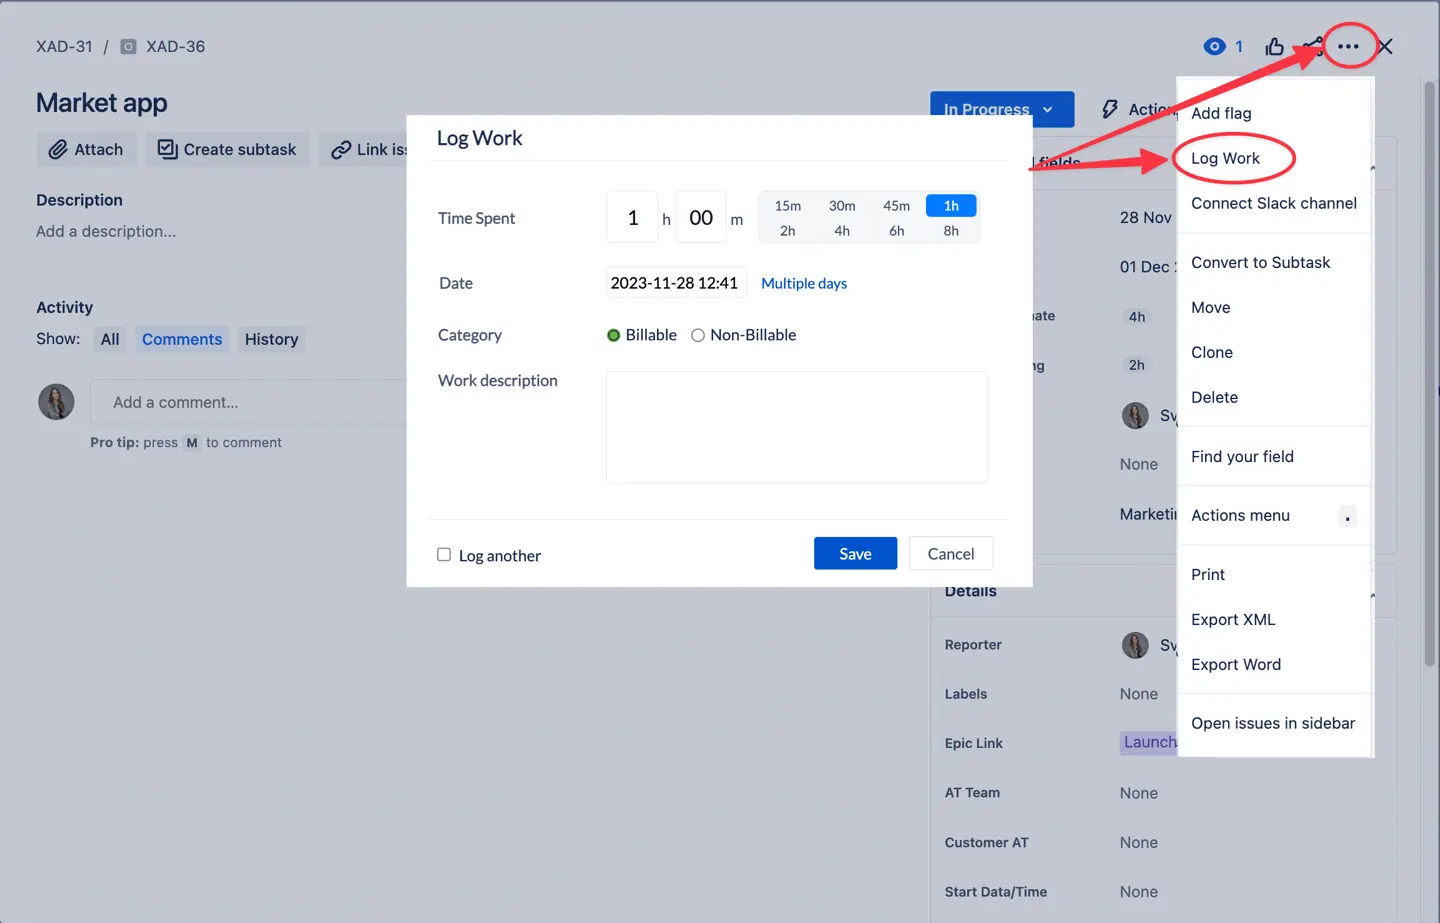
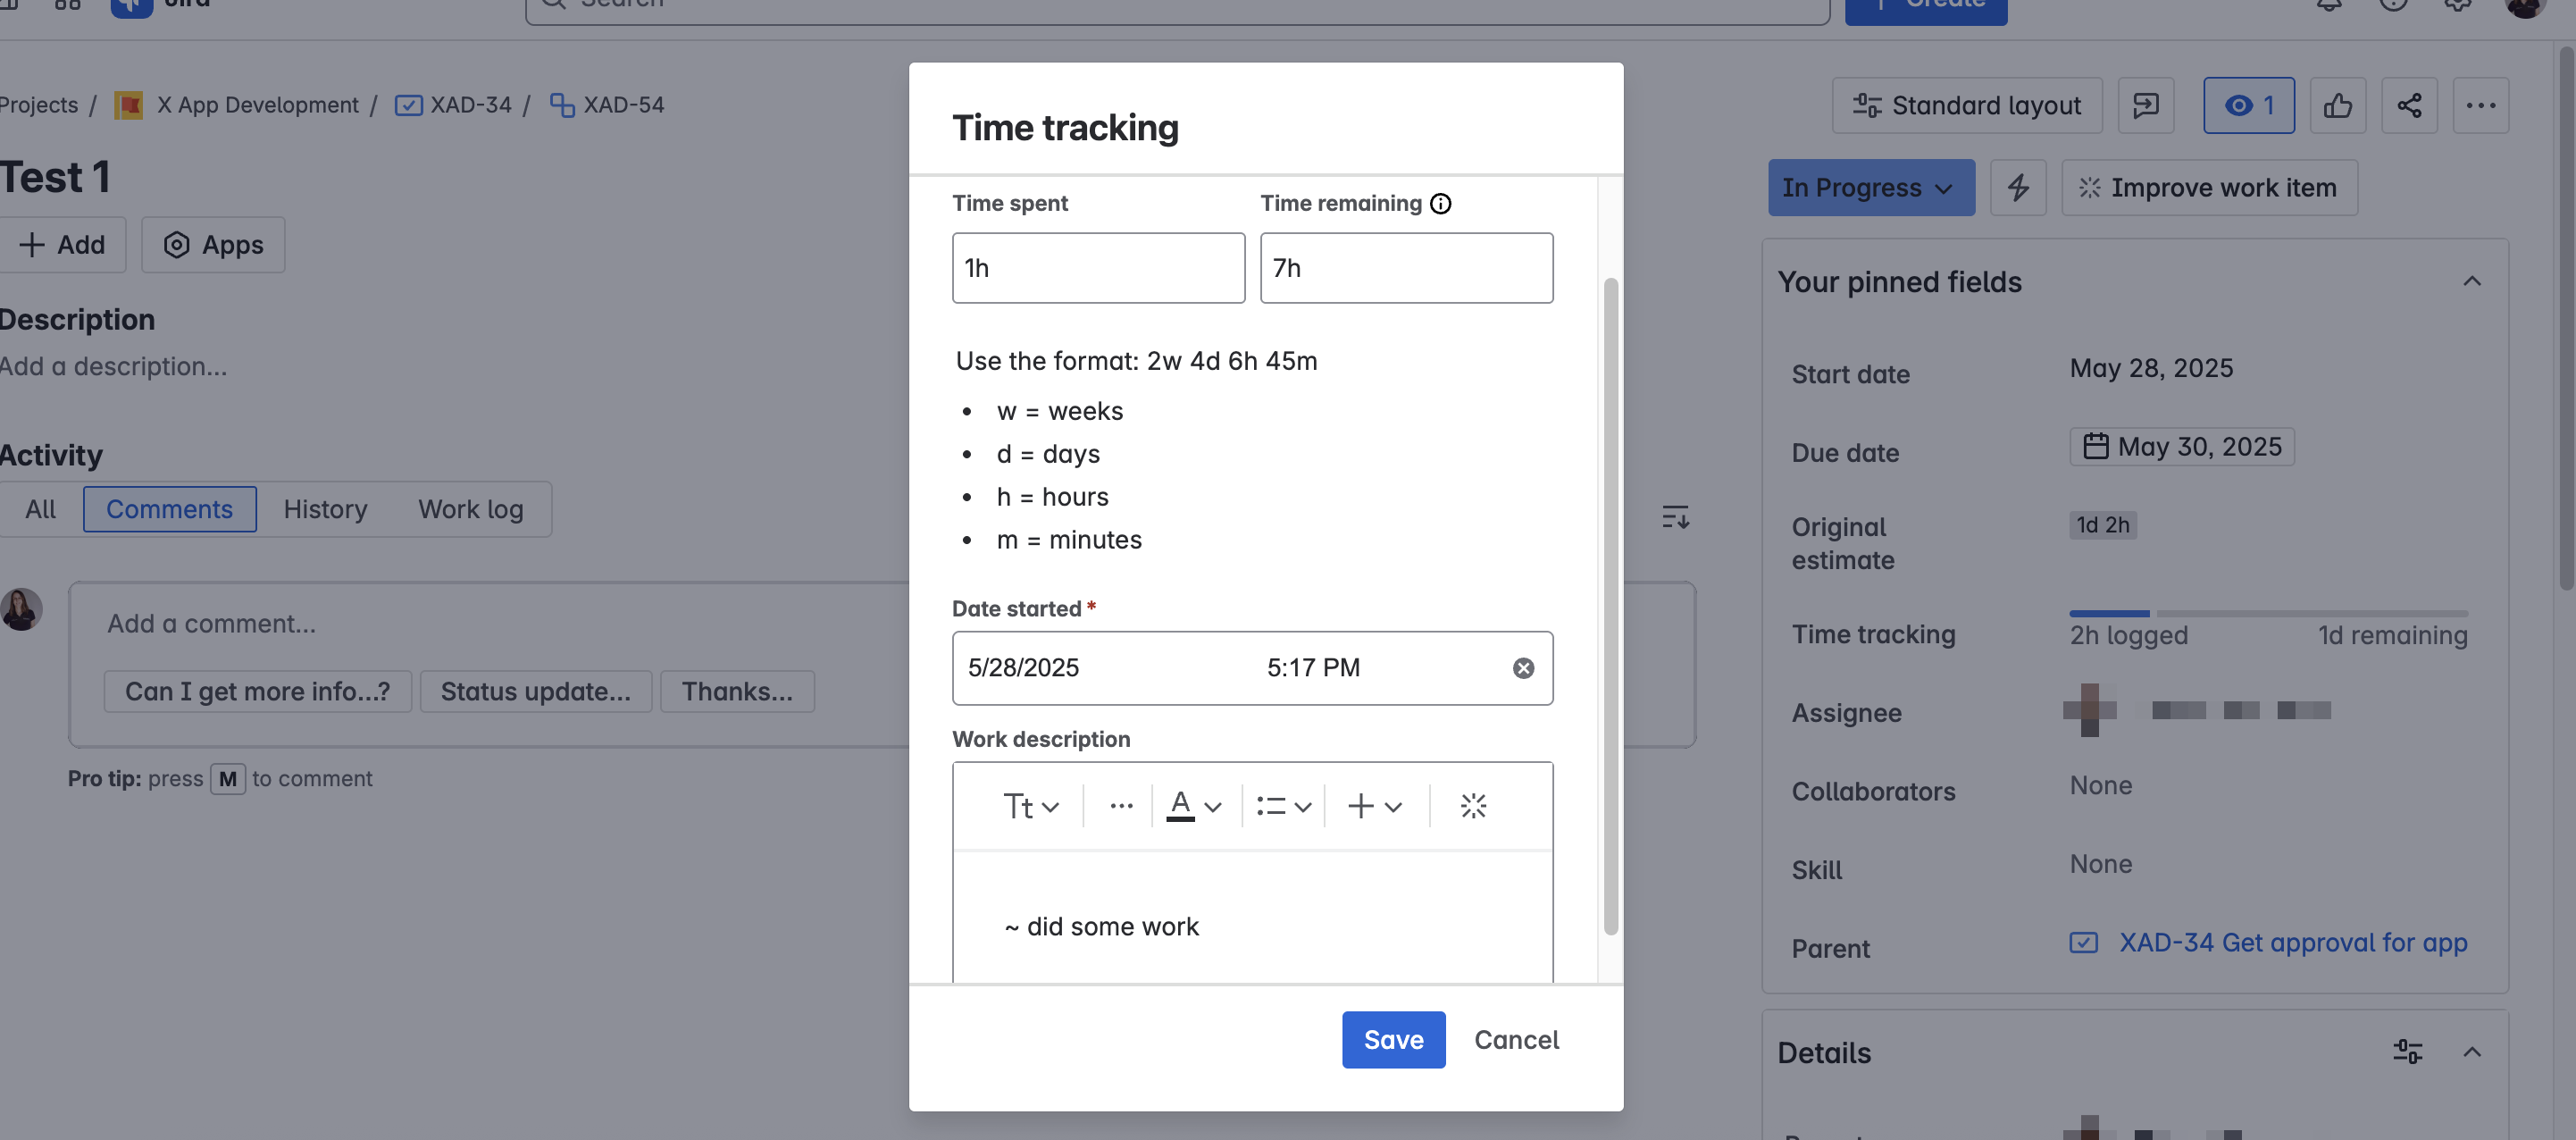
If ActivityTimeline Time Tracking is selected as the Jira time tracking provider, users can log time from the Jira issue page using the ActivityTimeline Log Work dialog.
Once ActivityTimeline is selected as the time tracking provider, users can log time from the Jira issue page in two ways:
-
Click the Actions icon in the top-right corner of the issue page and select Log Work.
-
Open the Worklogs tab and click Log Work or the timer icon.
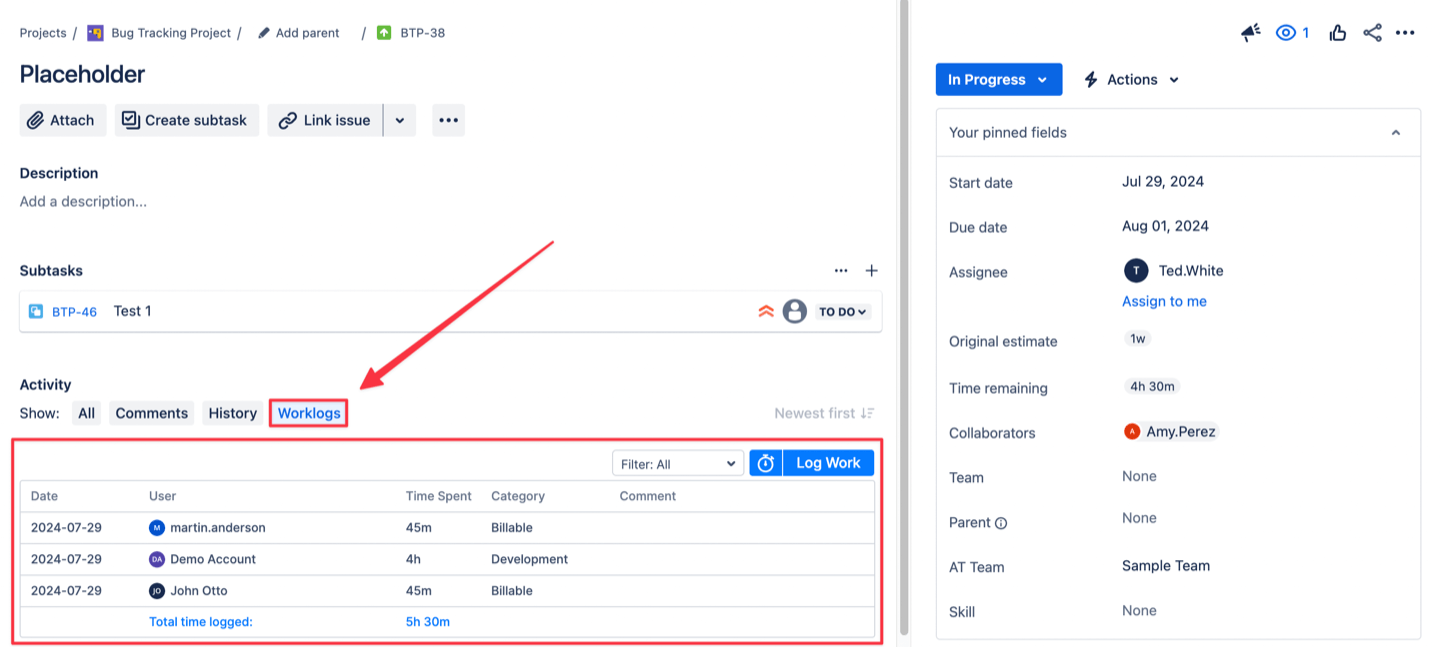
The ActivityTimeline Log Work dialog will then open directly from the Jira issue page.
Logging Time in Jira Using the Jira Time Tracking Field
If Jira is selected as the time tracking provider, worklogs submitted directly through Jira will be shown in ActivityTimeline as Billable by default.
In ActivityTimeline, this corresponds to Category #0 in Timesheets Configuration.
Users can also submit Jira worklogs as Non-Billable, which corresponds to Category #1, by adding the ~ symbol at the beginning of the worklog comment in Jira.
ActivityTimeline will recognize this symbol and categorize the worklog as Non-Billable.
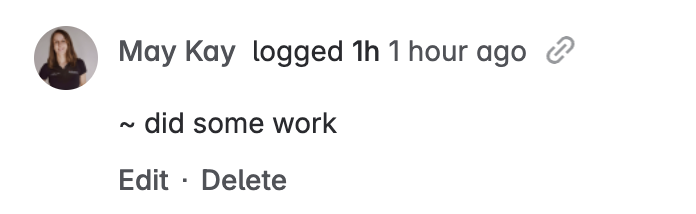
The system will read it and show and properly categorize such worklogs:
Timesheets and Worklog Categories
Worklog Categories can be used in ActivityTimeline Timesheets to analyze how time is distributed across different types of work.
You can group, filter Timeline or Detailed Timesheets by Category to see how much time was spent on each category.
To do this:
-
Go to Timesheets.
-
Open the Timeline or Detailed view.
-
Open the Custom tab.
-
In the Group By dropdown, select Category.
-
To filter open Filters, select Category.
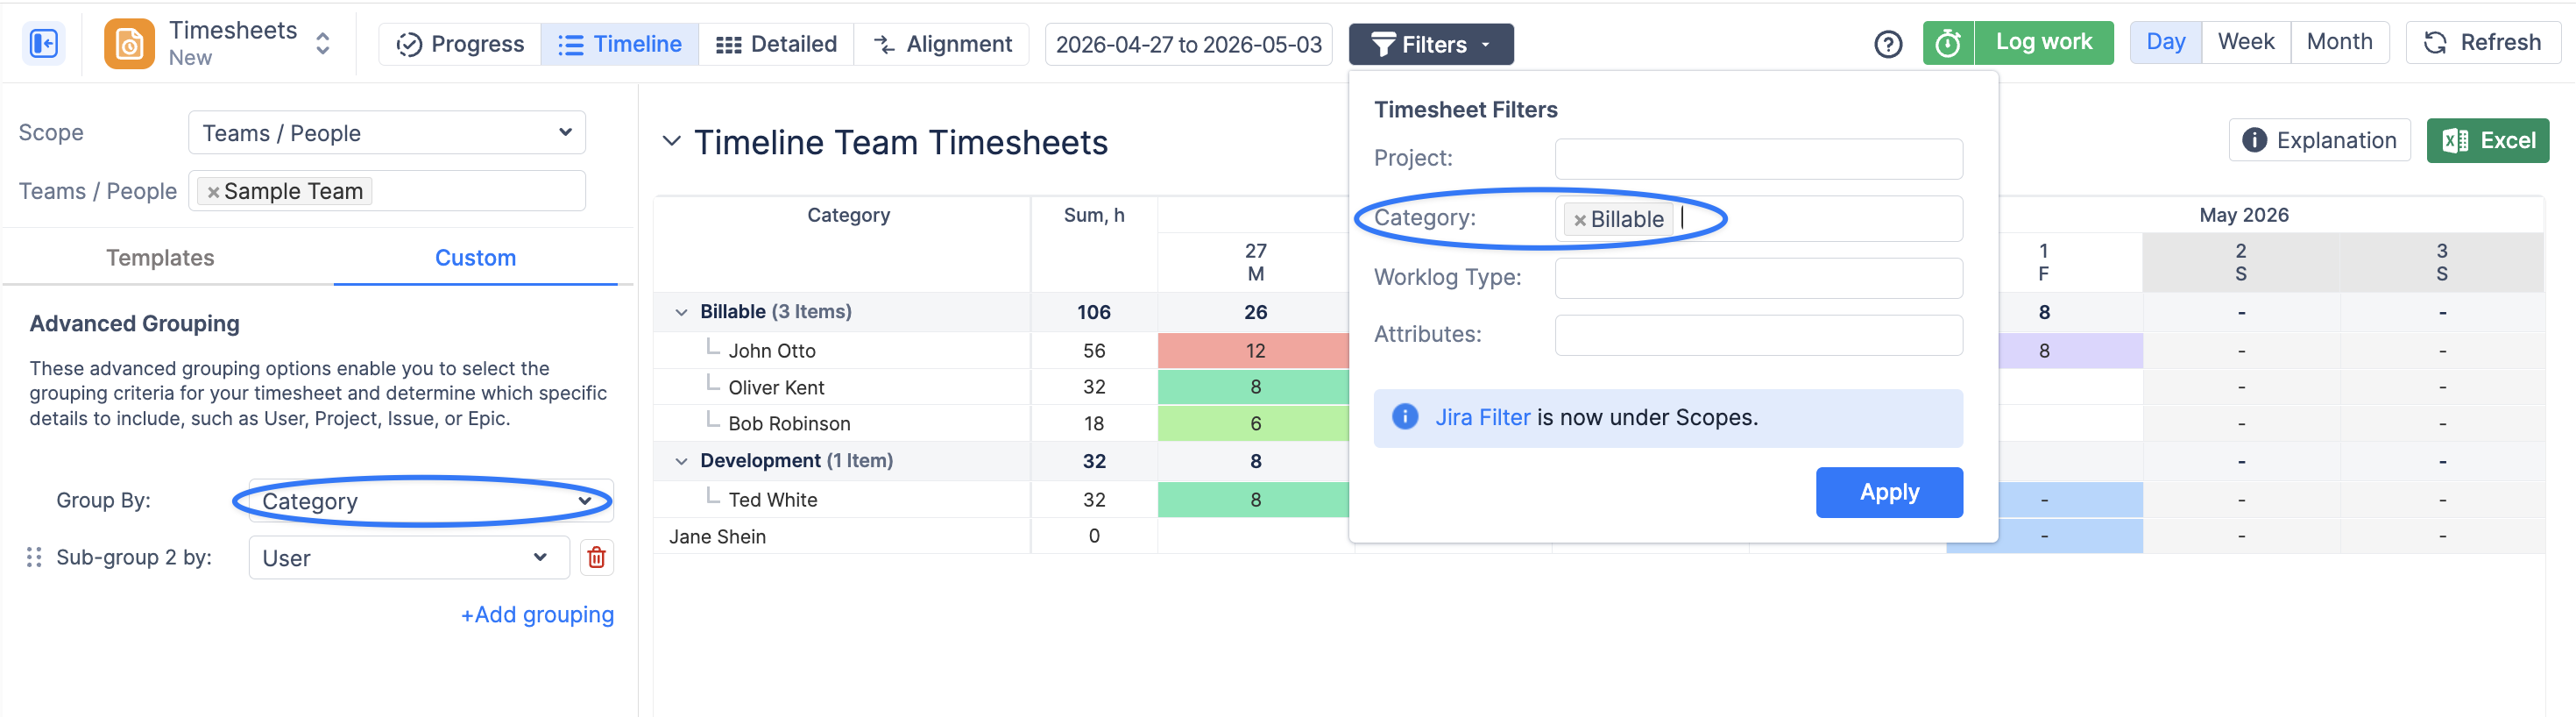
This helps managers and finance teams understand how time is consumed across billable, non-billable, support, development, internal, or other configured work categories.