
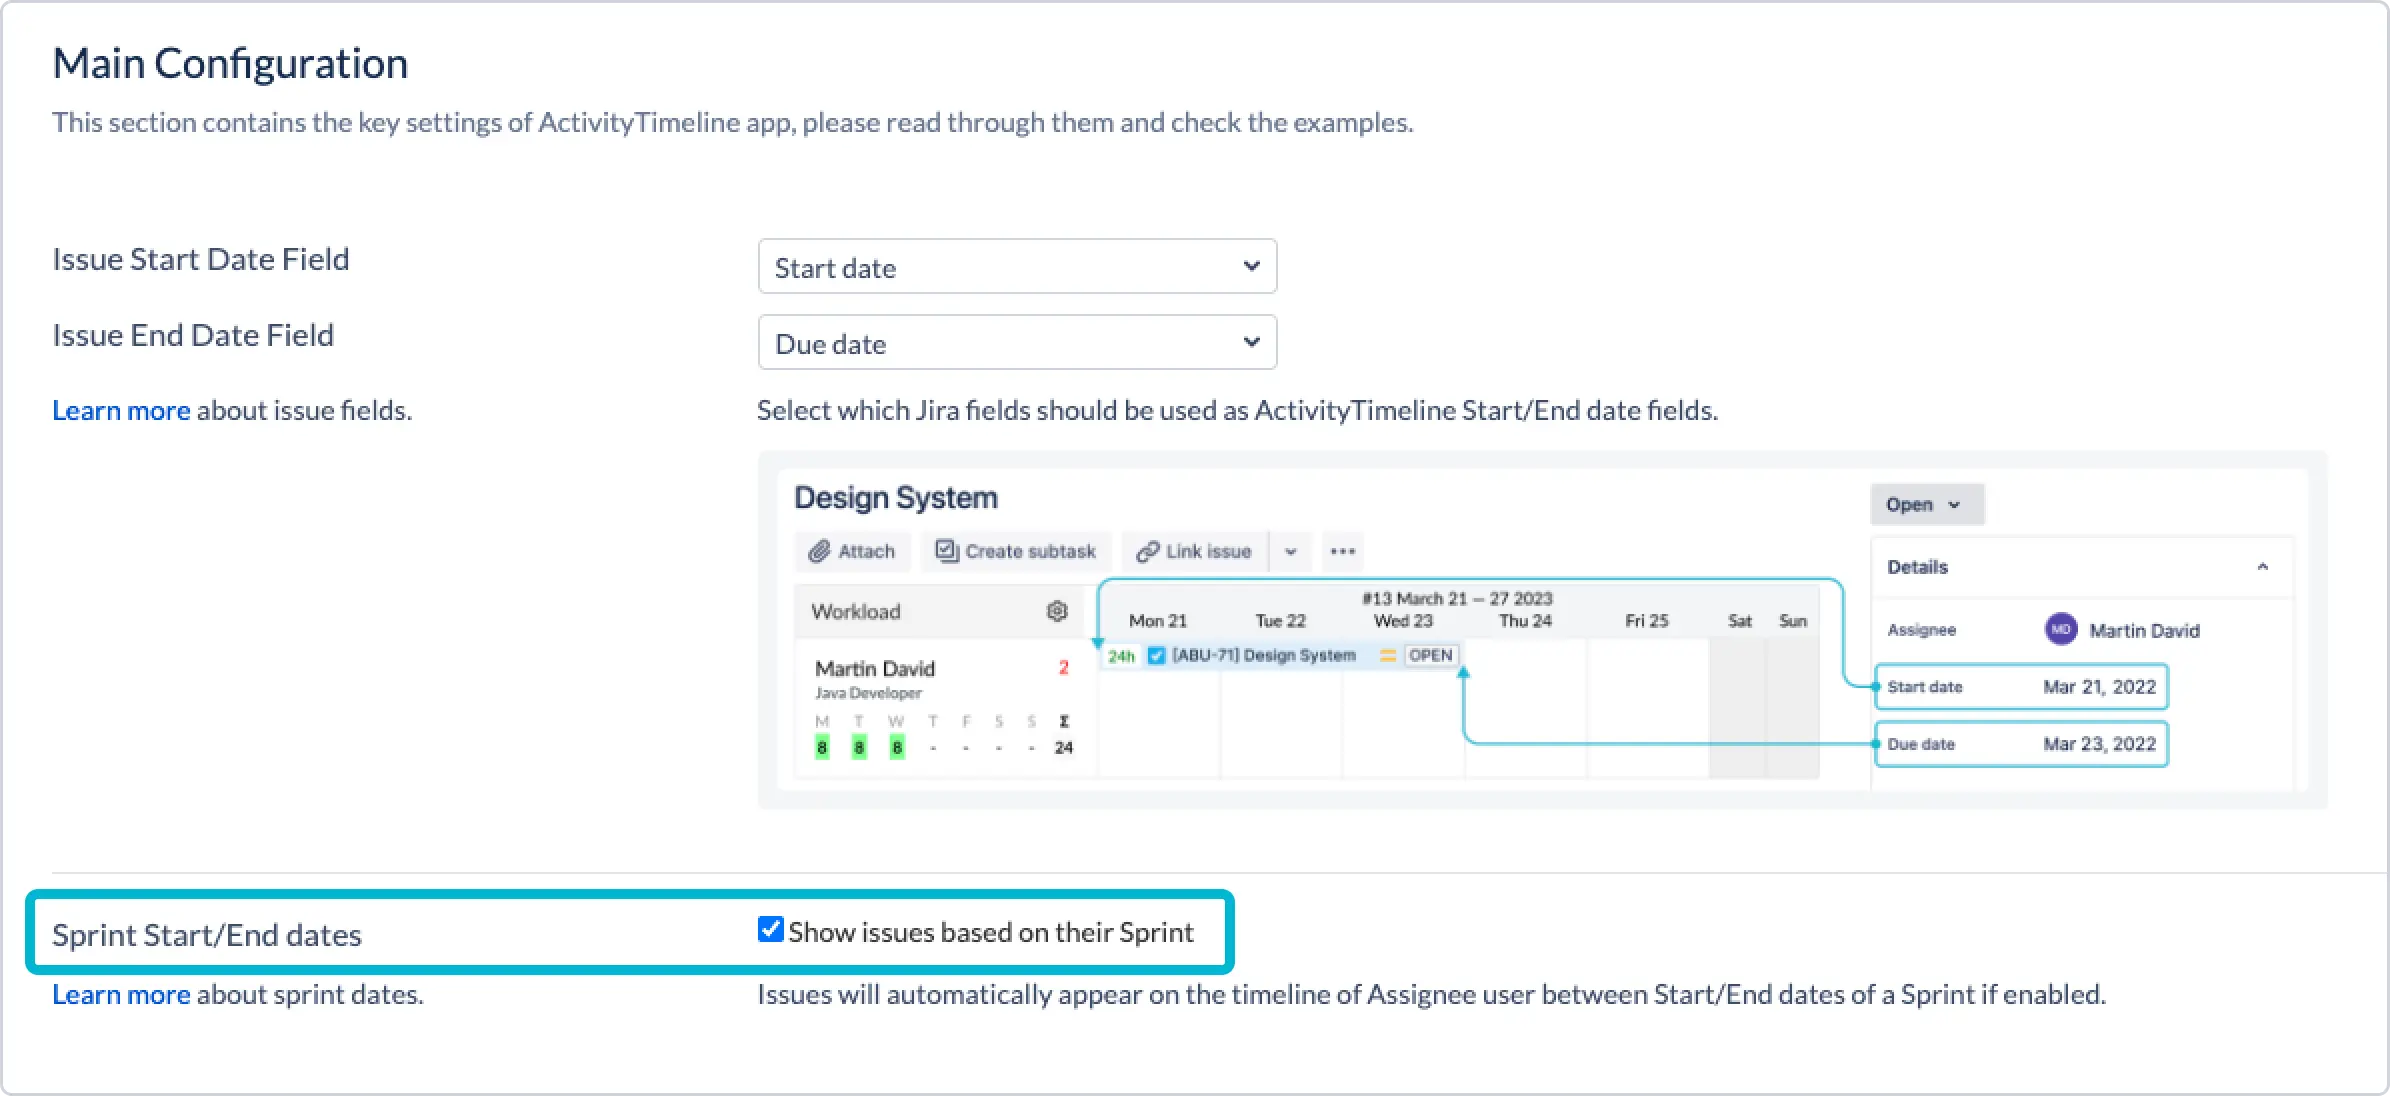
Use sprint start/end dates to automatically show issues on the calendar
ActivityTimeline Integration with Sprints
For those who work in sprints, ActivityTimeline allows the re-use of the Start/End dates of the whole sprint for individual stories/tasks of the sprint. This feature simplifies the process of managing tasks within a sprint by automatically populating users’ timelines based on the sprint schedule.
You need to have a Sprint that already has its Start/End dates defined and tasks assigned to users in Jira and ActivityTimeline you need to enable the option to “Show issues based on their Sprint” (Once enabled, please, navigate to Configuration → Synchronization → Refresh Issues → Perform Full Issues Refresh'):
After you do this, the system will automatically display tasks on the timelines of your users, based on the Sprint Start/End dates.
Priority of Issue Start/End Date Fields in ActivityTimeline: To display issues on the timeline based on sprint dates, please ensure that the Issue Start/End Dates are either empty in Jira or not mapped in ActivityTimeline.
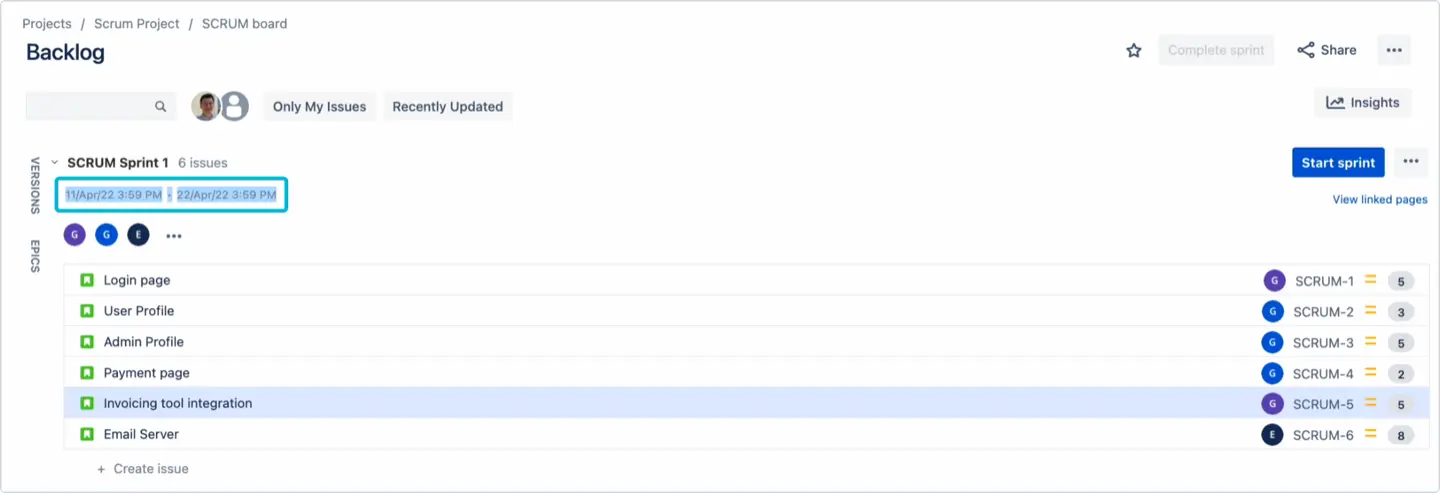
Assignments of tasks to sprints
Assignments of tasks to sprints are managed directly within Jira. During the sprint planning phase, teams decide which tasks (issues) from the project backlog will be worked on during the upcoming sprint. These tasks are then moved to the sprint backlog.
A short video below demonstrates best practices for sprint planning combining Jira and ActivityTimeline functionality:
Create a Sprint in Jira and add tasks to it.
If you want to preplan on the team level first, add a team to the tasks or assign it directly to users.
Navigate to ActivityTimeline → Click ‘Refresh’ to synchronize changes
Assign team members to tasks based on their availability from the Team Panel
Important:
Do not drag and drop tasks on the Planner if you want them to be shown based on sprint dates. Dragging and dropping tasks will assign specific dates to the tasks, overriding the sprint dates.
If you have already assigned dates by dragging and dropping, you can revert to using sprint dates by following these steps:
Click on the task.
Go to Schedule.
Clear the Start/End Date fields.
Click ‘Update’.
Click ‘Refresh’ on the top right corner of the Planner.
By following these steps, the task will be displayed on the timeline based on sprint dates.
Sprint Synchronization
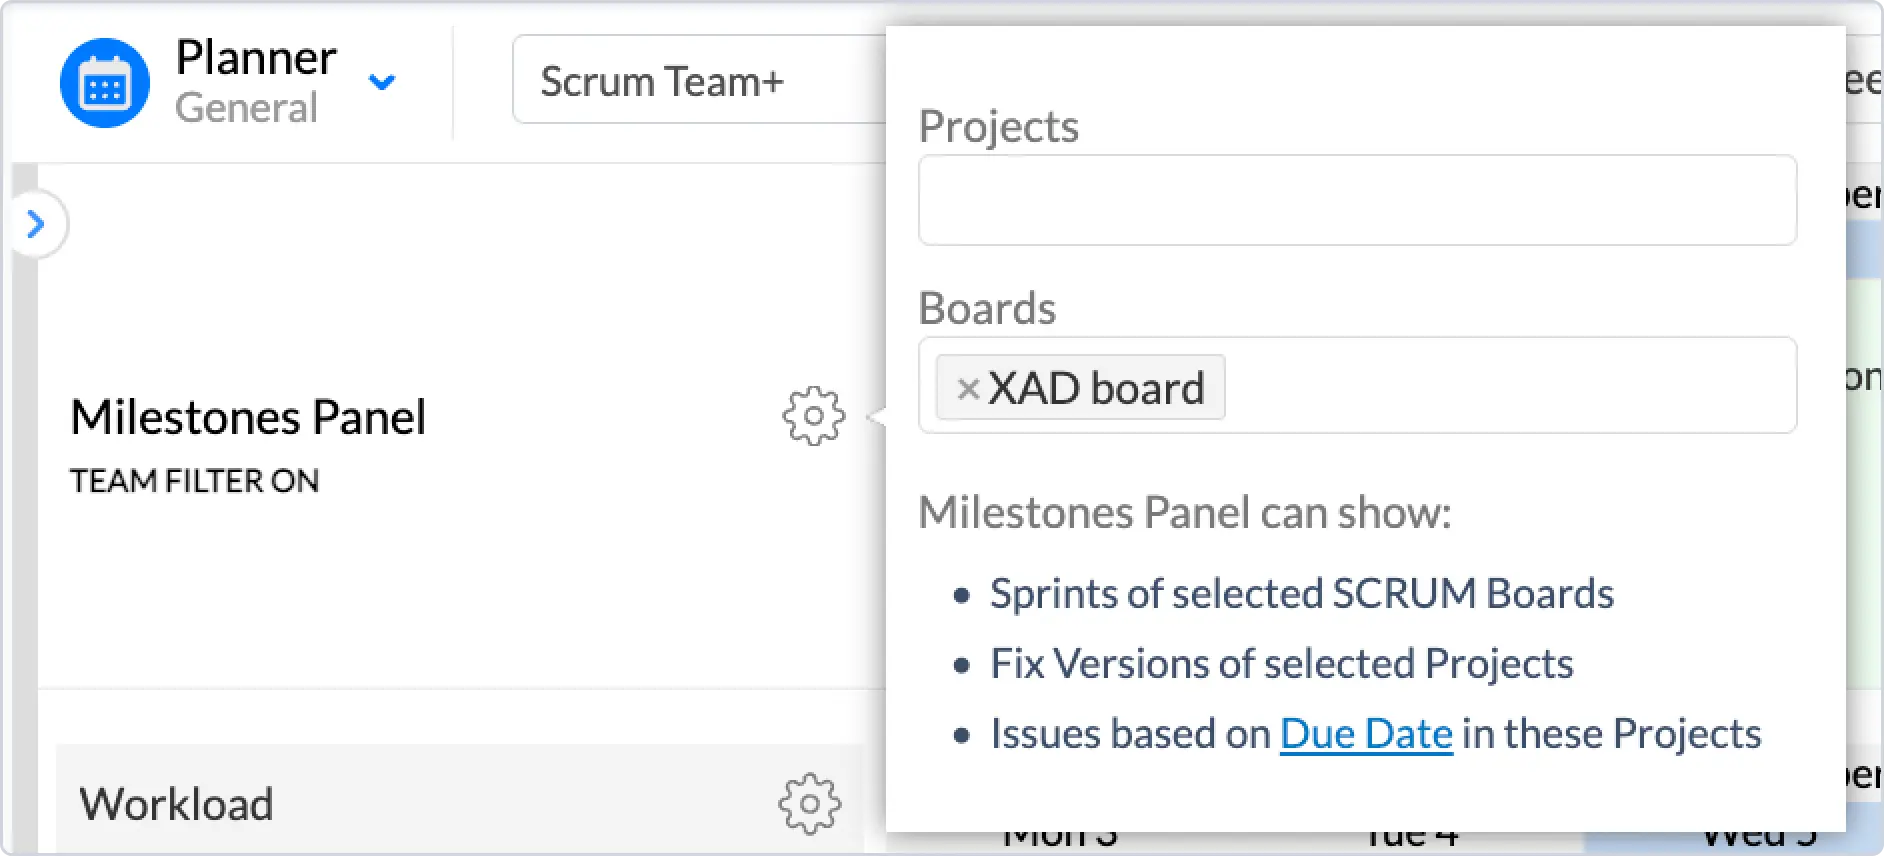
If a task is moved from one sprint to another, you can refresh the sprints and their associated issues using the Milestone panel. By default, the Milestones Panel is not visible on the dashboard. To access it, click the flag icon located on the right panel toolbar. Then, click on the ⚙️ icon to select the Projects and Boards you wish to display:
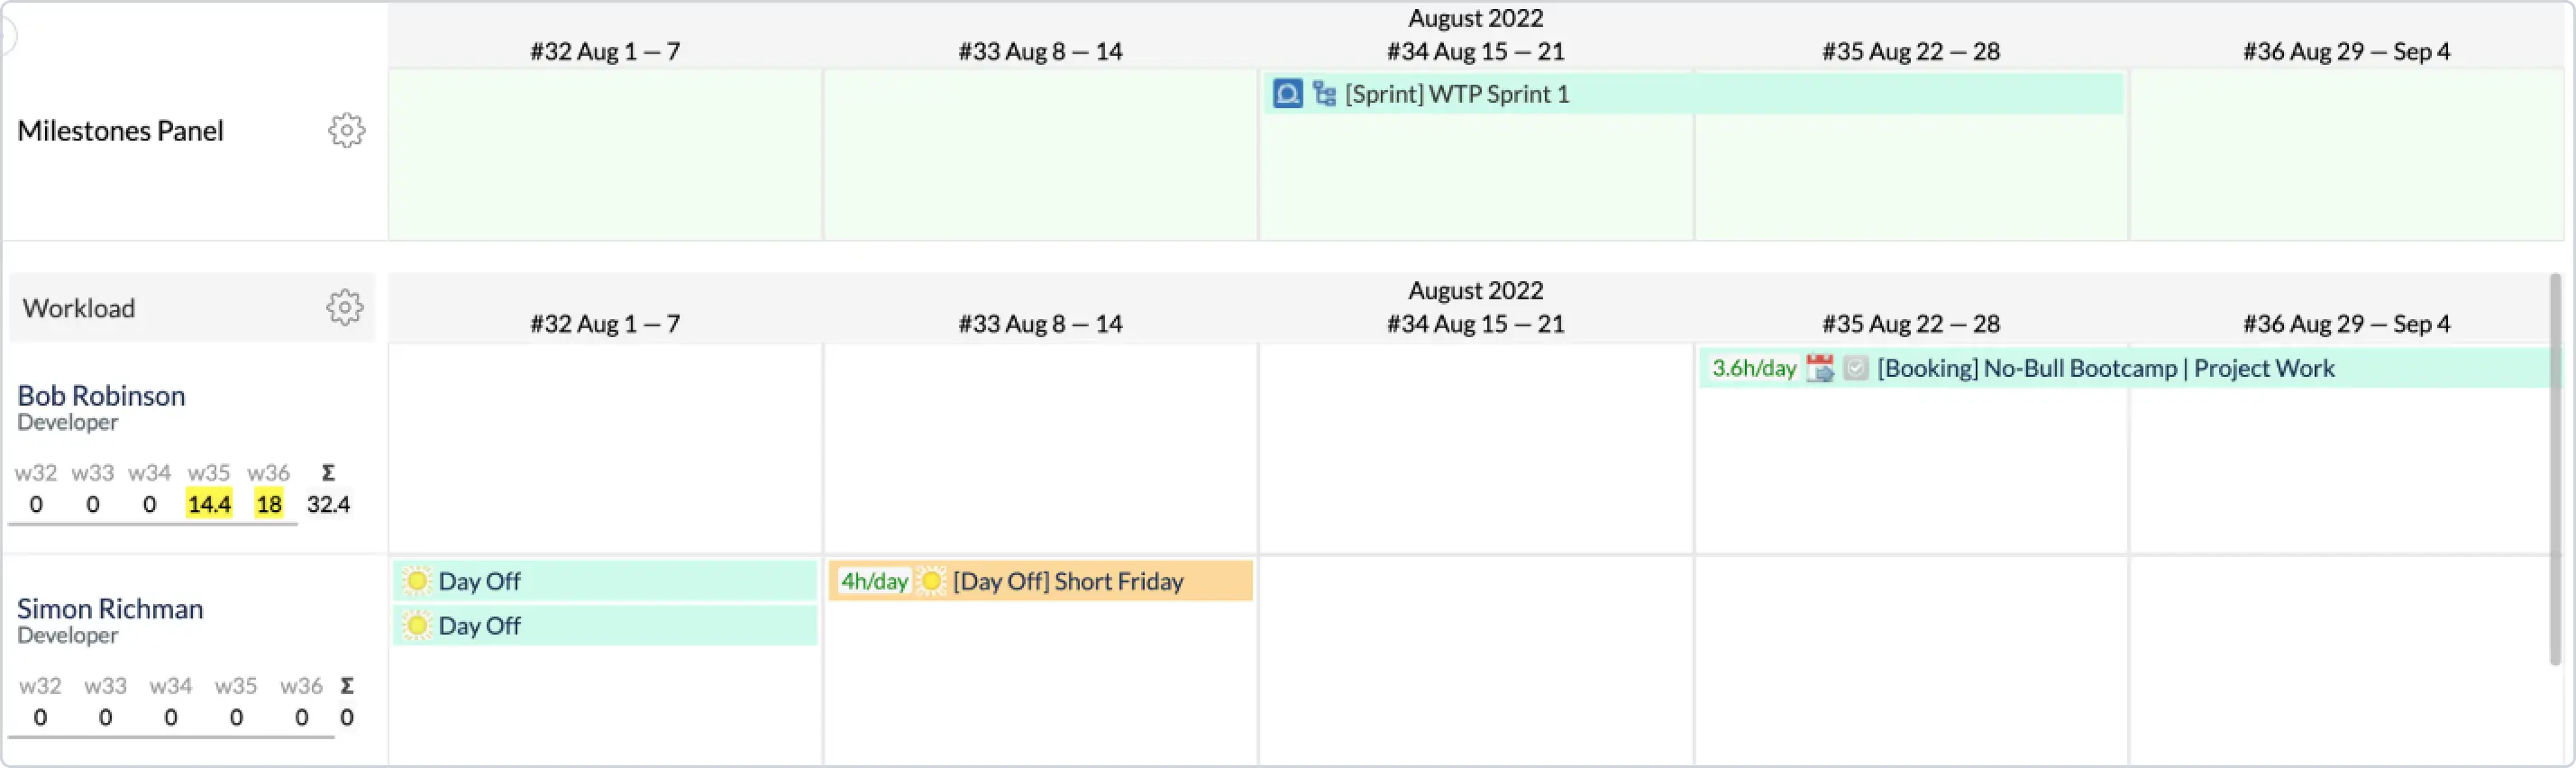
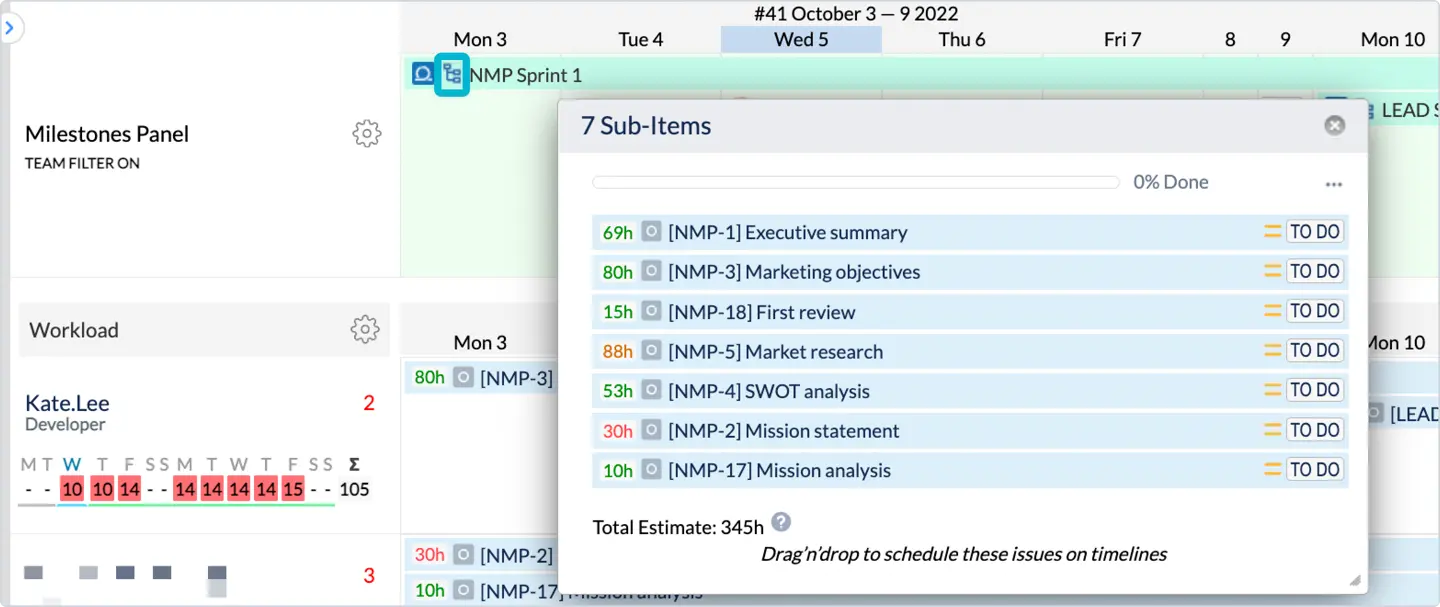
By clicking on the hierarchy icon, you will be able to see all tasks inside the sprint and their statuses:
Tasks must be assigned to sprints directly in Jira. When you drag and drop a task onto the timeline in ActivityTimeline, it will only set the Start and Due dates for the task.
Check the video example here: Video Example: How to use Start/End dates of the Jira Sprint to automatically show tasks in ActivityTimeline?