
ActivityTimeline allows you to create Jira issues directly from the Planner, without switching back to Jira.
This is useful when you identify missing work during planning and want to create and schedule a new issue right away.
Creating Jira Issue from ActivityTimeline
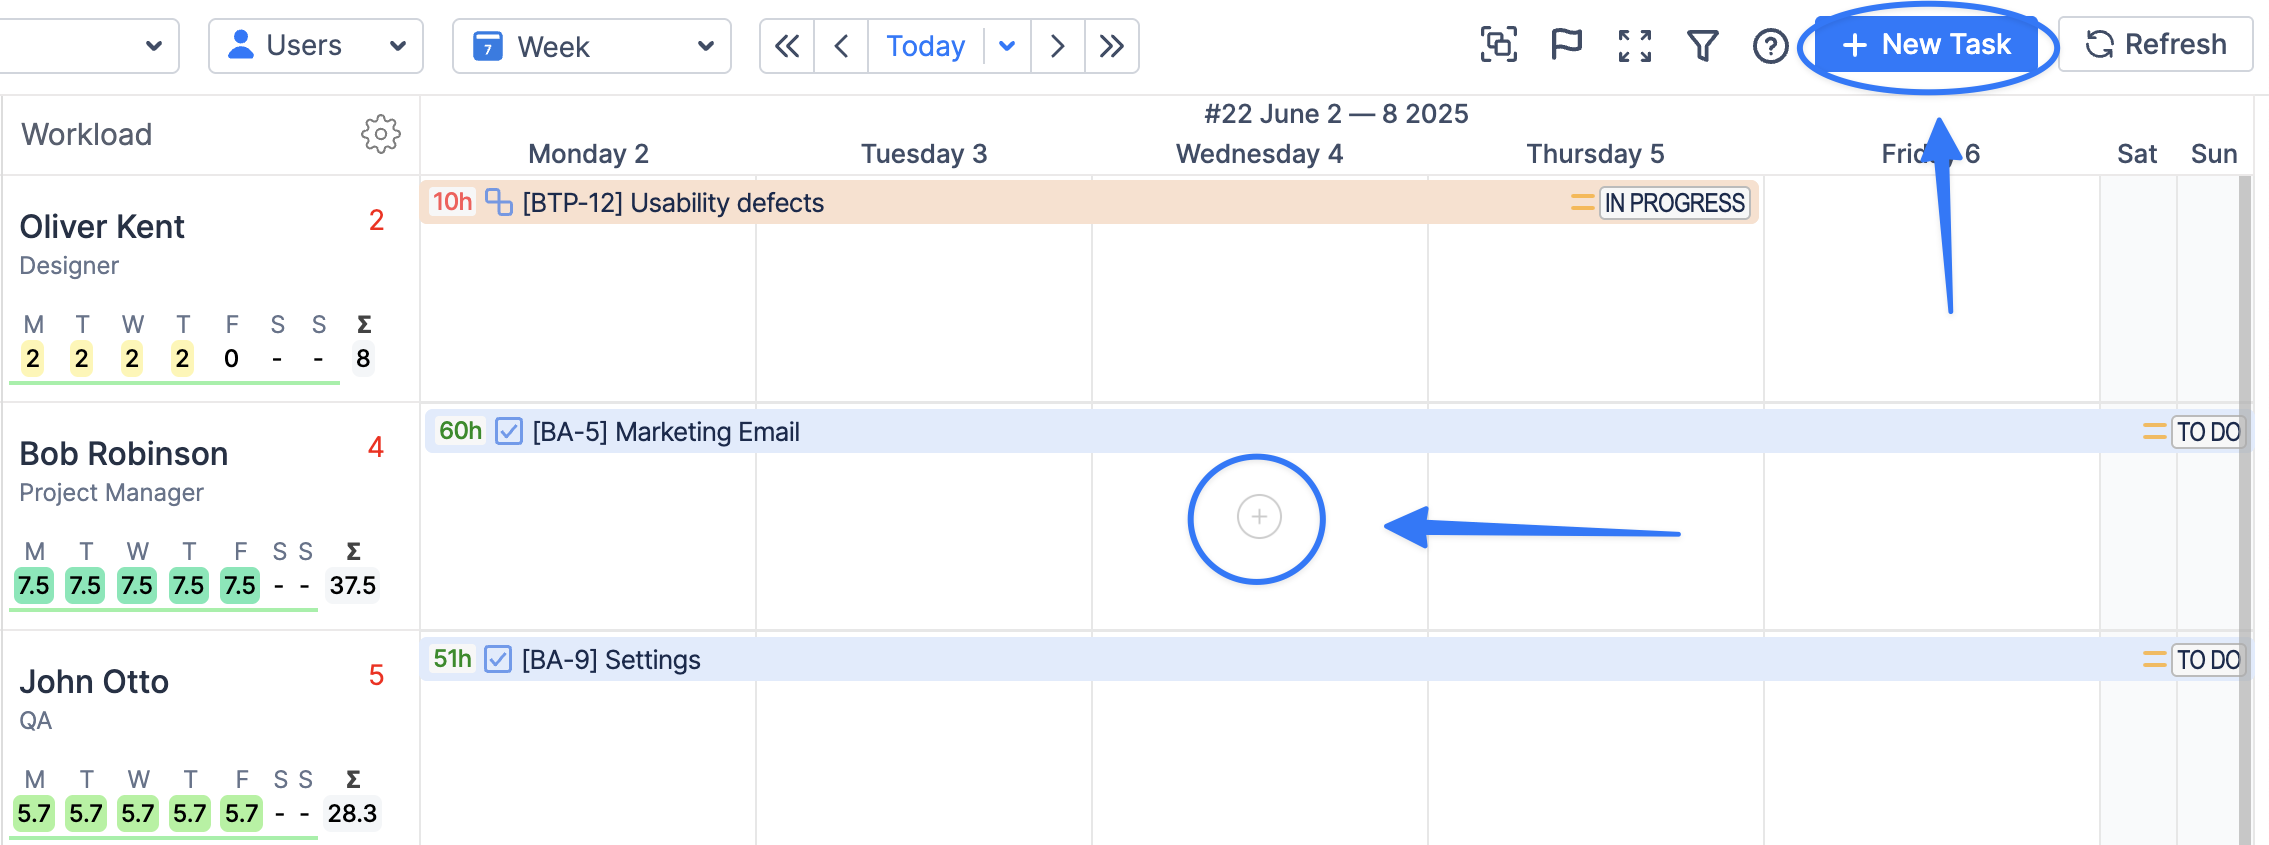
There are two ways to create the Jira issue on the person's timeline:
-
by clicking on a New Task to create a new Jira issue from the Planner toolbar.
-
by simply clicking on an empty timeline cell, or a cell where tasks are already scheduled, to create a new item for that specific date and user.
In the Create New Item dialog, select the Create New Issue tab.
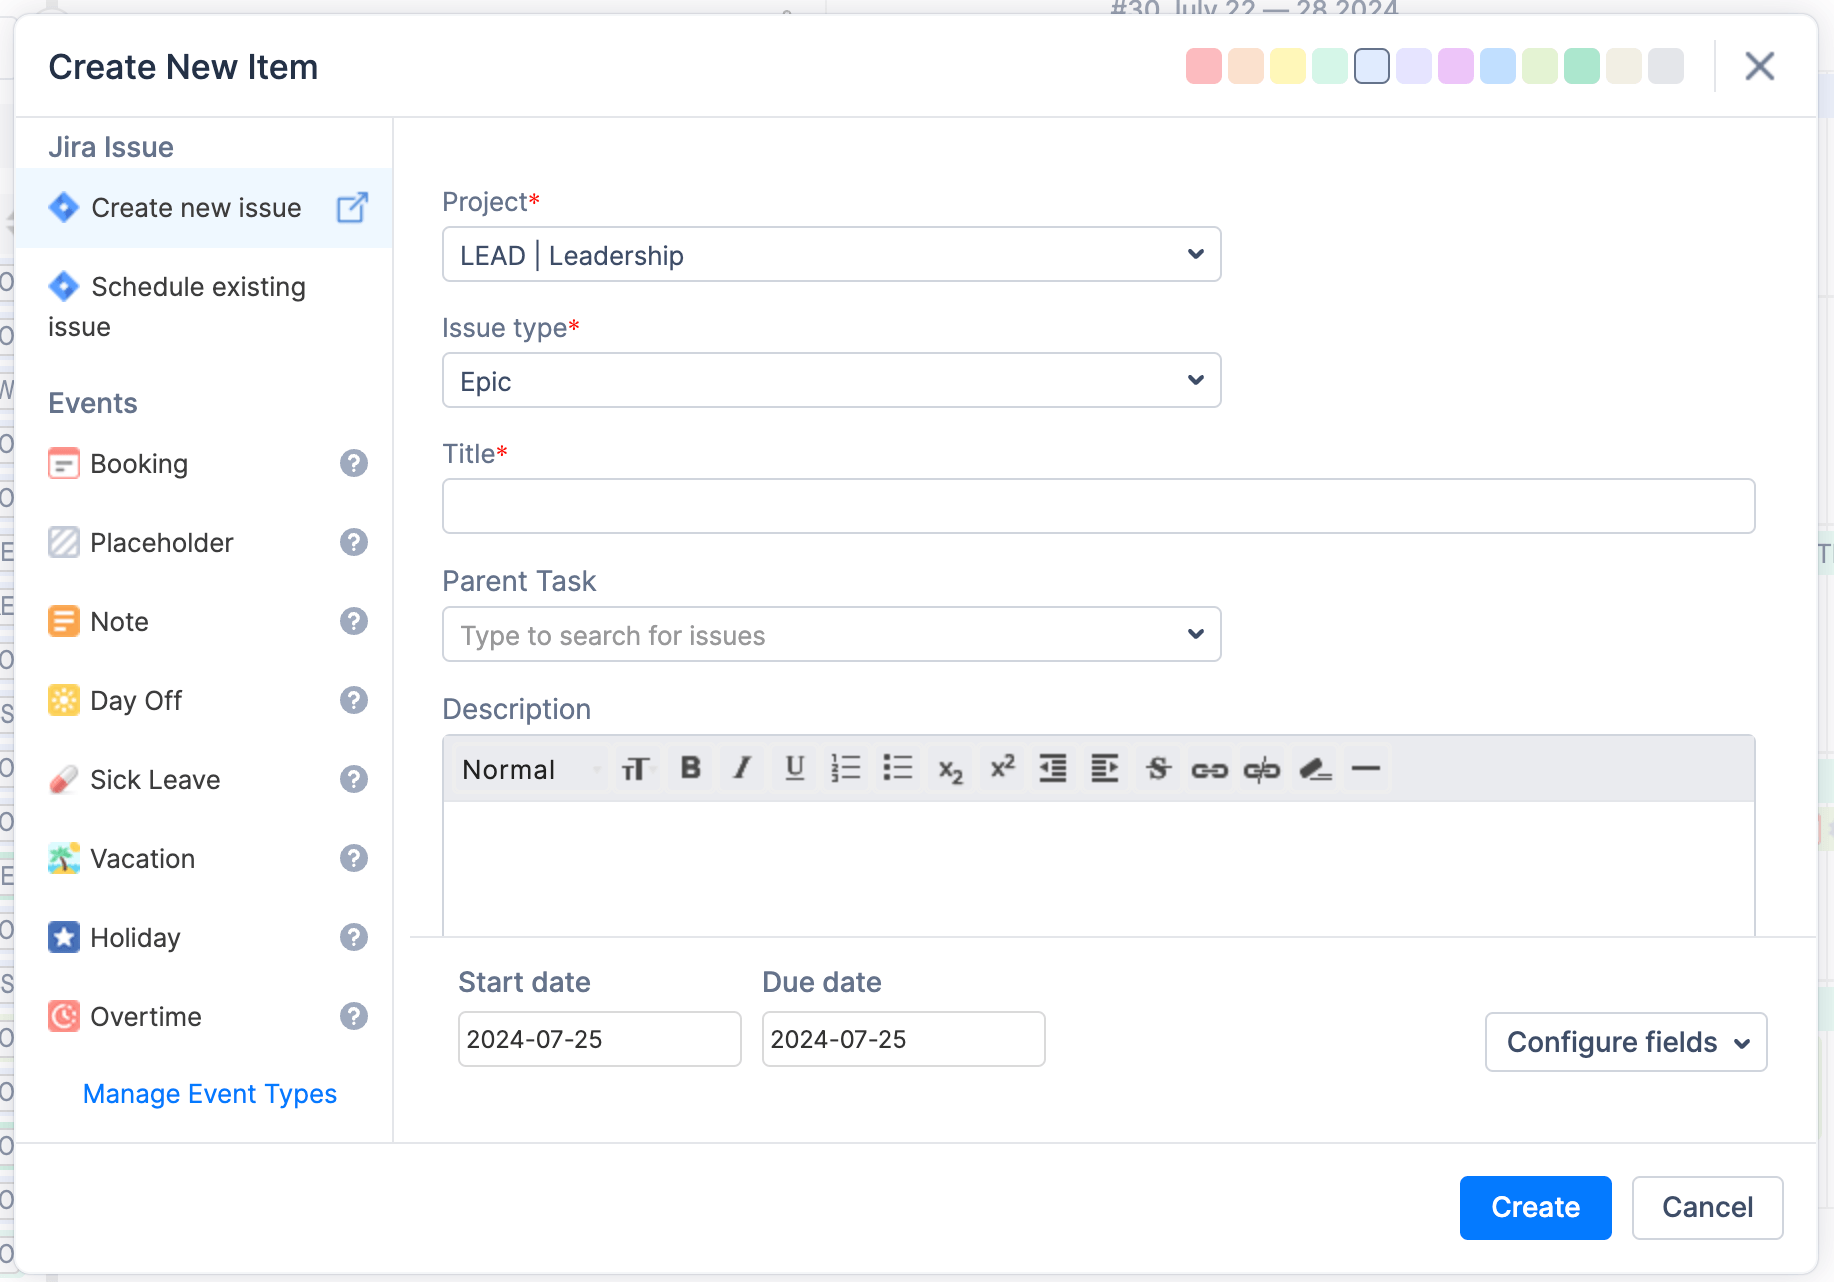
Then fill in the required issue details:
-
Select a Project.
The available fields are loaded based on the selected project and its Jira configuration. -
Select an Issue Type.
This field is required. -
Enter the issue Summary.
This field is required. -
Fill in any additional fields, such as Assignee or Description, if needed.
-
Click Create.
Once created, the issue is synchronized with Jira.
Start and End Dates
The start and end dates are set automatically based on how the issue is created.
If you click the New Task button, the issue is created for the current day.
If you click a specific timeline cell, the issue is created for the date of that cell.
ActivityTimeline remembers the last selected Project and Issue Type.
The next time you open the Jira issue creation dialog, these fields will already be pre-filled, helping you create similar issues faster.
Configure Fields in the Create Issue Dialog
Users can customize which fields are shown in the Create New Issue dialog and define their display order.
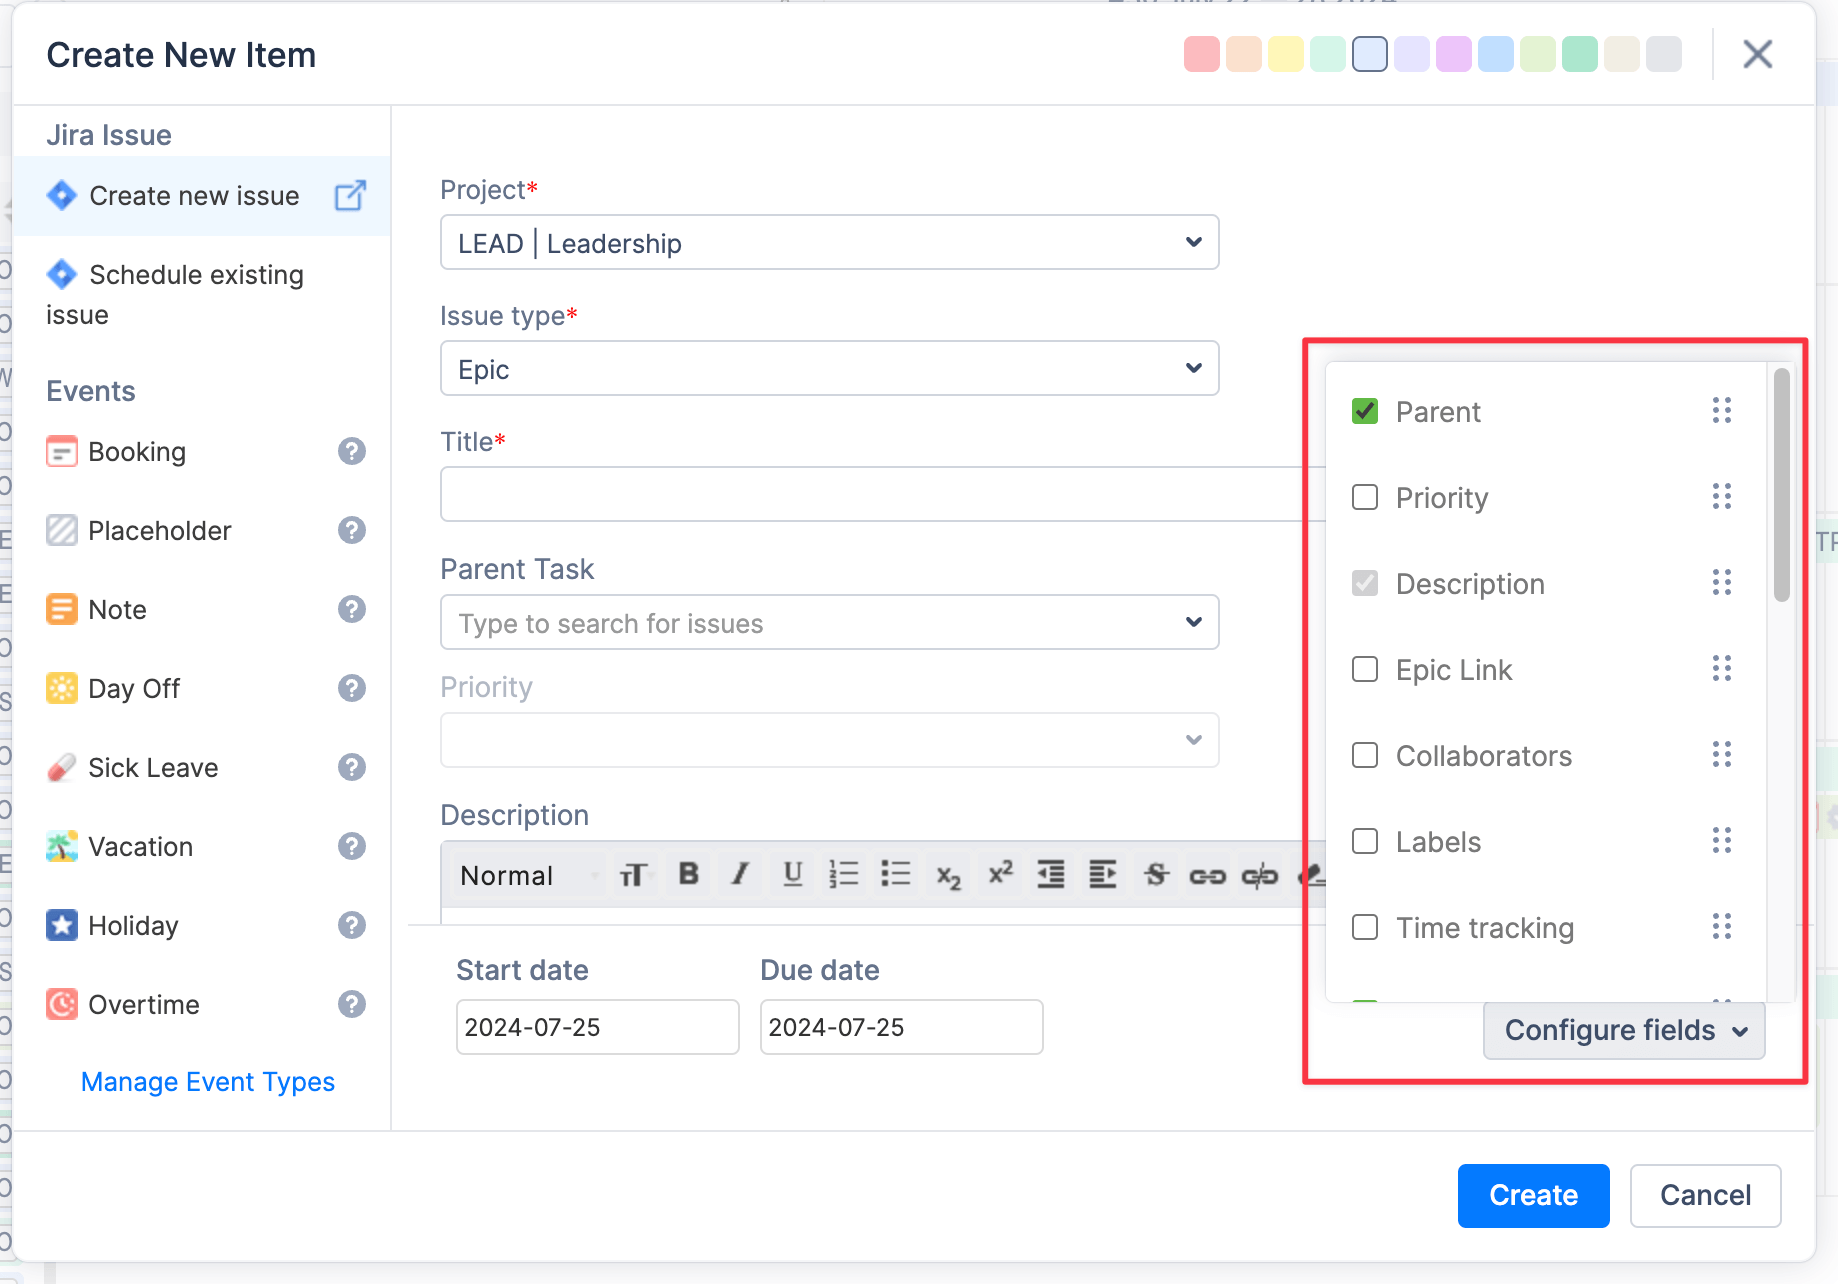
This helps each user adjust the issue creation form to their planning workflow and keep only the most relevant fields visible.
Creating Jira Issues Through the Jira Dialog
The native Jira Create button is always visible in Jira, including when users are working in the ActivityTimeline Planner.
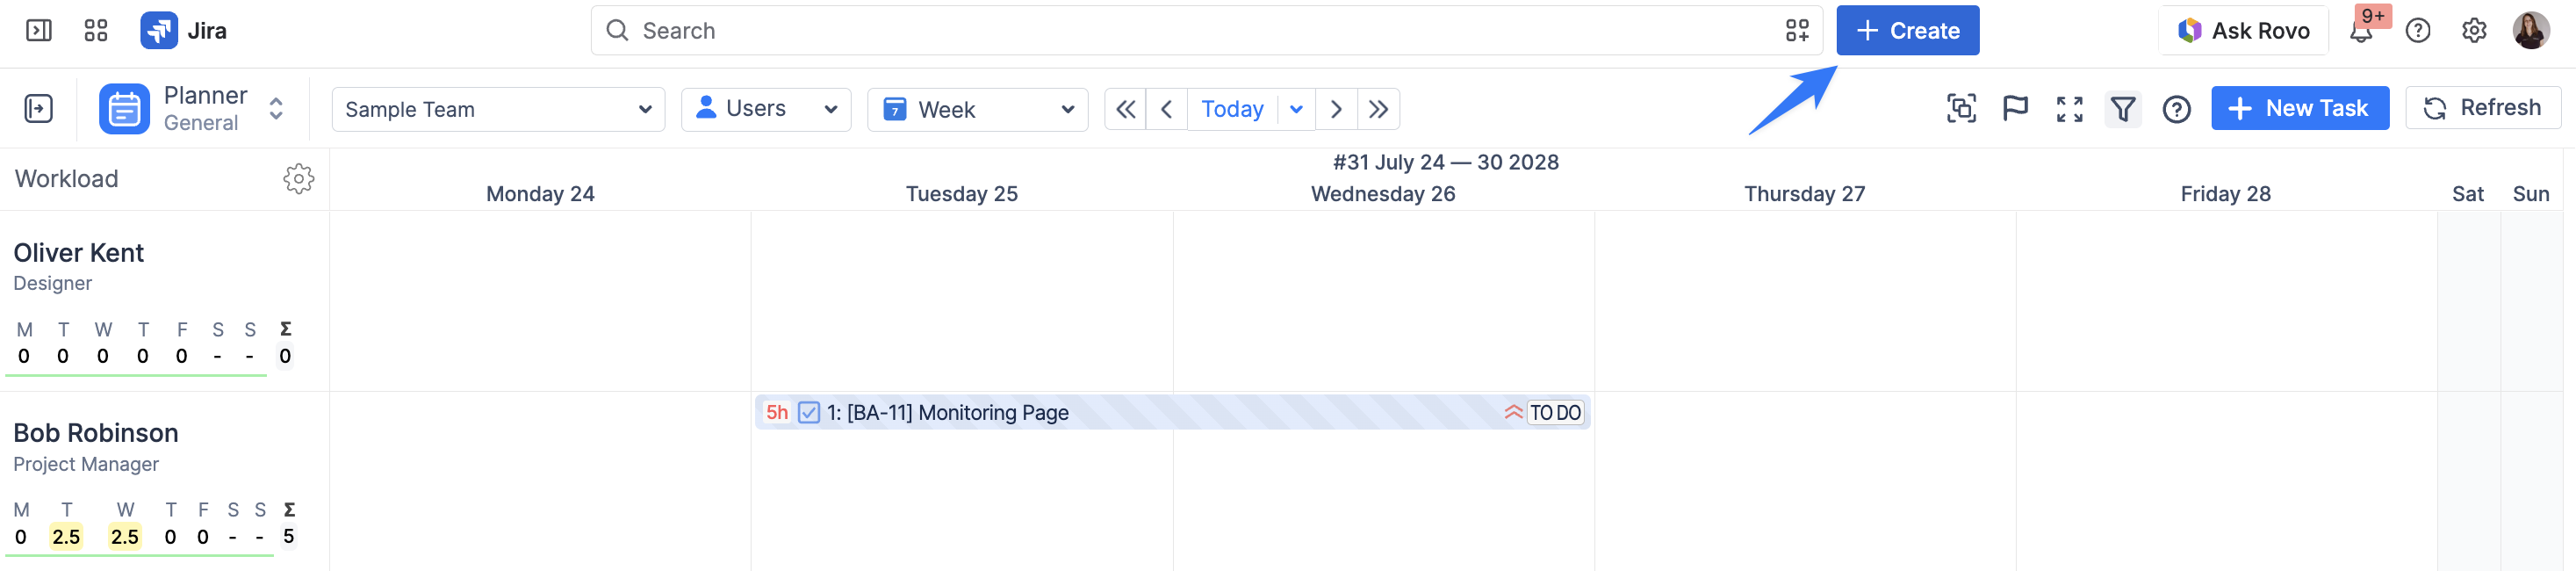
When users click this button, the standard Jira issue creation dialog opens. The issue is created in Jira first, using Jira’s own fields, required field rules, permissions, and validation settings.
After the issue is created in Jira, click Refresh in ActivityTimeline to load the new issue into the Planner.
Please note that this Jira Create button is separate from ActivityTimeline’s New Task button.
Administrators can enable or restrict issue creation through ActivityTimeline’s own dialog in:
Configuration → Timeline Panel → Create Jira issues through ActivityTimeline
This setting controls whether users can create Jira issues directly from the ActivityTimeline New Task flow.