
The Planner is the main resource and capacity planning workspace in ActivityTimeline. It brings Jira issues, individual and team schedules, workload, availability, time off, and future resource demand into one timeline.
Use Planner to understand who is working on what, who has available capacity, where resources are overloaded, and how upcoming work fits into your team’s capacity across multiple Jira projects.
What you can do in Planner
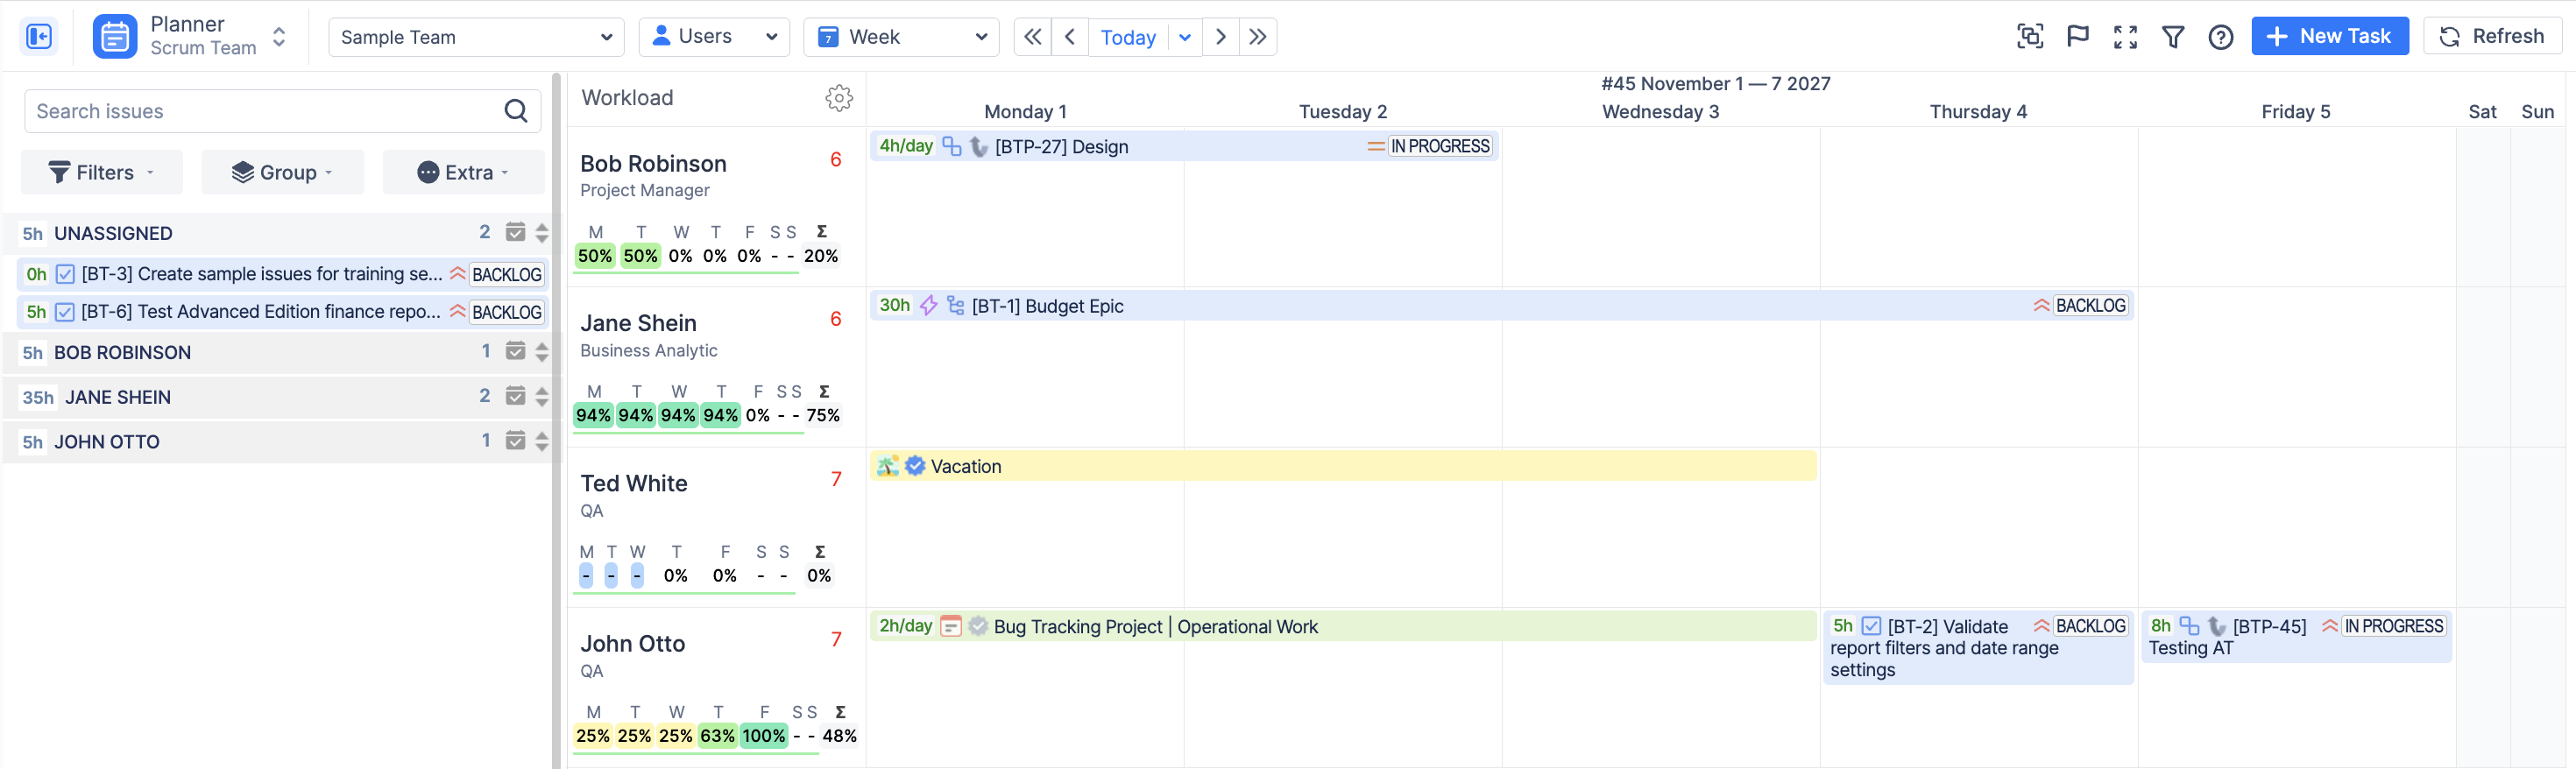
Planner gives resource managers and team leads a shared view of planned work and available capacity.
Planner can be used for both day-to-day resource scheduling and longer-term capacity planning, depending on the period and planning level you select.
How capacity planning works
Planner compares the work assigned to a resource with the amount of time that resource has available.
The main concepts are:
-
Capacity — how much working time a person or team has during a selected period.
-
Workload — how much work is currently planned.
-
Availability — how much capacity remains after planned work and non-working time are taken into account.
-
Time off — vacations, holidays, and other non-working activities that reduce available capacity.
-
Worklogs — the actual time users have spent on their work.
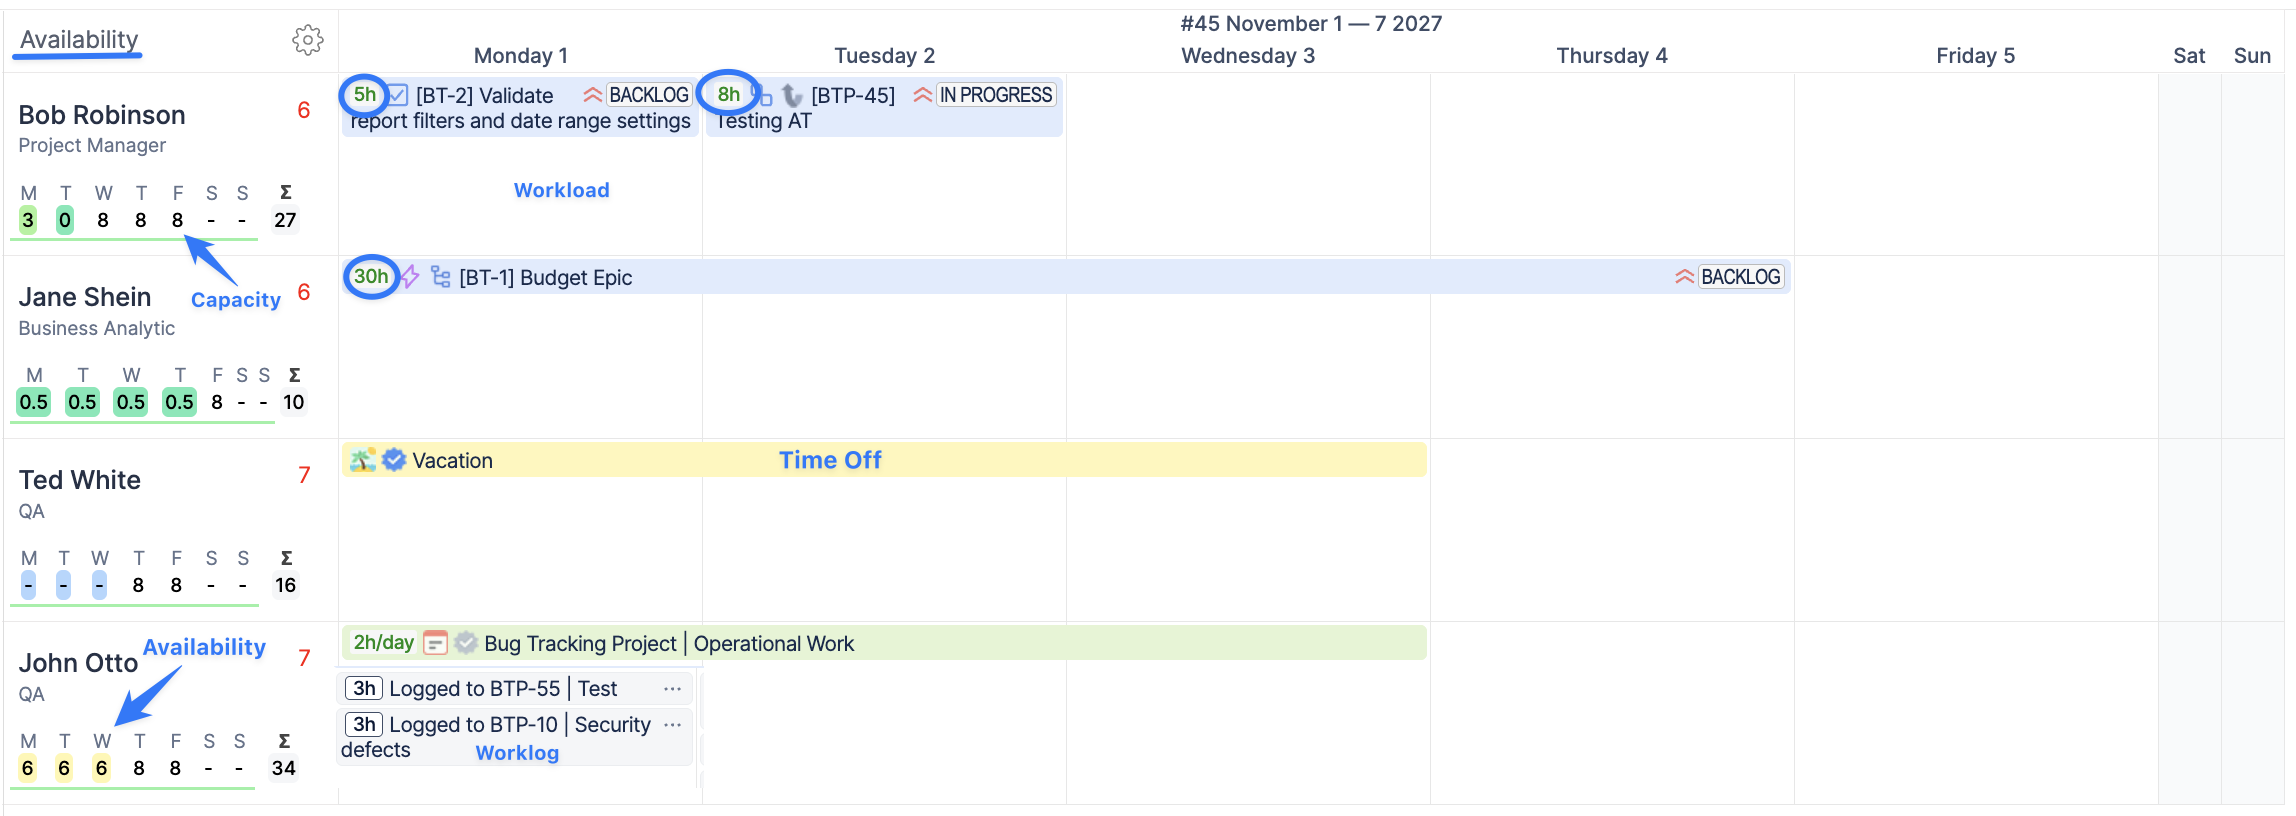
For example, if a user has 40 hours of capacity for a week and 13 hours of planned workload, they have approximately 27 hours of remaining availability.
A user’s capacity is based on their configured working schedule and can also be affected by holidays, vacations, and other non-working events.
Choose the right planning level
Planner supports different planning levels depending on how much you already know about the resources who will perform the work.
-
Use the Users view when you know which individual should perform the work. It provides a detailed view of each person’s assignments, workload, availability, and time off, making it suitable for individual resource scheduling and workload balancing.
-
Use the Teams view when work should be planned against a team’s overall capacity before individual assignees are known. For example, you may know that an upcoming initiative requires capacity from the Development or QA team next quarter without yet knowing which individual team members will work on it. This view is particularly useful for long-term resource planning, portfolio planning, and early-stage project planning.
-
Use Team with Users when you need to see team-level demand and individual allocations together. This allows you to review the team’s overall capacity while also understanding how work is distributed between individual team members.
See Team Panel for more information about team capacity planning.
Plan work
Different planning objects can be used depending on how certain the work is and how you want it to affect capacity.
-
Schedule Jira issues when the work already exists in Jira and should be assigned to a specific user or team.
-
Use Bookings when you need to reserve a defined amount of someone’s capacity for a project or activity. For example, you may reserve four hours per day or 50% of a person’s capacity for a project over several weeks.
-
Use Placeholders to represent tentative or future work when the exact Jira plan is not yet confirmed. They are useful for forecasting future demand, testing different resource assignments, or planning upcoming initiatives before final Jira tasks are ready.
-
Add vacations, holidays, and other non-working activities so that Planner reflects the resource’s actual available capacity.

Which planning option should I use?
Use a Jira issue for confirmed Jira work, a Booking to reserve a defined amount of capacity, and a Placeholder for tentative future demand. If the person who will perform the work does not exist in Jira yet, a Resource can be used to represent a future hire, open position, contractor, or other non-Jira resource.
Read workload and availability
Planner’s workload indicators help you understand whether planned work fits within each resource’s available capacity.
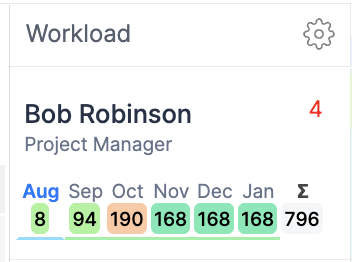
Depending on the selected period, you can quickly identify resources who:
-
Have capacity available for additional work.
-
Are fully allocated.
-
Have more work planned than their available capacity.
-
Have reduced capacity because of vacations, holidays, or other non-working time.
When overload is detected, review the activities scheduled for that period to understand what is contributing to the workload.
Planned Jira issues, Bookings, Placeholders, and other activities can affect workload depending on their configuration.
See Workload Indicator for details on interpreting workload values and Workload Schemes and Holiday Schemes for information about how working capacity is configured.
Rebalance resources
When Planner shows that someone is overloaded or another resource has unused capacity, you can adjust the plan directly from the timeline.
A typical resource-balancing workflow is:
-
Identify an overloaded user or team.
-
Review the work contributing to the overload.
-
Check which other resources have capacity during the same period.
-
Move, resize, or reschedule work when its timing is flexible.
-
Reassign work to another suitable user or team when appropriate.
-
Review the workload indicators again to confirm that the updated plan fits available capacity.
This makes it possible to identify capacity problems and adjust assignments before they affect delivery.
-
Planner Interface & Navigation -
Users & Teams in Planner -
Workload Indicator -
Planning & Scheduling Jira Issues -
Issues Panel on Planner -
Custom Events in ActivityTimeline -
Team Panel -
Planning Period, Units and Compact Mode -
Milestones & Sprints on Milestone Panel -
Timeline Filter -
Timeline Aggregation -
Overdue or Expired Tickets Indicator -
Saved Dashboards