
ActivityTimeline v 7.6+ allows planning not only at the individual level but also at the team level using the Team Panel.
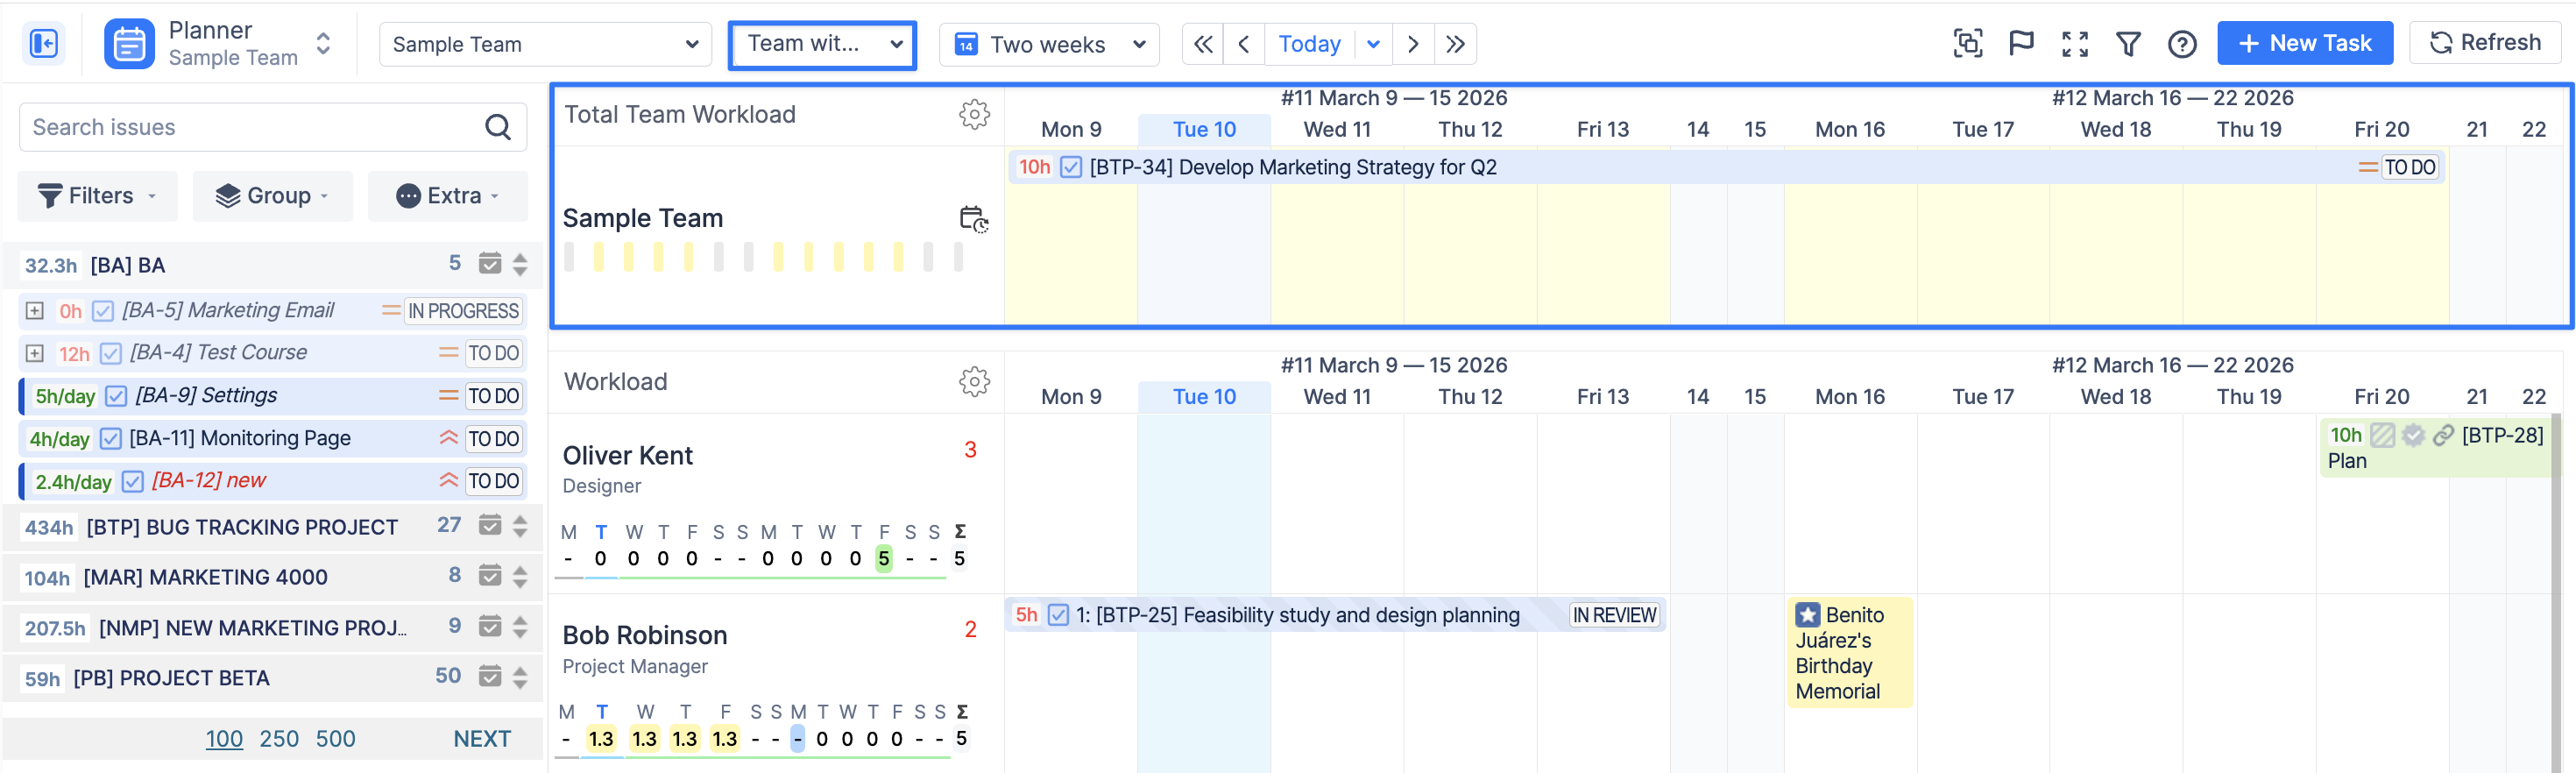
The Planner includes a view selector that lets you switch between different planning views. This allows managers to move from individual resource planning to high-level team planning without leaving the Planner.

By default, the Planner opens in the Users view.
Planner Views Overview
ActivityTimeline provides three Planner views:
-
Users — individual resource planning;
-
Teams — high-level team capacity planning;
-
Team with Users — combined team and individual planning.
Each view supports a different planning scenario and provides a different level of workload visibility.
1. Users View
The Users view is the default Planner view. It is focused on individual resource planning.
In this view, managers can plan and track work for each team member using drag-and-drop scheduling.
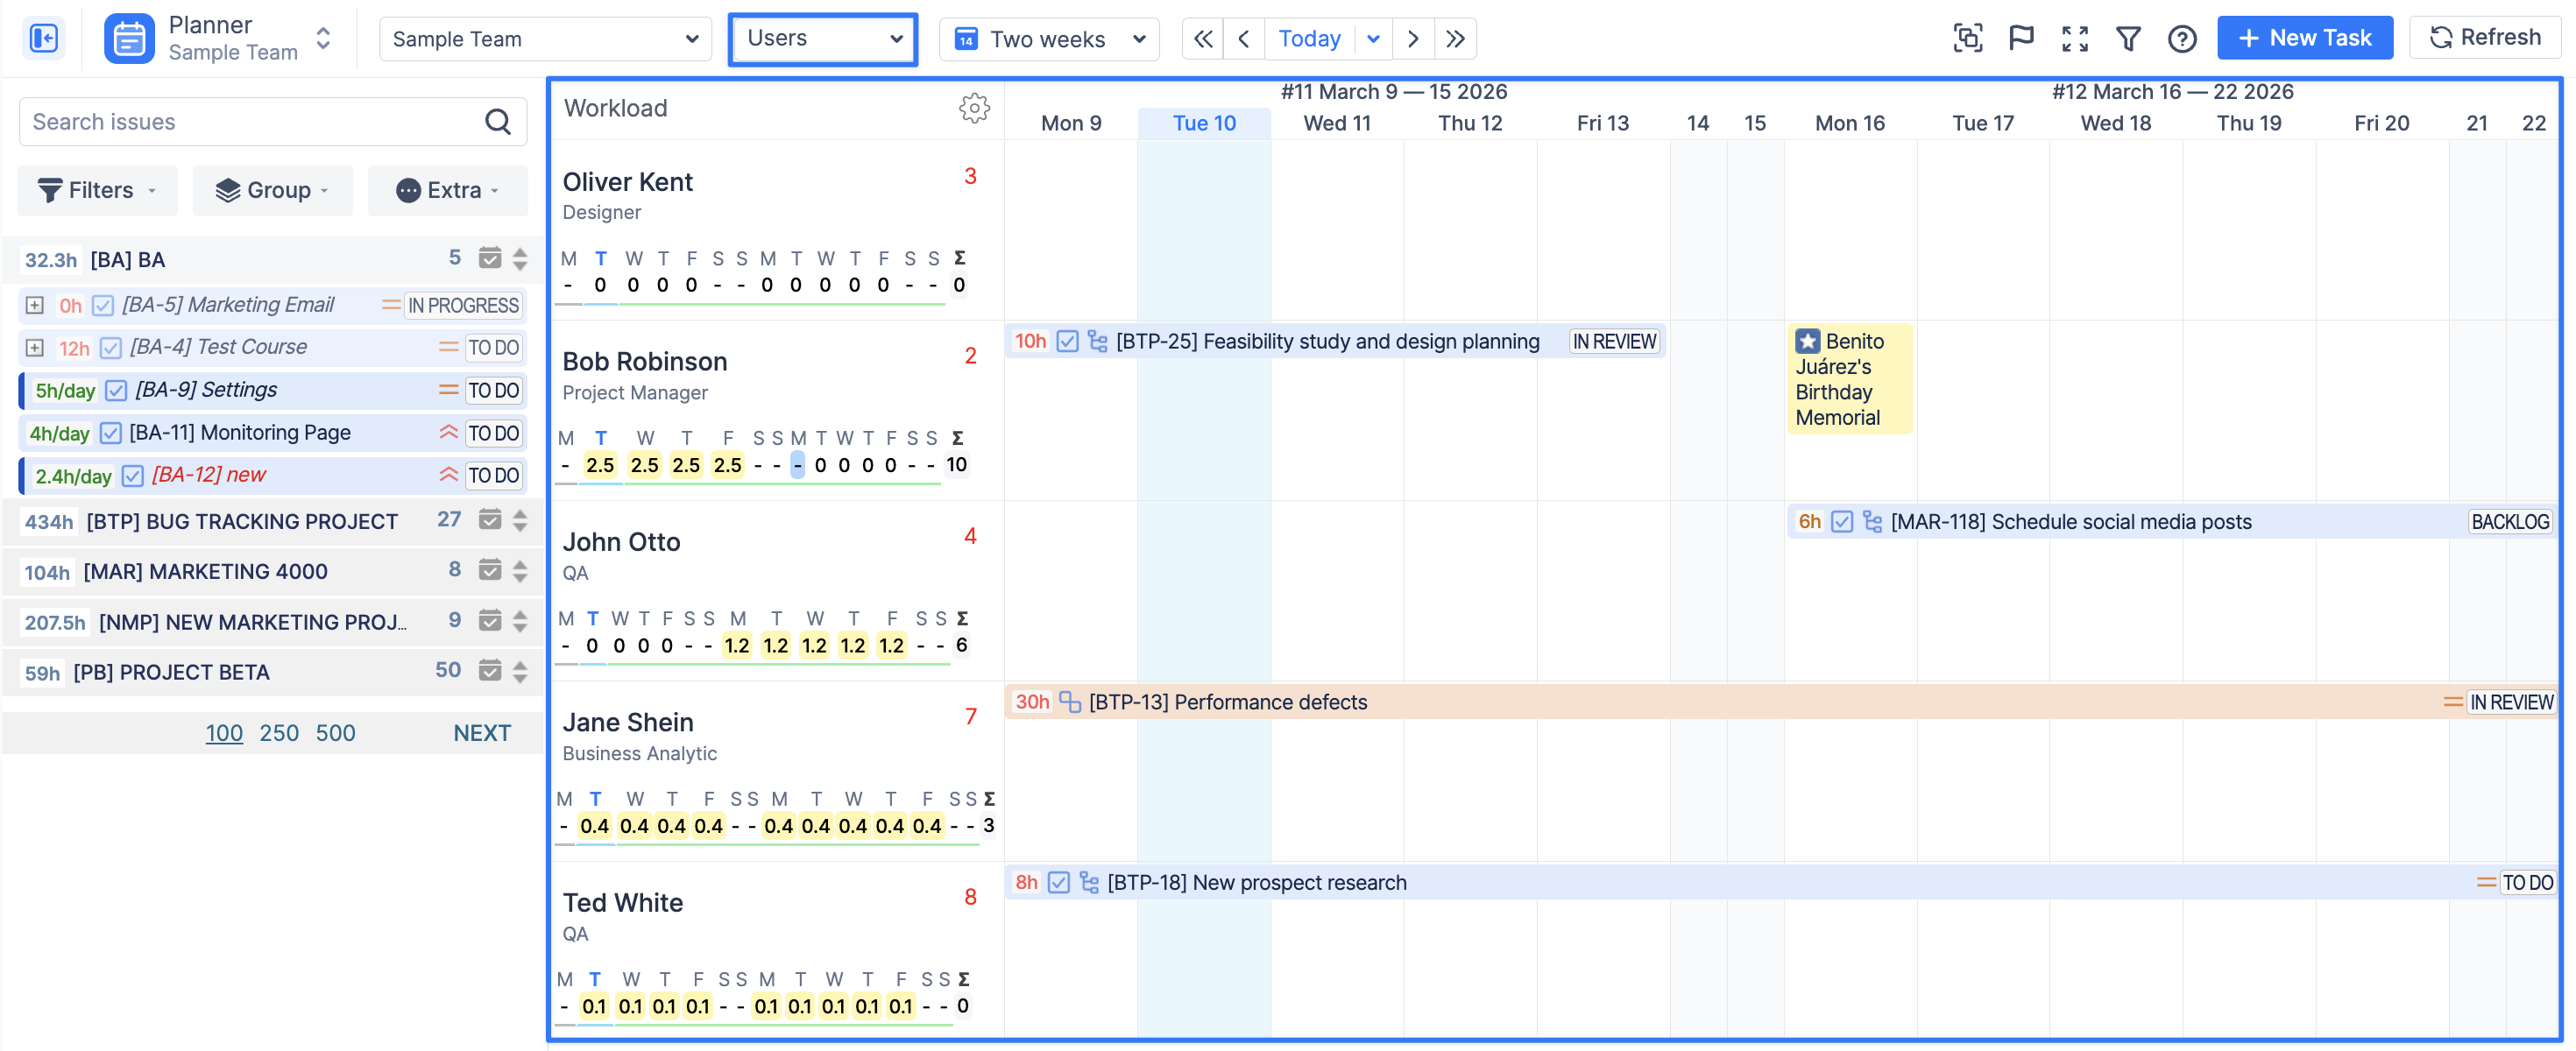
This view is best when you need to:
-
assign tasks to specific users;
-
monitor individual workload;
-
check personal availability;
-
balance work distribution across team members.
The Users view gives managers a clear overview of each person’s schedule, workload, and availability for the selected time period.
2. Teams View
The Teams view is designed for high-level capacity planning across one or multiple teams.
Instead of focusing on individuals, this view shows the workload and availability of entire teams, making it ideal for long-term and strategic planning.
Managers can use the Teams view to:
-
plan work for multiple teams;
-
schedule large initiatives across weeks, months, or quarters;
-
reserve team capacity before assigning work to individuals;
-
allocate work when the exact assignee is not yet known.
This view is especially useful for:
-
department planning;
-
portfolio roadmapping;
-
Program Increment planning;
-
early-stage project planning;
-
planning large work items such as Epics or initiatives.
You can hover over the indicator to see detailed availability and workload information for the selected period.
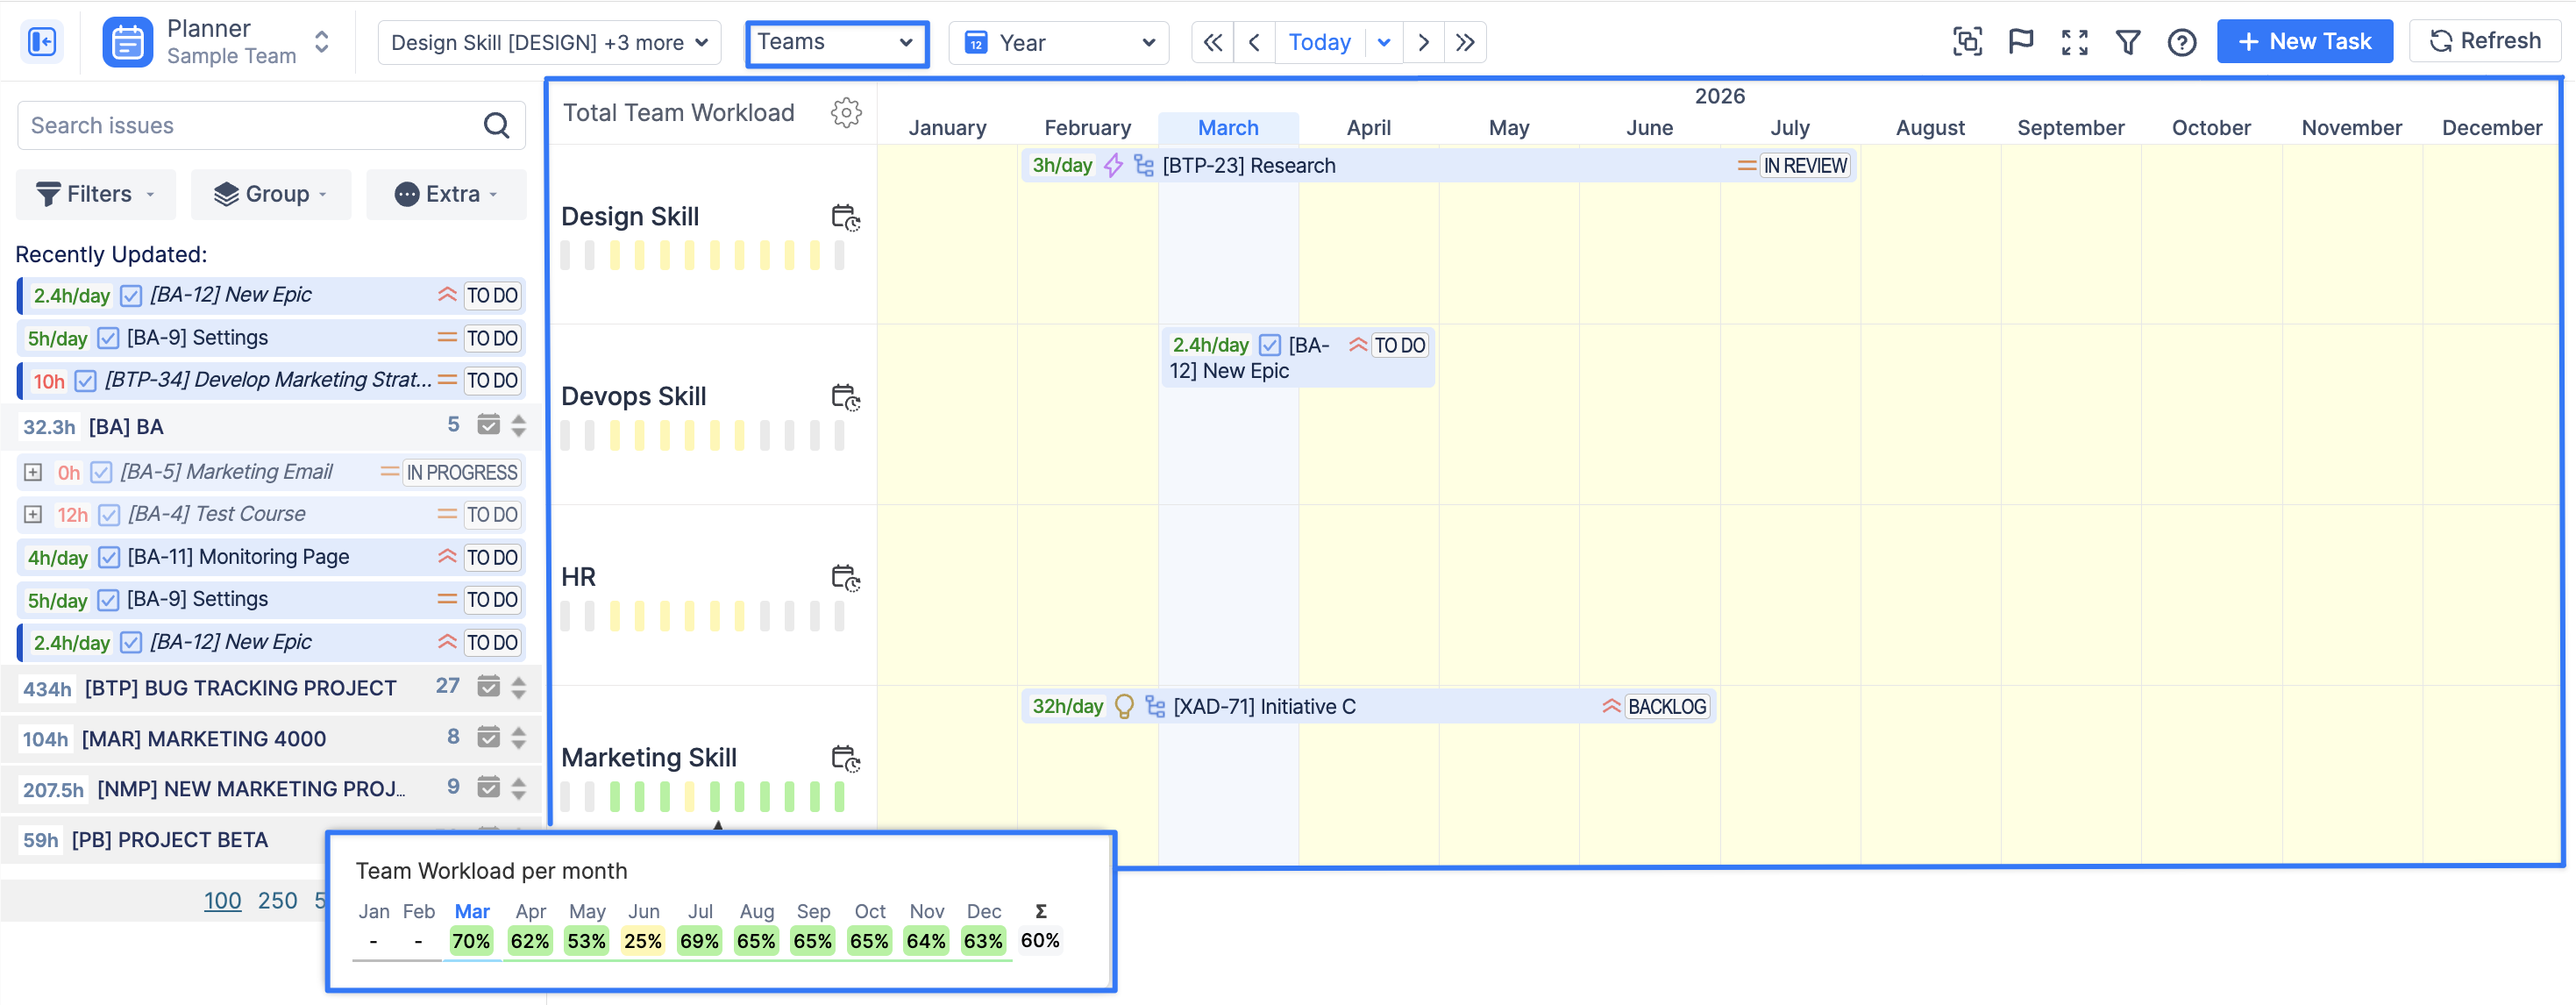
The Team Panel workload indicator can display different metrics, such as team workload or availability. To change the displayed mode, click the cog icon and select the preferred workload indicator mode.
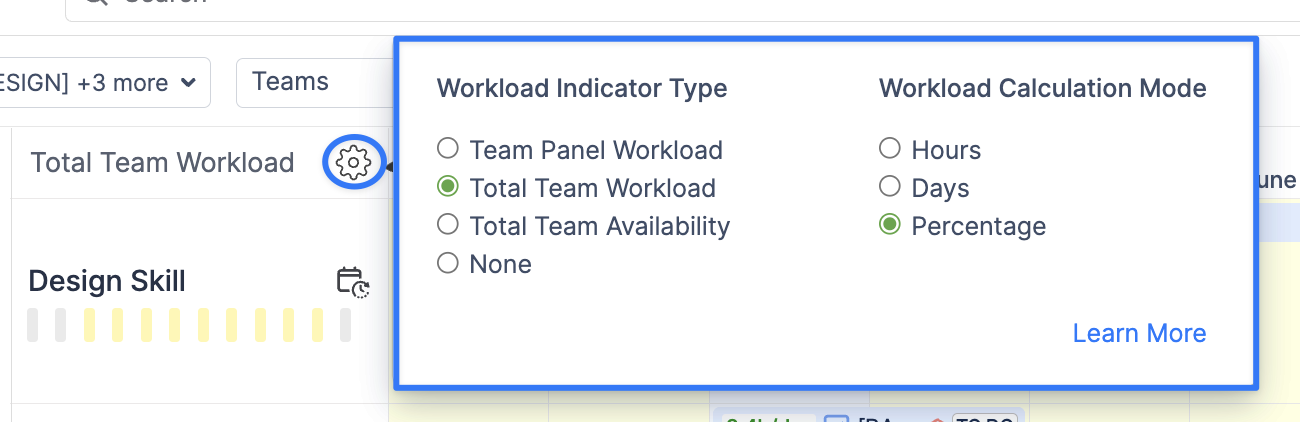
Learn more about it: https://help.activitytimeline.com/at/team-panel-workload-modes
3. Team with Users View
This view combines team-level planning with individual visibility.
It allows managers to see the overall team schedule while also viewing the workload of each team member. This creates a bridge between strategic planning and daily execution.
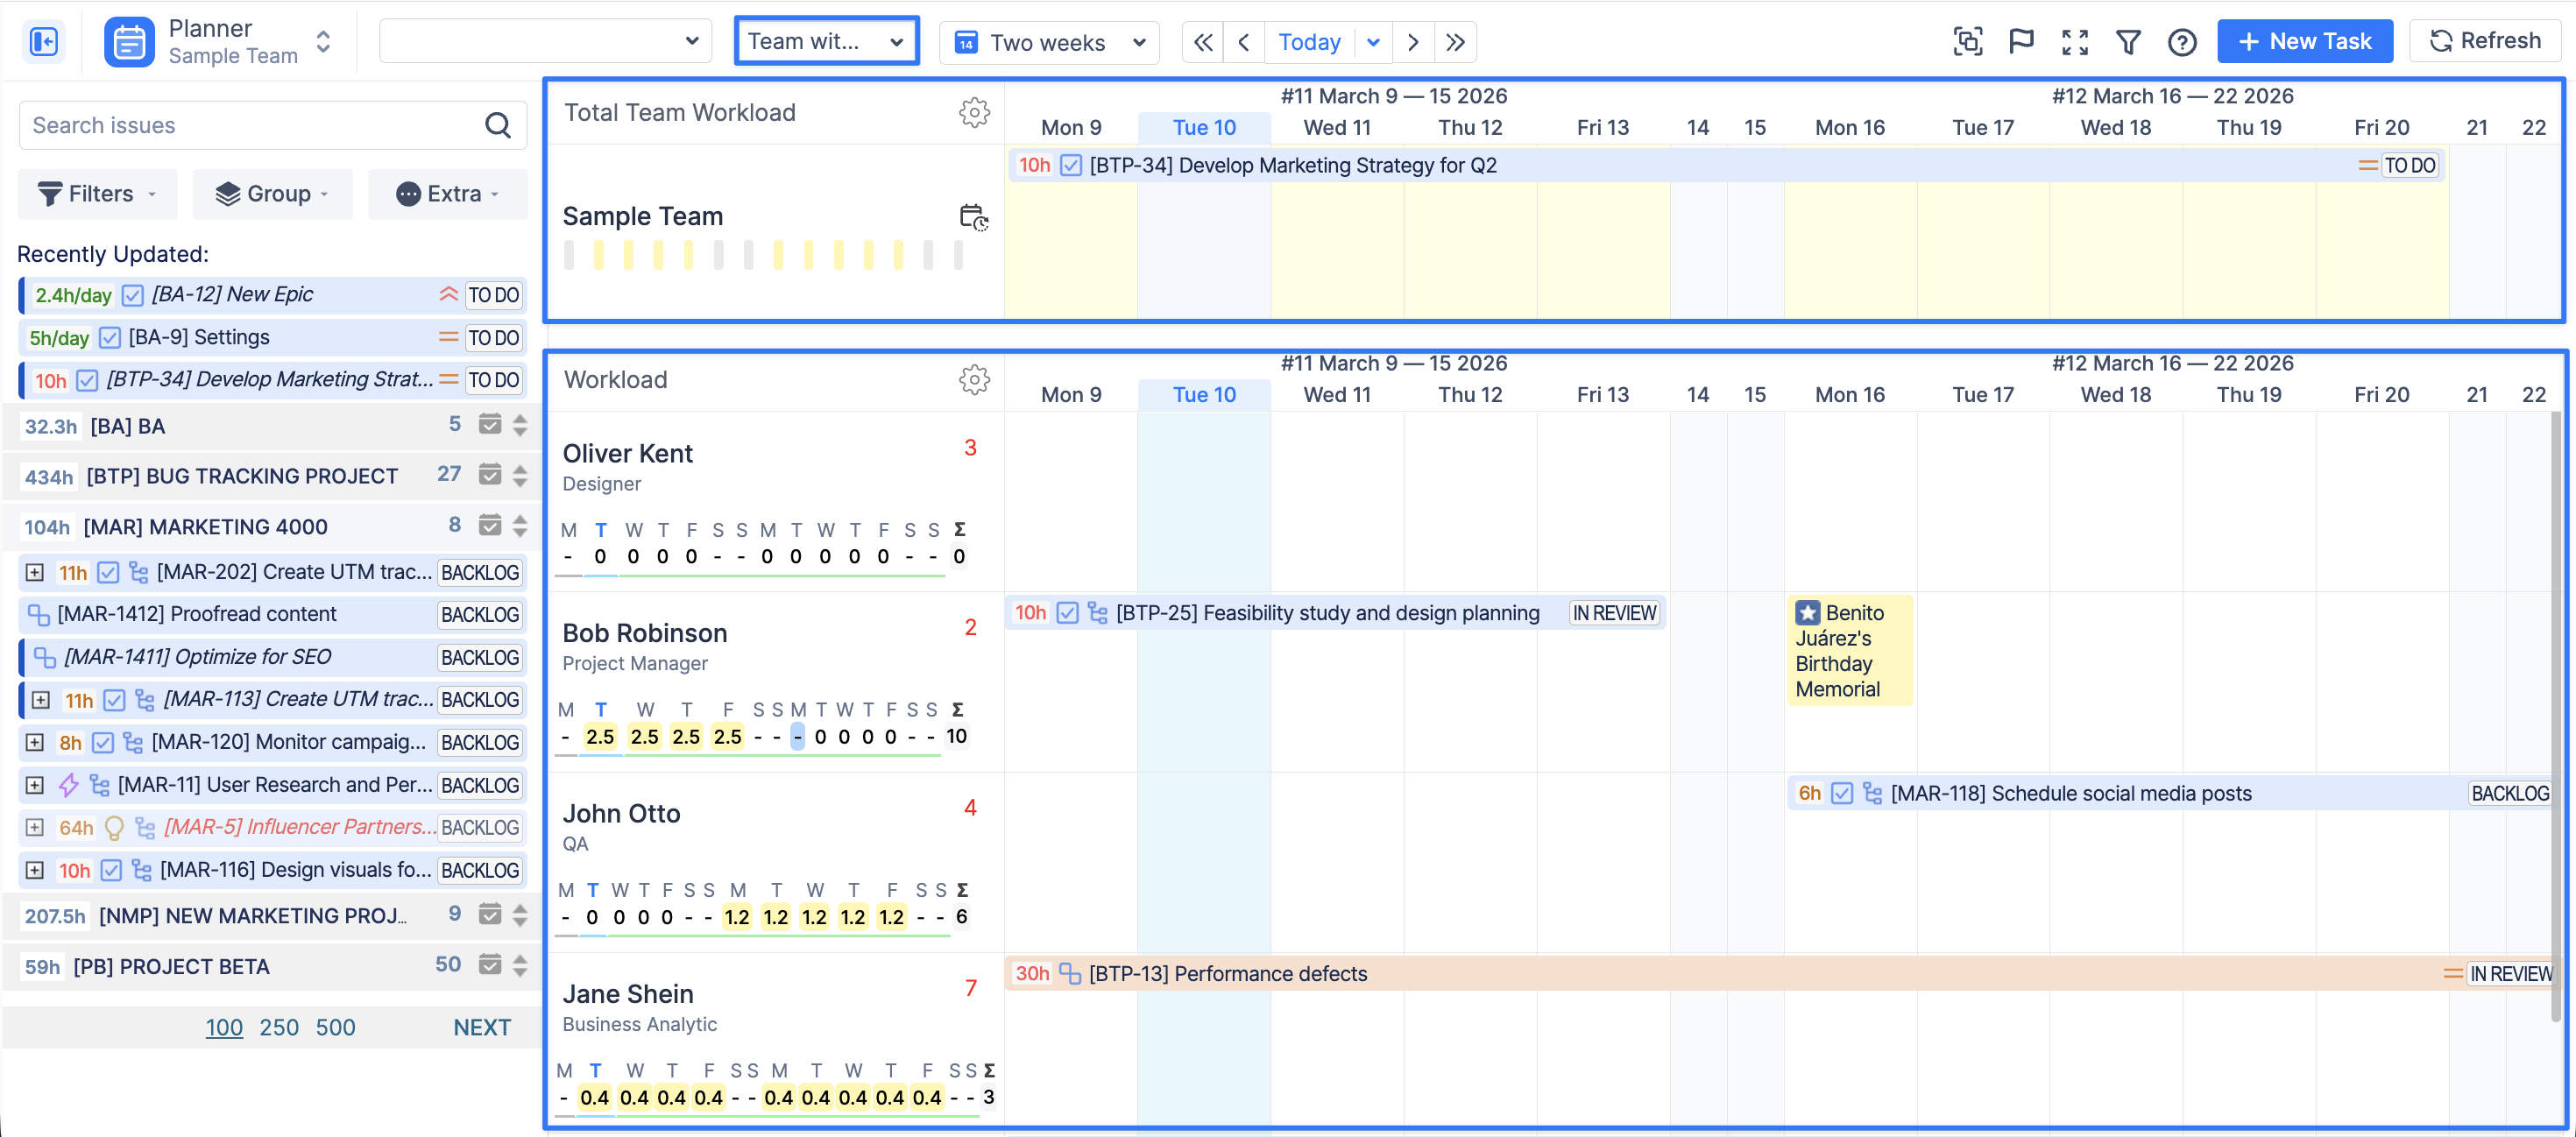
Managers can use this view to:
-
understand what the whole team is working on;
-
review how work is distributed among team members;
-
assign tasks while considering both team and individual capacity;
-
coordinate long-term initiatives with operational planning.
This view is useful when:
-
work is planned at the team level but executed by individuals;
-
you need both team-level and user-level visibility;
-
you want to distribute tasks without overloading individual team members.
Scheduling Tasks on the Team Panel
Tasks and issues can be scheduled directly at the team level, allowing managers to allocate work before distributing it to individual members.
There are several ways to assign work to a team:
-
You can drag an issue from the left Issues Panel and drop it directly onto the Team Panel timeline of the selected team. This is the fastest way to reserve team capacity during planning sessions.
-
Assign from ActivityTimeline: Open the issue within ActivityTimeline by clicking on it once and select the Team as the assignee instead of an individual user. This method is useful when adjusting existing plans.
-
Assign from Jira: If your Jira instance uses the Team field, you can assign an issue to a team directly in Jira. Once synchronized, the issue will automatically appear in the Team Panel.
Learn more: ActivityTimeline Team Field for Jira
How Assignment Affects Display
Where a task appears in the Planner depends on how it is assigned:
-
If a task is assigned to a user, it appears on that user’s timeline.
-
If a task is assigned to a team and no individual user is selected, it appears on the team timeline.
This distinction is important for accurate capacity planning.
A task is displayed only at one level to prevent double booking of workload.
If the same task appeared on both the team and the user timelines, it would artificially inflate planned capacity and create confusion.
By showing the task either on the team level or the individual level, ActivityTimeline ensures that workload calculations remain accurate and teams are not overbooked.
Events on the Team Panel
In addition to scheduling Jira issues, ActivityTimeline allows creating local planning events directly in the Planner.
These events help reserve capacity and plan upcoming work before it is finalized.
Supported event types include:
-
Booking — Reserve team capacity for planned work
-
Placeholder — Block time for tentative or undefined tasks
-
Note — Add informational markers to the timeline

This will help you to better plan your team's workload, and make sure that they are always working at their full potential.