
ActivityTimeline allows users to assign Jira issues directly to the Team Panel from the Jira issue screen. This is useful when work should be planned at the team level instead of being assigned to a specific individual.
Configuring the Team Field
To enable this integration:
-
Go to ActivityTimeline Configuration → Jira Integration.
-
Find the Team Field section.
-
Click Create Team Field.
-
Enter a name for the Team Field.
-
Click Submit.
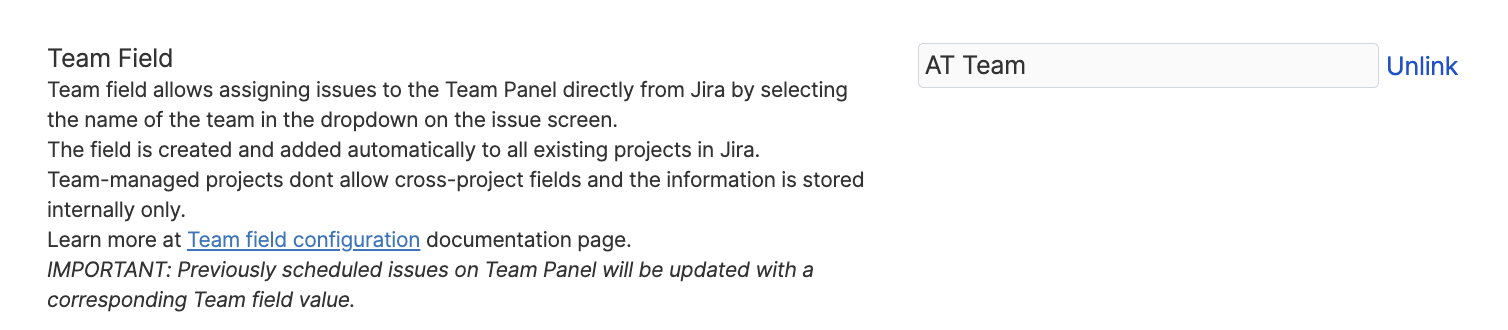
After you click the ‘Submit’ button, ActivityTimeline will create a new custom field in your Jira and add it to your Jira issue screens. Afterward, the system will update all issues that are currently scheduled on the Team Panel with the corresponding Team field value, this may take a couple of minutes depending on the size of your Jira instance.
Once the field is created, users can open a Jira issue and select a team in the Team Field to display the issue on the corresponding Team Panel in ActivityTimeline.
How Team Assignment Works
When an issue is scheduled on the Team Panel, ActivityTimeline clears the issue assignee and sets the Team Field value instead.
This allows the issue to be planned for a team without assigning it to a specific user.
Important Notes
-
The assignee field takes precedence over Team Field, so if an issue is assigned to both User & Team, it will be shown on the user’s timeline
-
Team Panel does not support Issue parts, hence it’s not possible to partially assign a task to the Team & partially to an individual
-
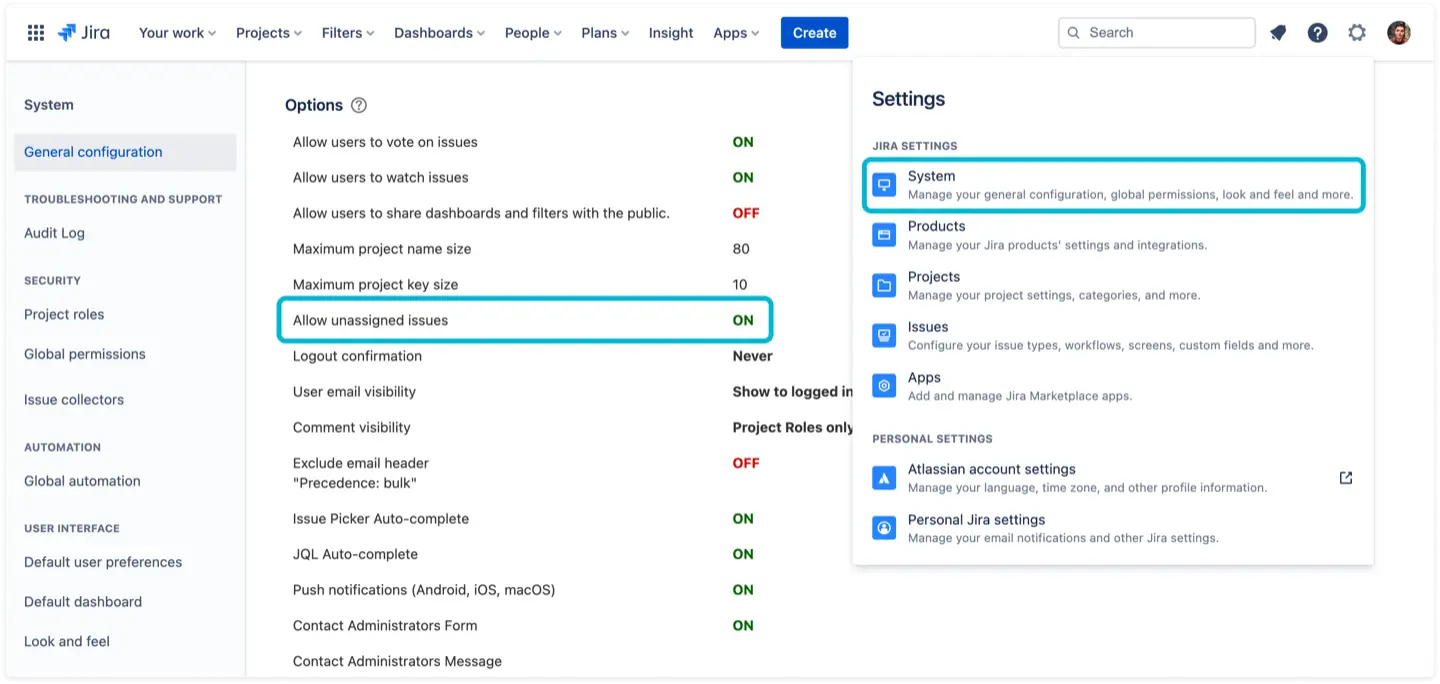
Jira instance must allow ‘Unassigned issues’, you can check if your instance allows this in Jira Settings->System
-
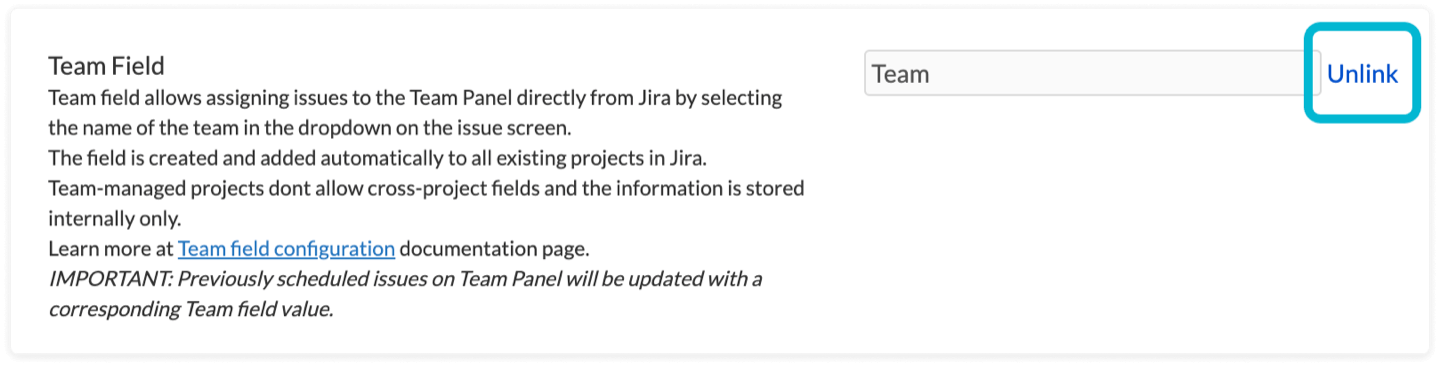
You can ‘unlink’ the field from ActivityTimeline and the system will no longer try to update it, after this, you can remove the field from your Jira instance. You can do this in ActivityTimeline Configuration → Jira Integration → Unlink:
You can also learn more about Team Panel here: Team Panel Workload Modes