
If time tracking is enabled, ActivityTimeline provides several convenient ways to log work directly from the Workspace module or Jira.
Choose the method that best fits your workflow.
Before You Start
Available time-tracking options may depend on:
-
ActivityTimeline configuration;
-
Jira time tracking provider settings;
-
Jira project permissions;
-
approval workflow or period closure settings;
-
whether logging time for other users is enabled.
Use the Log Work button
Click Log Work in the top toolbar to open the Log Work dialog.
Use this option when you want to manually select the issue, date, and number of hours to log.
Use the Timer
Click the Timer icon to start tracking your work in real time.

When you finish working, simply stop the timer and convert the recorded time into a worklog.
Log work from the Daily Logged Hours chart
Click on a day in the Daily Logged Hours chart to quickly log time for that date.
This is the fastest option when you know how many hours you still need to report on a particular day.
Log work from a Issue Card
Click on any issue in the Timeline or Issues panel and click Log Work.
This method is convenient when you’re already reviewing or working on a specific task.
Enter hours in the My Logged Hours table
Use the My Logged Hours table to log or update hours directly for each issue and day.
This view is especially useful when entering worklogs for multiple days or multiple issues at once.
Log Work on Behalf of Another User
If enabled, ActivityTimeline Administrators, Managers, or Team Leads can log time for other users.
To log work on behalf of another user:
-
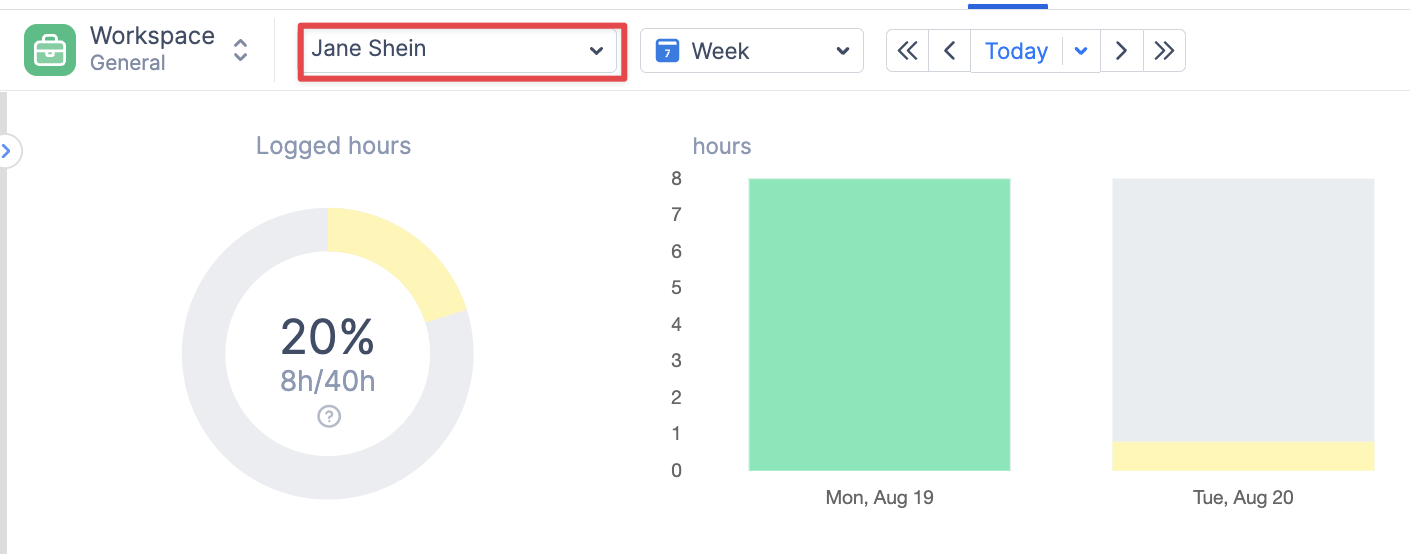
Open the Workspace view.
-
Switch to the required user.
-
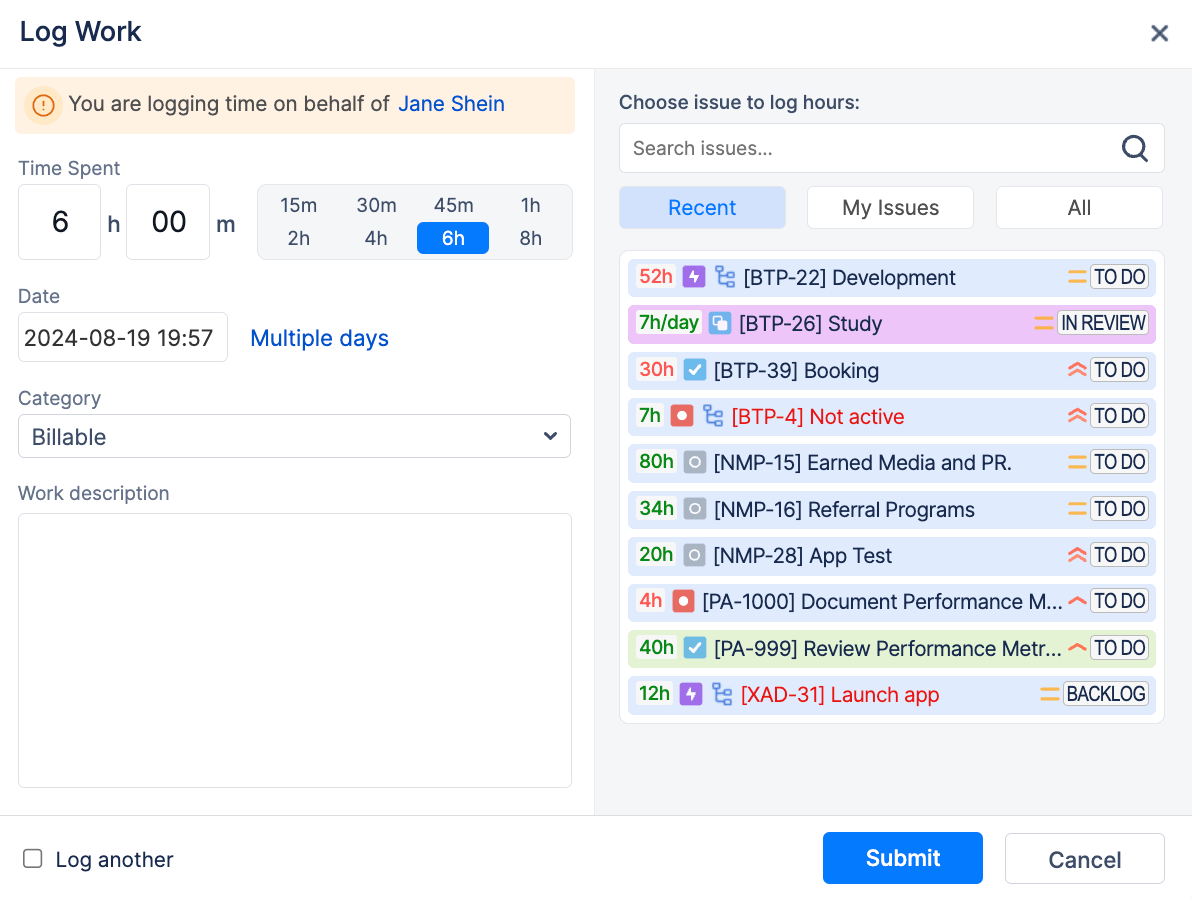
Click Log Work.
-
Confirm that the warning message appears:
You are logging time on behalf of [user].
-
Continue logging the work.
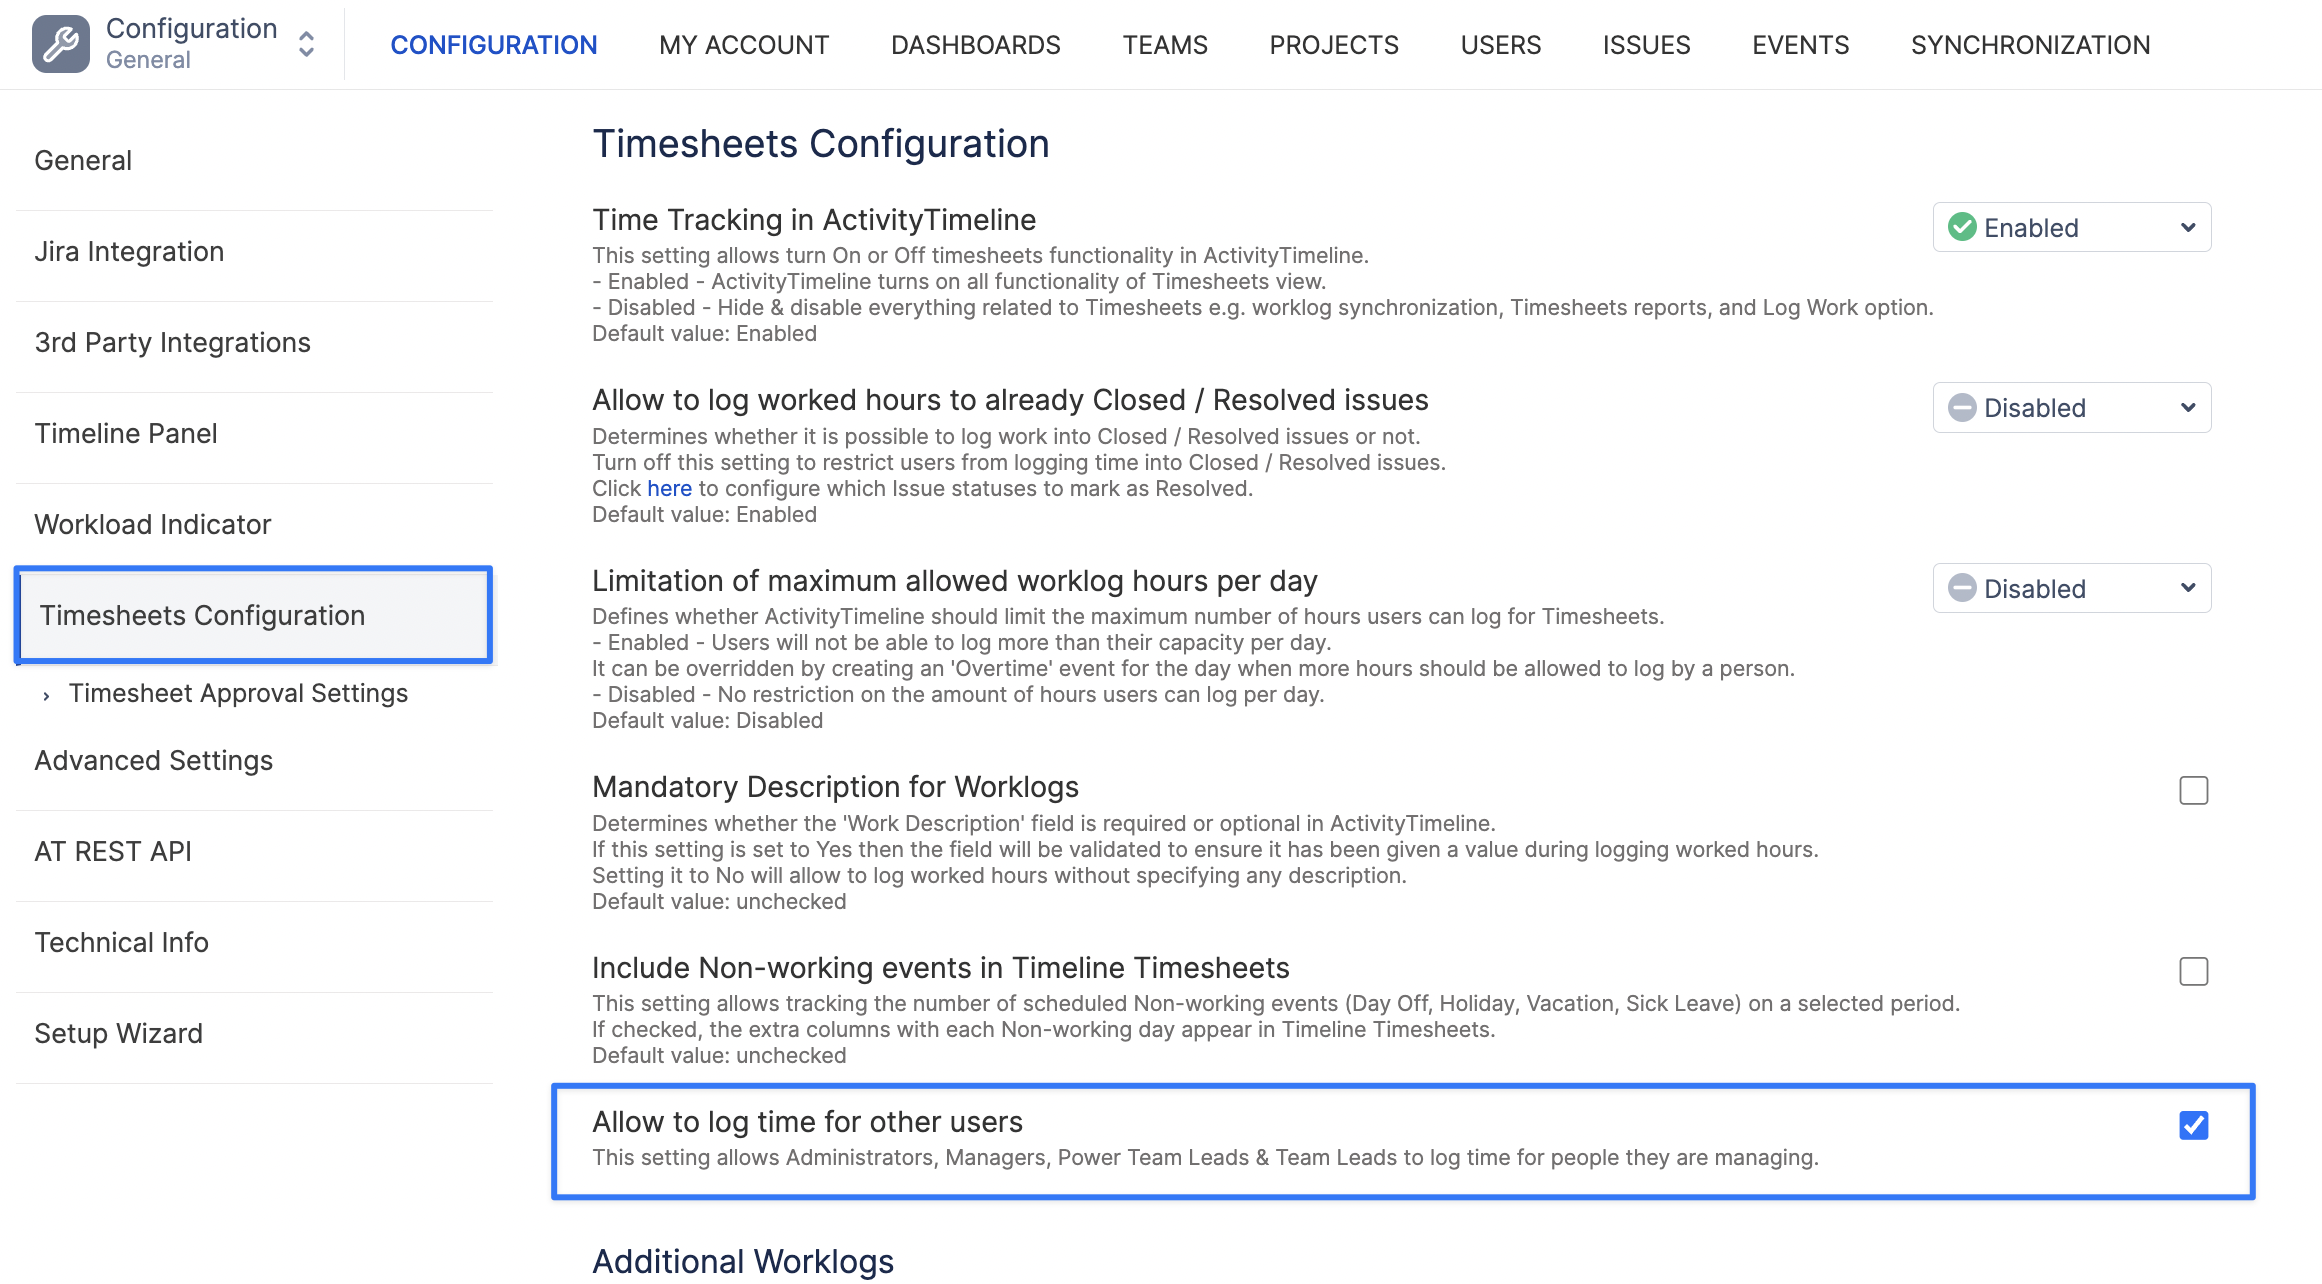
This feature can be enabled or disabled under:
Configuration → Timesheets Config → Allow to log time for other users
Log Work from Jira
The way users log work from Jira depends on your Jira time tracking configuration.
-
If ActivityTimeline is configured as the Jira time tracking provider (Cloud), clicking Log Work in Jira opens the ActivityTimeline Log Work dialog. Worklogs are created directly in ActivityTimeline and are immediately available in Workspace, Timesheets, Reports, and other ActivityTimeline modules.
-
If Jira is configured as the time tracking provider, users log work using Jira’s standard Log Work dialog. Those worklogs are then synchronized with ActivityTimeline and become visible across the application.
This allows users to log time from Jira while ensuring their worklogs are available throughout ActivityTimeline, regardless of the configured time tracking provider.
What Happens After You Log Work?
After a worklog is created, ActivityTimeline updates:
-
the issue’s logged time;
-
the issue’s remaining estimate
-
Workspace charts;
-
My Logged Hours table;
-
My Worklog Details;
-
Timesheets;
-
Reports.
The worklog is also synchronized with Jira.
Configuration Notes
Some time tracking options in Workspace depend on your ActivityTimeline configuration.
For example, administrators can define:
-
whether time tracking is enabled in ActivityTimeline;
-
whether ActivityTimeline or Jira is used as the time tracking provider;
-
whether users can log time to closed or resolved issues;
-
whether users can log more hours than their daily capacity;
-
whether worklog descriptions are mandatory;
-
whether users can log time for other users;
-
whether users can log work for future dates;
-
whether Bookings or external calendar events are treated as worklogs.
If an option is not available in Workspace, it may be disabled by your administrator or restricted by your permissions.
Learn more: Timesheet Configuration
Learn how to manage worklogs: Manage Worklogs