By default, ActivityTimeline connects to Jira using ‘Assignee’ and standard ‘Start Date' and ‘Due Date’ fields.

However, you have the flexibility to configure how you want to manage your plans:
-
Isolated Plans: If you prefer to create plans within ActivityTimeline without affecting Jira, you can do so. These plans will remain exclusive to ActivityTimeline.
-
Synced with Jira Plans: If you want your changes to be synchronized with Jira, this is also possible. Changes made in ActivityTimeline will automatically update the corresponding Jira issues.
Isolated Plans
If you do not want information in Jira to be changed and simply want to plan in ActivityTimeline, you can use isolated plans approach.
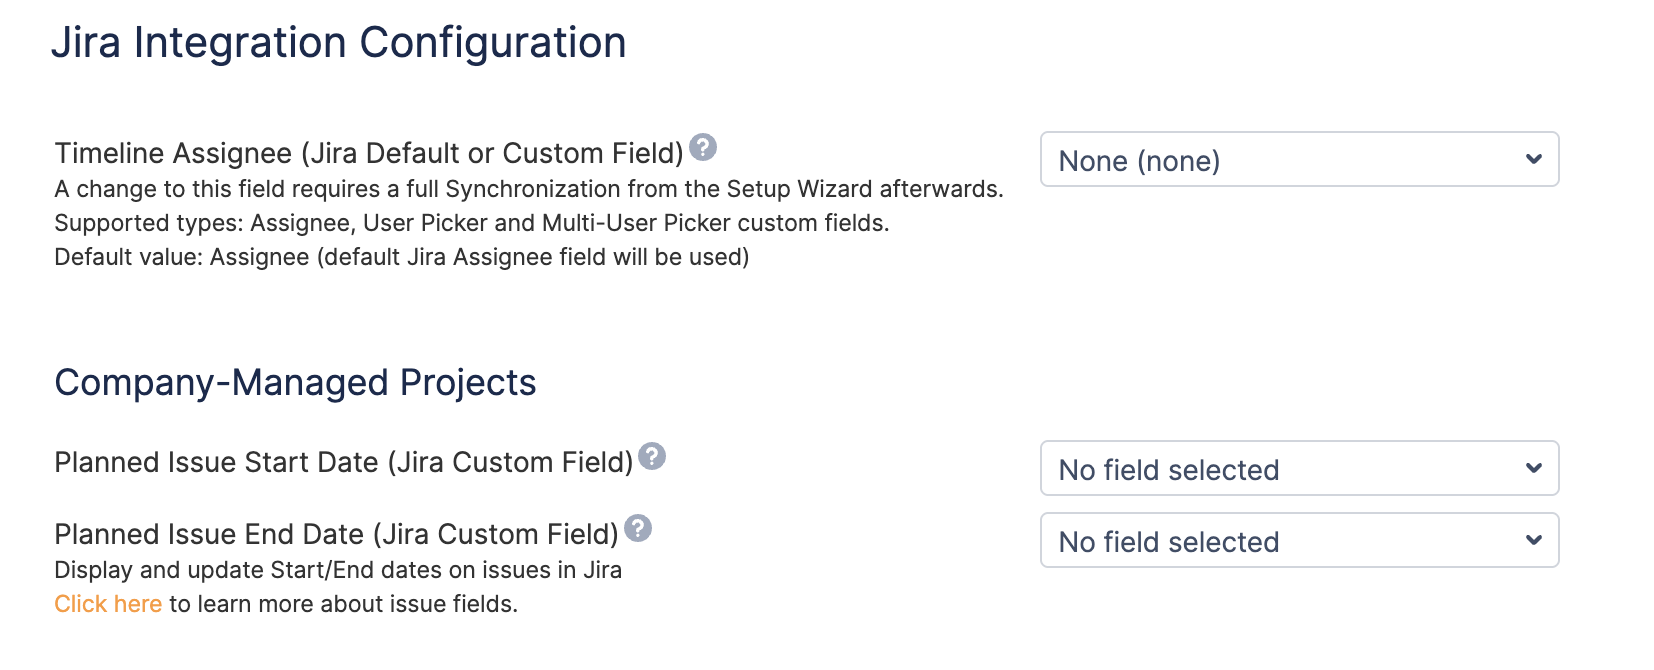
To setup an isolated plan, you need to first configure your settings properly. Ensure that you choose ‘No mapping’ for the start date, end date, or even assignee (Under Configuration → Jira Integration). This setup is crucial as it prevents automatic assignments and allows for manual planning.

Once the settings are configured, follow these steps to manually allocate tasks:
-
Open the Issue Panel where the tasks are listed.
-
Select the task you wish to assign.
-
Drag the selected task to the appropriate day on the user’s timeline. No changes are synced to Jira.
Synced with Jira Plans
There is nothing wrong with isolated manual planning via drag’n’drop, however, if you want the dates of the task to be displayed in Jira as well as be able to schedule tasks right from your issue, we recommend keeping your Start/End dates mapped.
In Jira, there are two types of projects:
-
Company-managed projects are controlled at the organizational level and allow for extensive customization and administration, making them ideal for larger teams needing consistent configurations across projects.
-
Team-managed projects offer more autonomy to individual teams to set up and manage their own configurations without impacting other projects.
Company-Managed Project
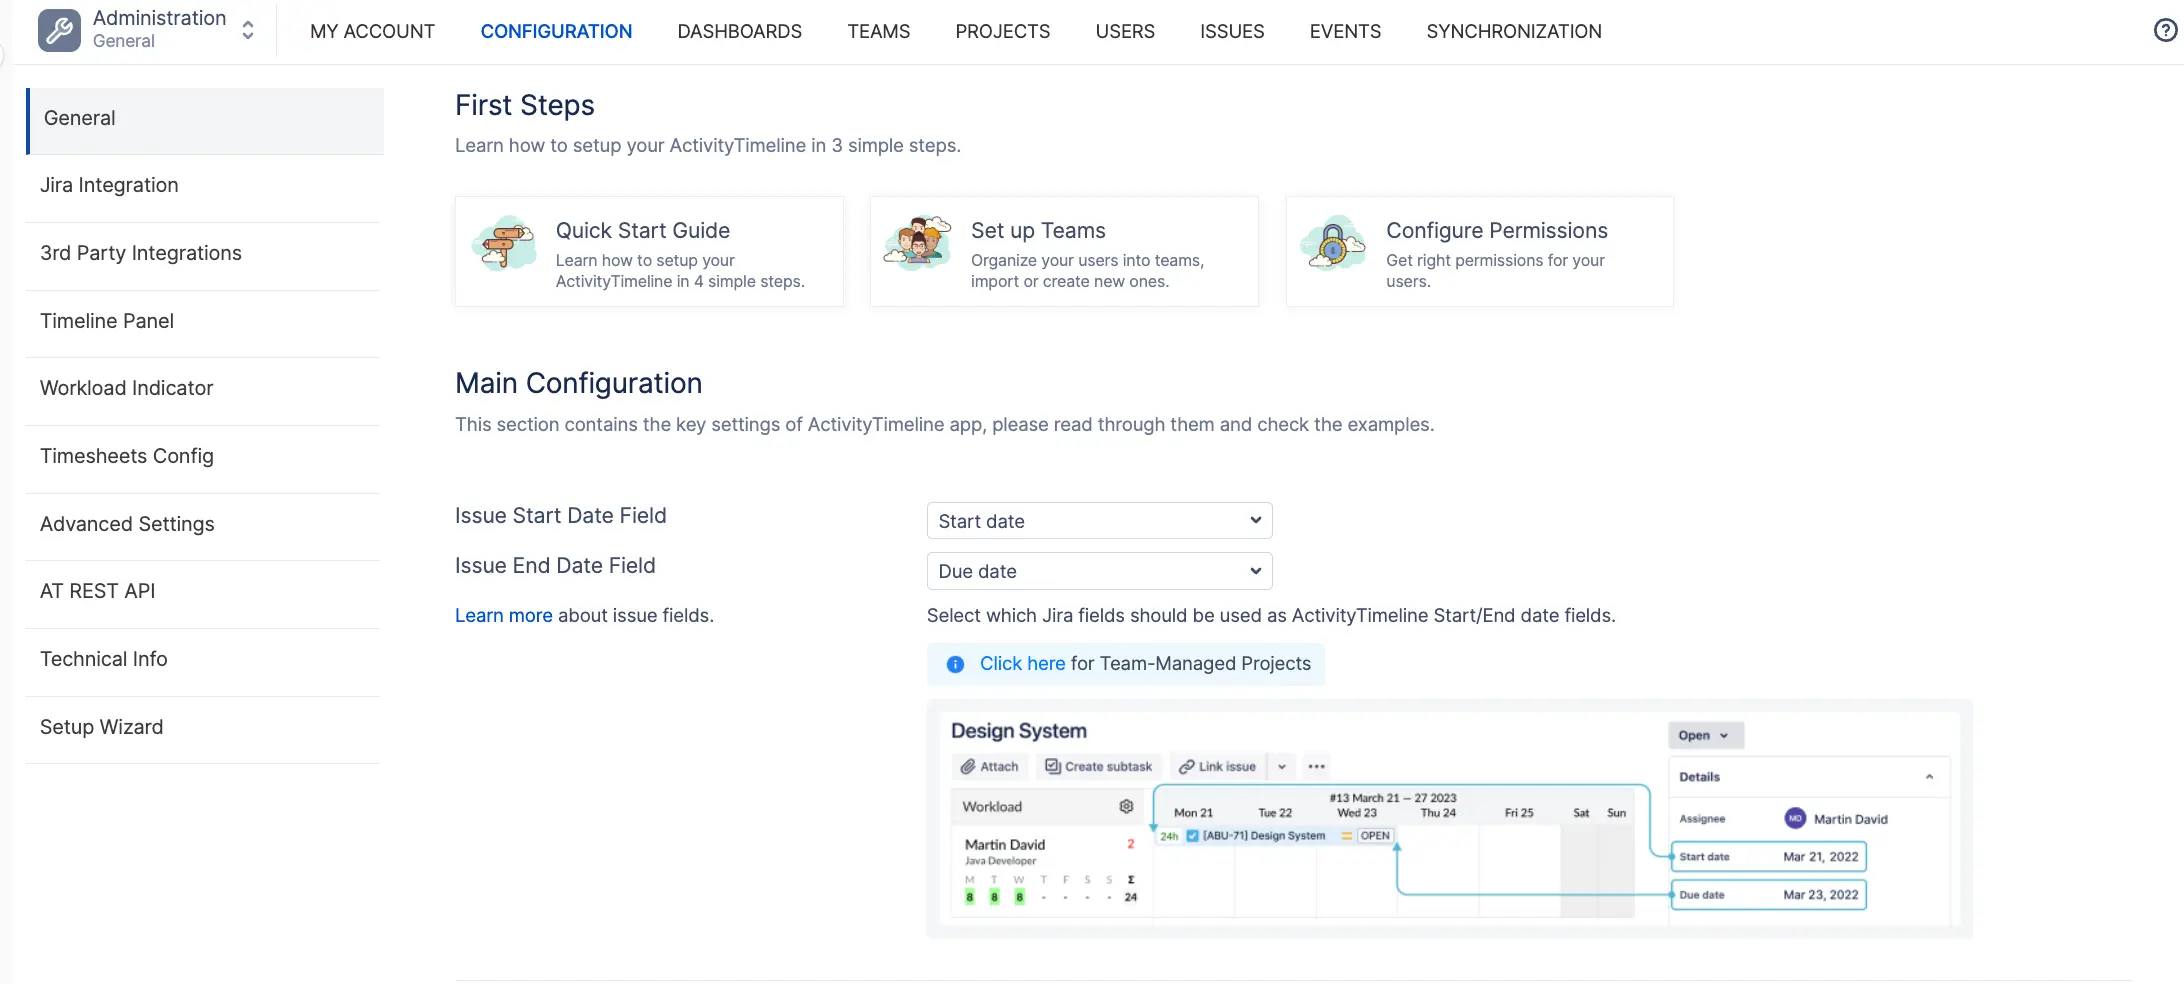
If you use any other than standard Start and Due Dates fields to represent Start/End Dates in your Jira (any Date Picker or Date/Time picker format will work), you can also map them to ActivityTimeline, so that it can read this data from Jira and display your tickets automatically.
Go to ActivityTimeline Configuration → From the dropdown Issue Start Date Field and Issue End Date Field choose your Start/End date fields:

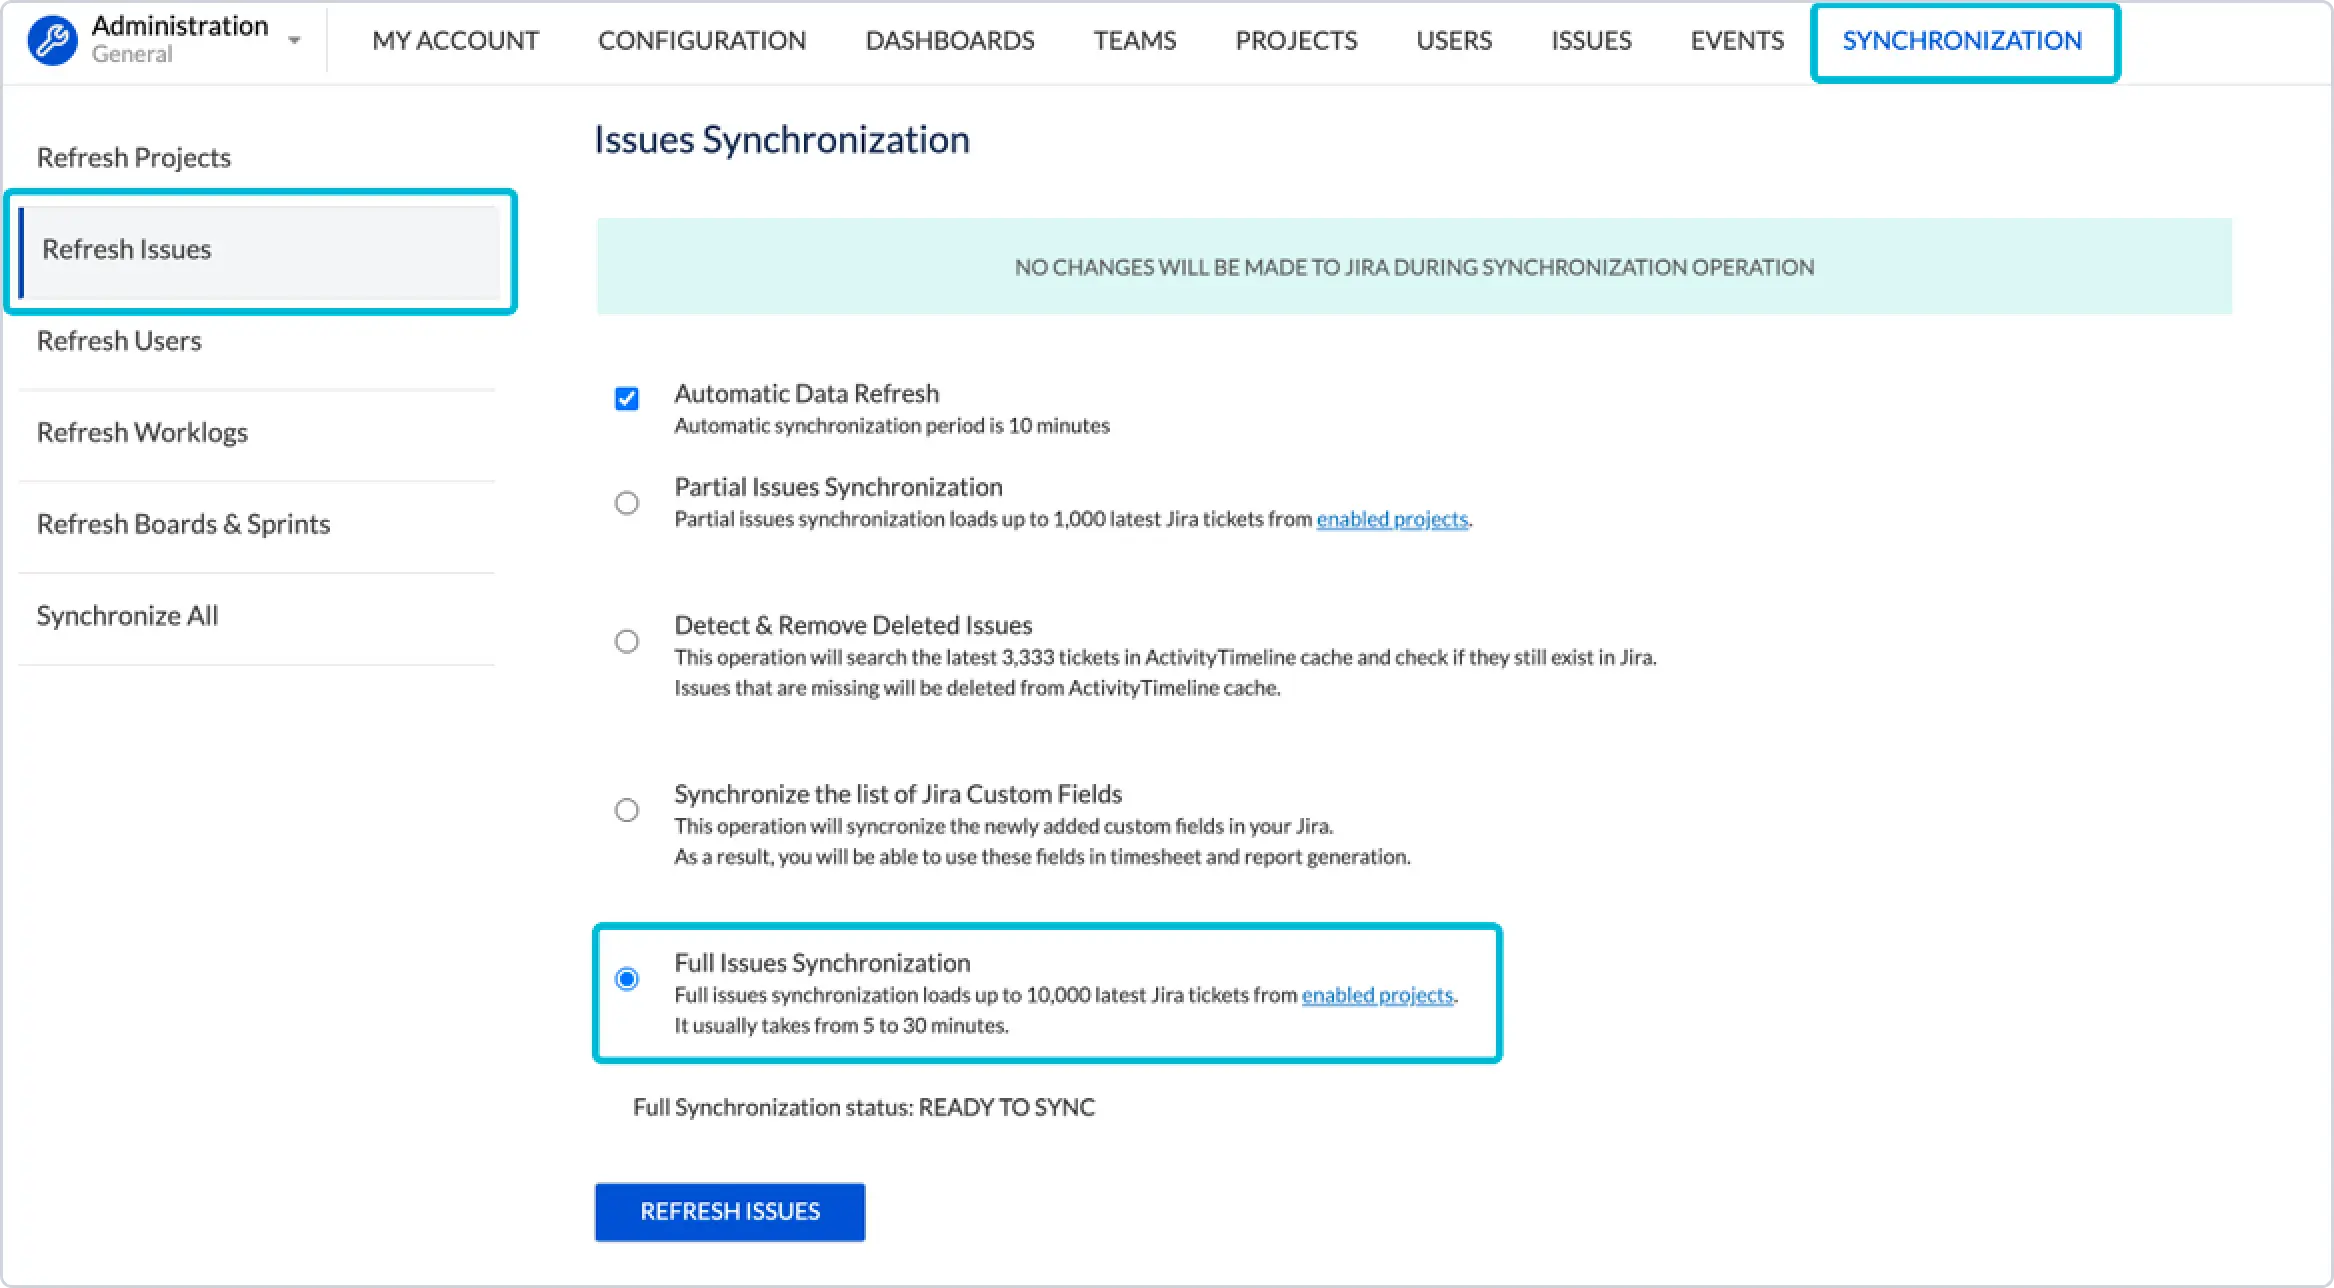
Then go to Synchronization → Refresh Issues → Perform full Synchronization, so that the system can re-cache all the issues.

If Start/Due date fields are mapped but are not currently set on the Jira issue screens, you can simply drag and drop a task from the issue panel to the user’s timeline. This action will automatically configure the necessary fields in Jira on the appropriate screens.
Team-Managed Projects
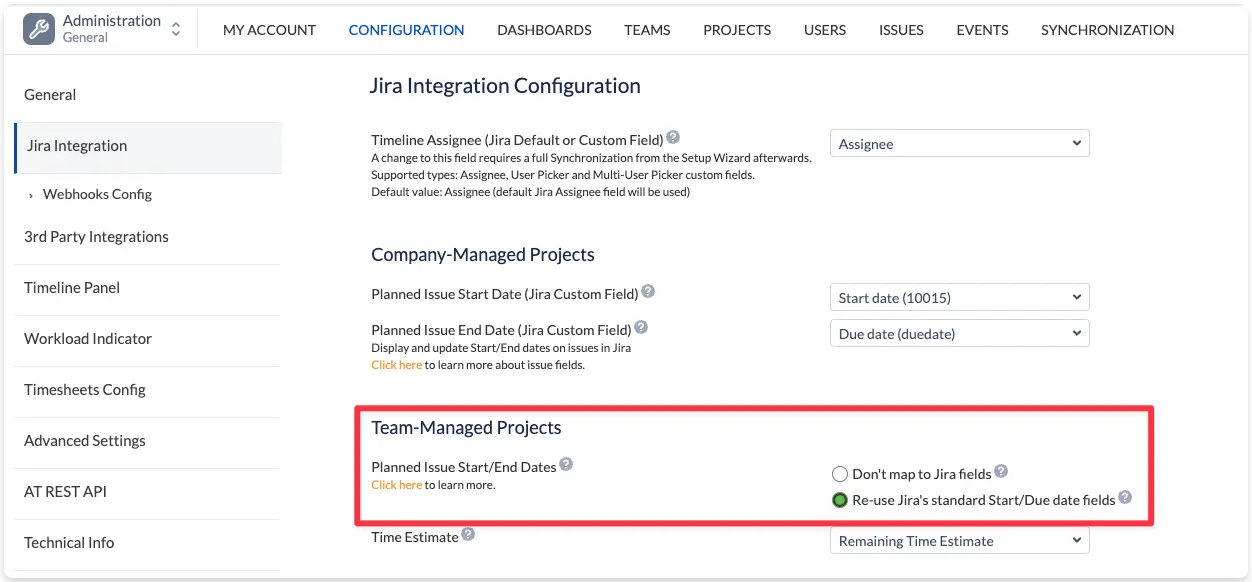
If you already have generic Start/Due date fields in your Team-Managed project, simply navigate to ActivityTimeline Configuration → Jira Integration → Team-Managed Projects → Choose ‘Re-use Jira’s standard Start/Due date fields’ → Click ‘Update' → Proceed with Full Issue Synchronization as described above:

If you already have some issues scheduled on your dashboard, changing the configuration of your Start/End Dates field, will remove them from the schedule, so we recommend firstly make sure that all those tickets also have dates set in Jira.
You can use the following fields to integrate ActivityTimeline with other applications that use date picker fields, like BigGantt or BigPicture by Softwareplant. You can check our guide on how to perform this integration here.
Once you are all set, go to the next step, which is: Assign Jira Tasks & Custom Events