
When you have your teams created, and users assigned to the required roles and positions, you are ready to start planning actual Jira tasks.
Assign Jira Tasks
The whole concept behind scheduling tasks in ActivityTimeline is fairly straightforward, you just take the task from Issue Panel and drag’n’drop it to the user’s timeline, where you can then re-size it or even split it between users or dates.
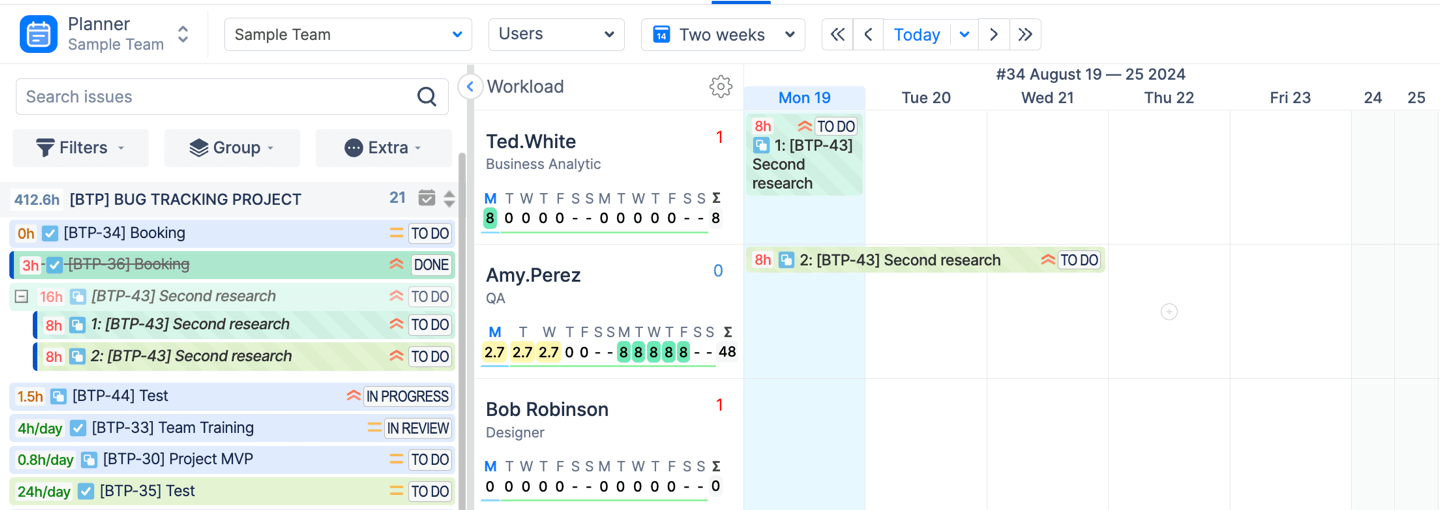
If you followed our advice in the previous section of this guide, you also have the option to assign tasks not only via drag’n’drop, but by going to your Jira and specifying Start/End dates there:
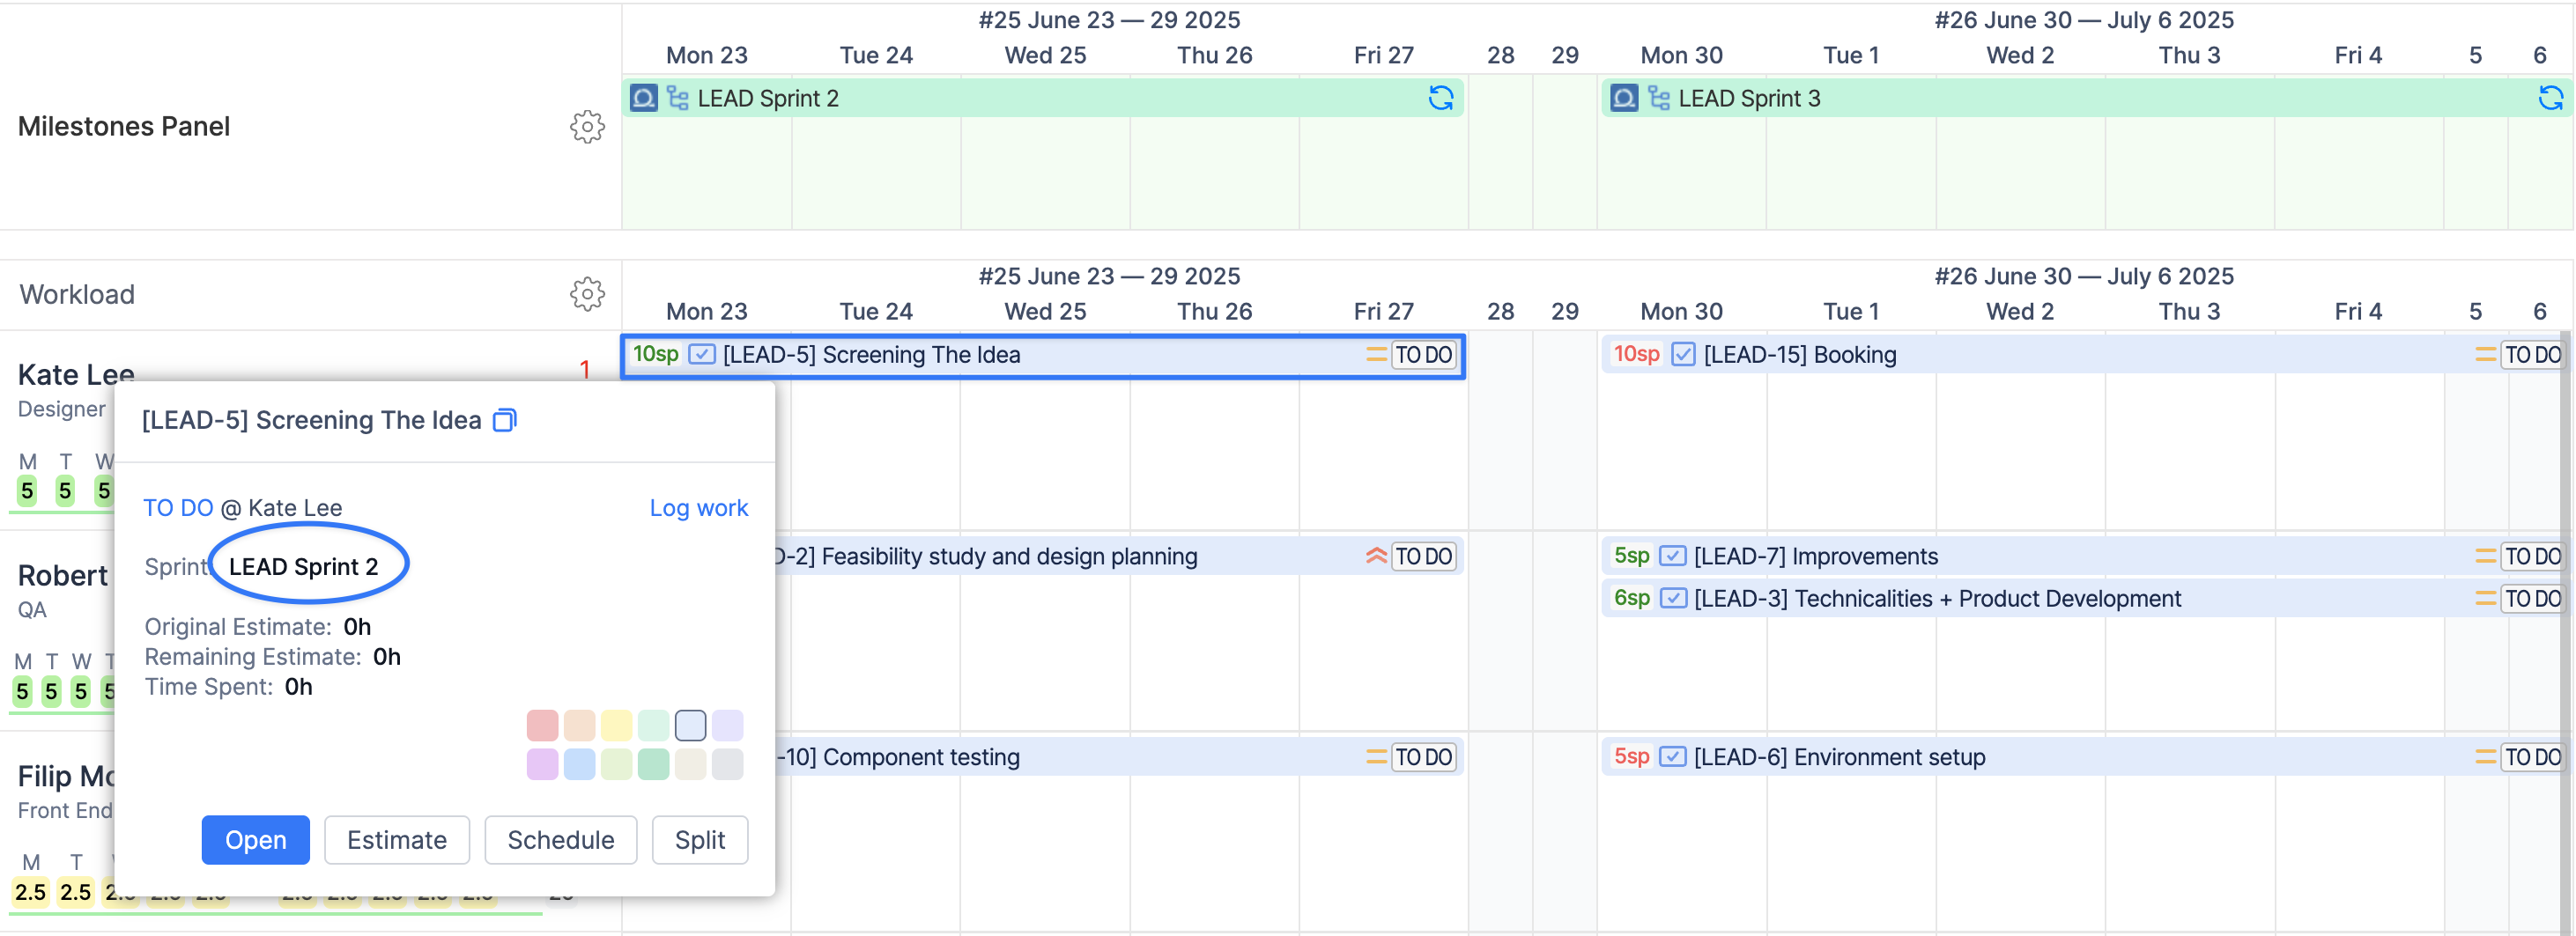
For people who use Scrum a lot and are not really interested in scheduling individual tasks, the system will read Start/End dates of the sprint and schedule tasks assigned to a user based on these days:
Custom Events
As for local events, you can create them simply by selecting a specific period on the calendar and choosing which event to create. You can check the details about Custom Events here.
When you unschedule a local event from the user, it disappears, as there is no backlog for events at the moment.
What Happens Next
Once you are all set, go to the next step, which is exploring Workload Calculation Modes options.