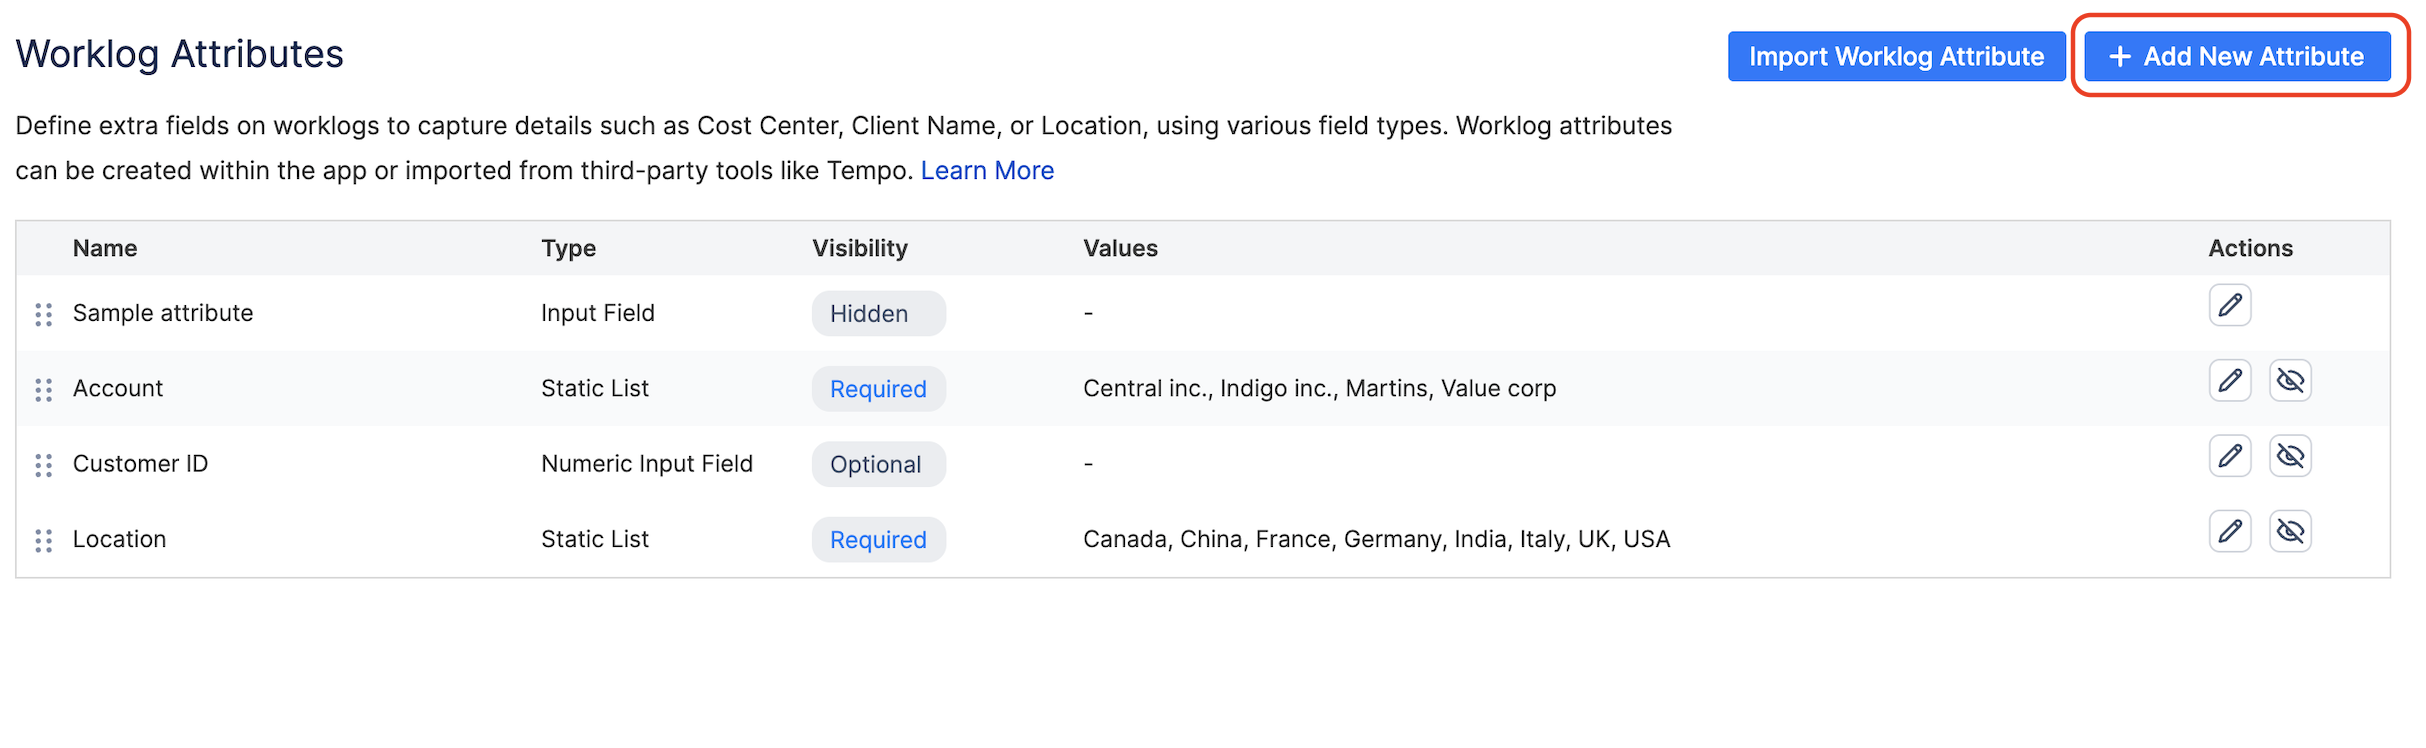
Worklog Attributes allow you to add custom fields to worklogs, helping you capture additional details such as Cost Center, Client Name, or Location. These attributes can be used to enhance reporting, streamline approvals, and ensure accurate billing.
You can either create Worklog Attributes directly in ActivityTimeline or import them from Tempo Timesheets Cloud if you already use that integration.
Note: Worklog attributes are shared across all enabled projects in ActivityTimeline. At this time, it is not possible to restrict them to specific projects.
Creating a New Worklog Attribute
To define a new attribute manually:
-
Navigate to Configuration -> Timesheets Configuration -> Worklog Attributes.
-
Click on the Add New Attribute button.
-
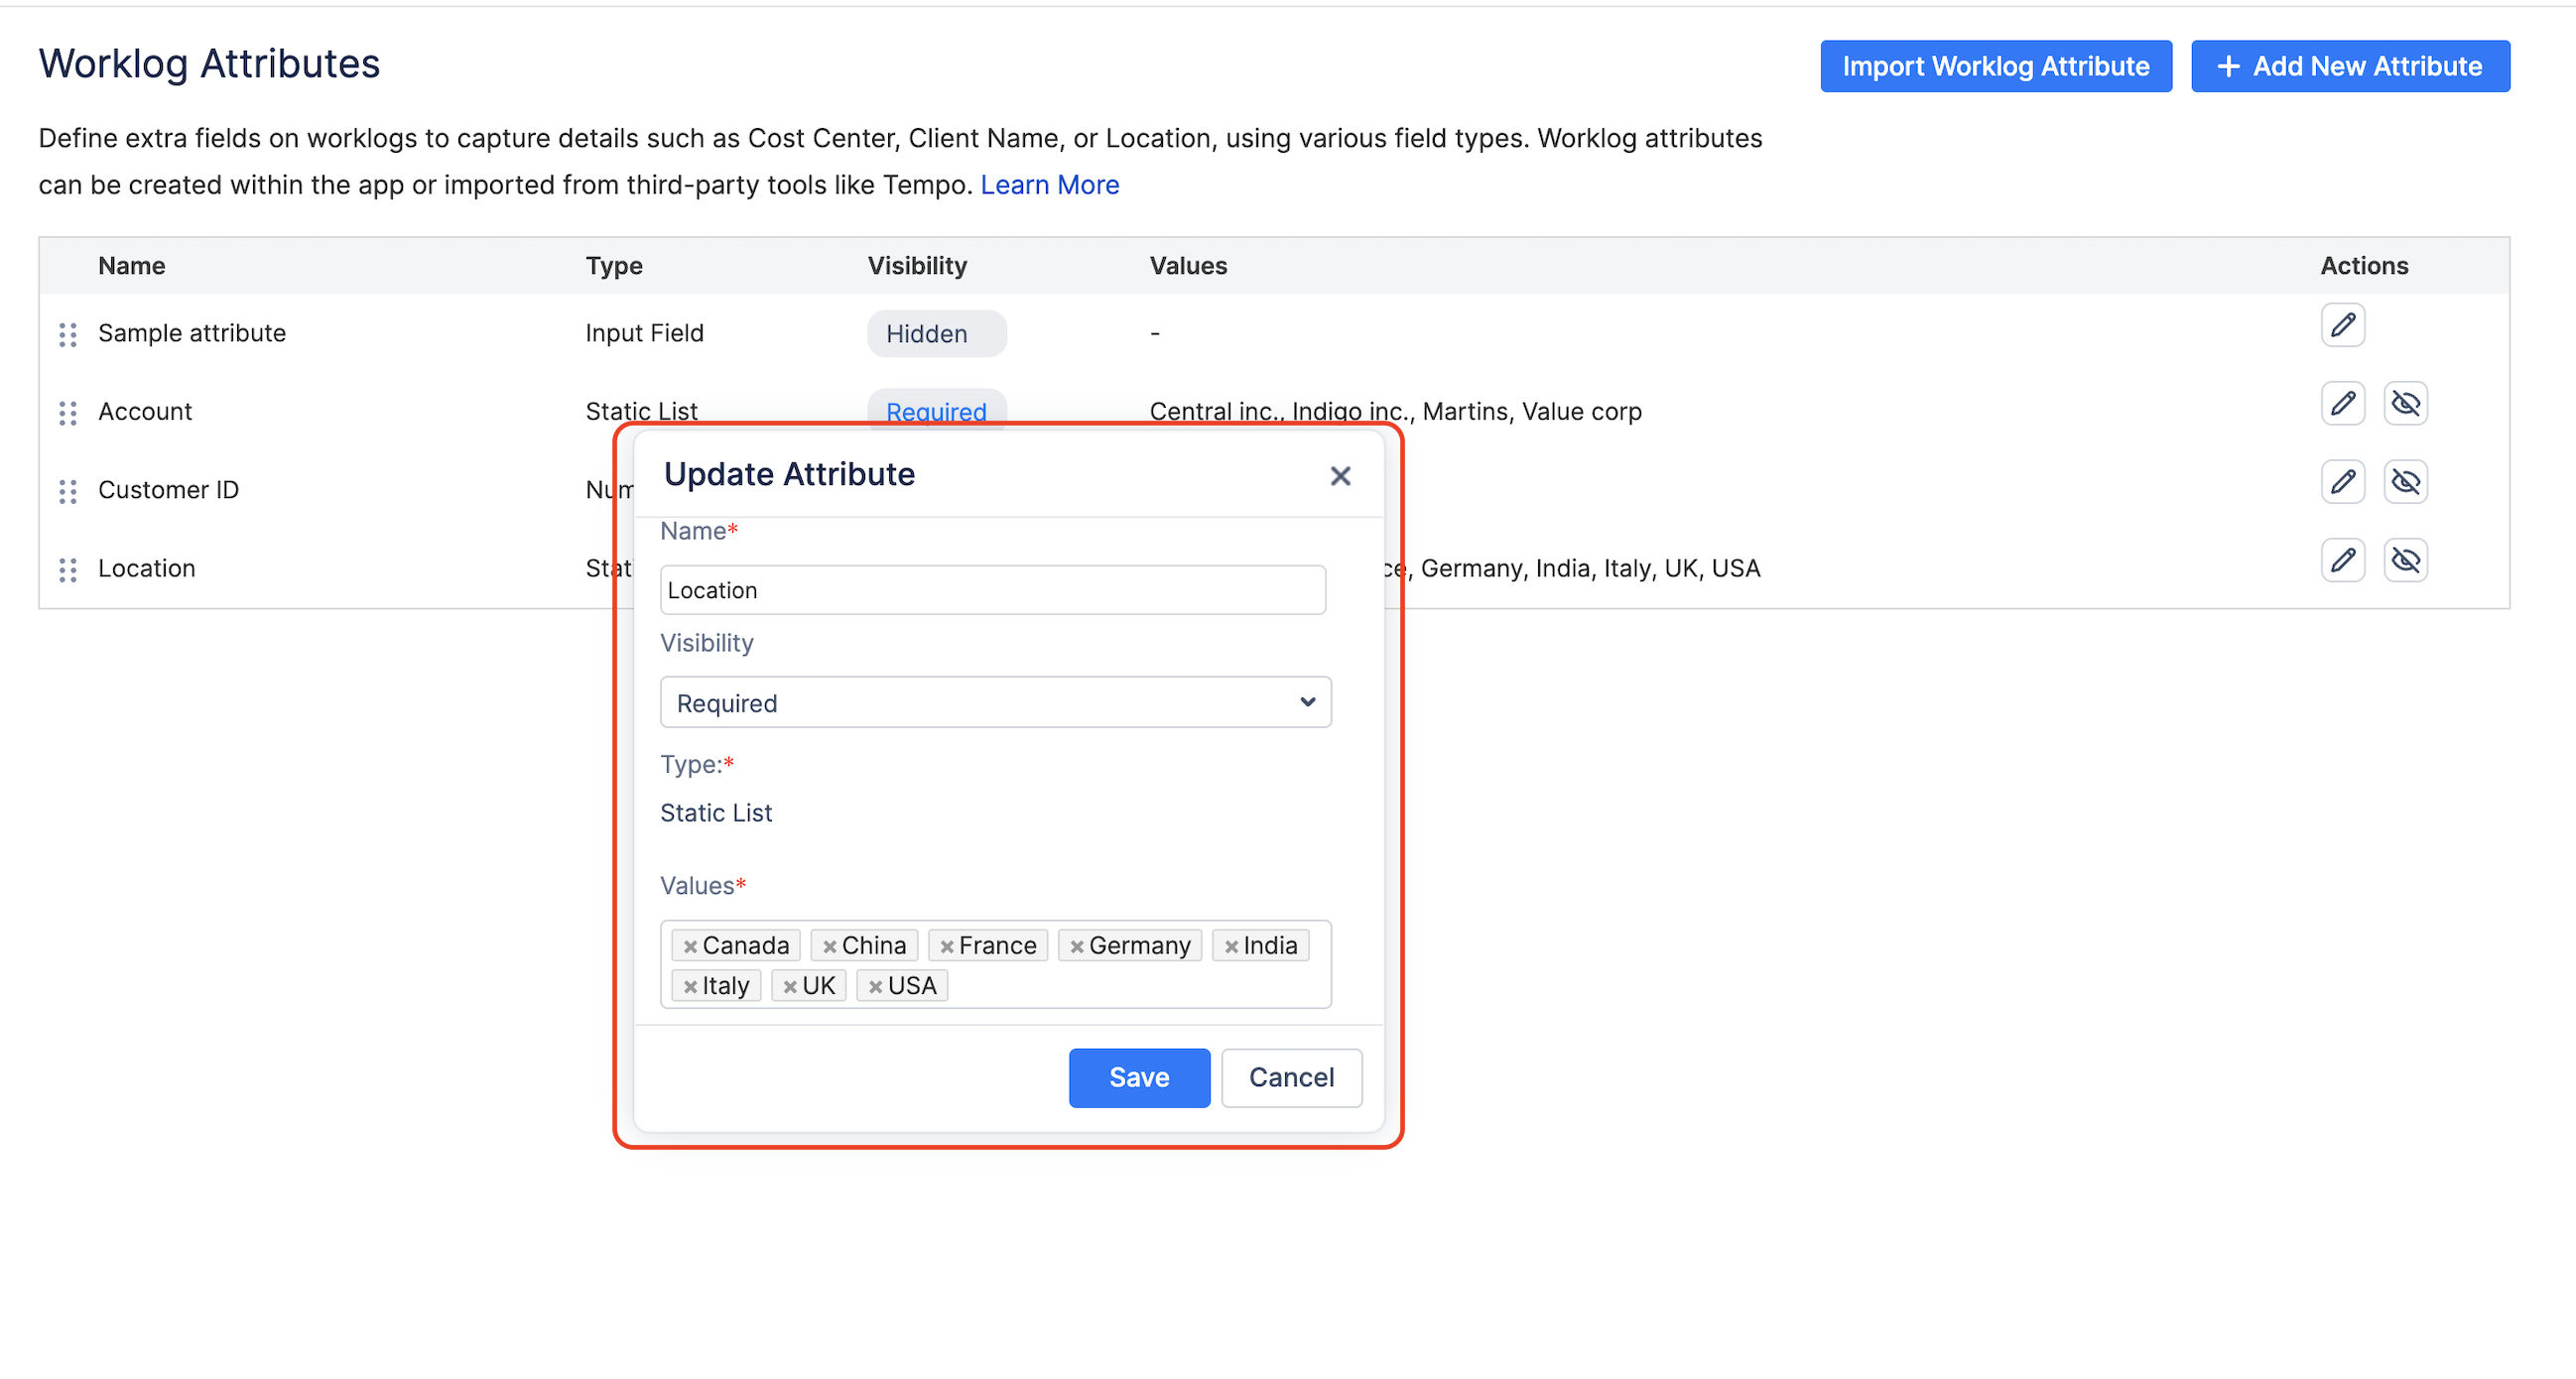
Fill in the required fields:
-
Name – the label shown to users in the worklog dialog.
-
Visibility – choose between
Required,Optional, andHidden:-
Required – the attribute must be completed before a worklog can be submitted.
-
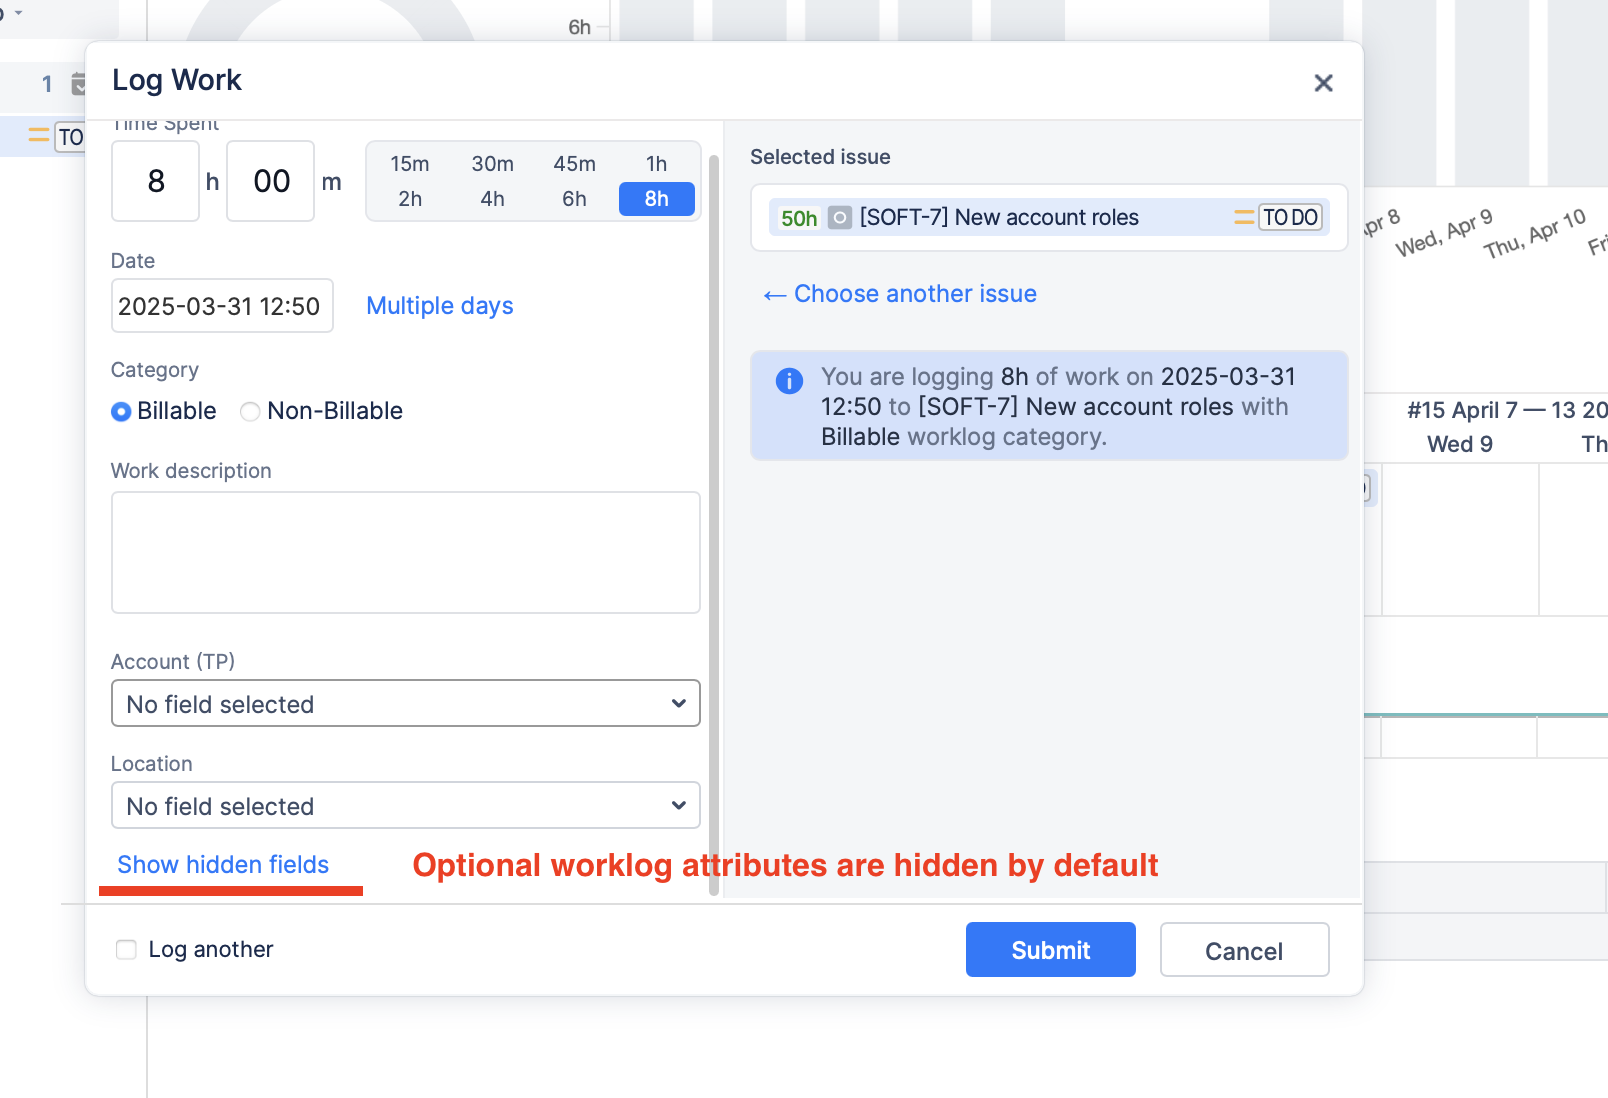
Optional – the attribute is hidden by default but can be accessed by clicking Show hidden fields during time logging.
-
Hidden – the attribute is not shown in the Log Work dialog and cannot be selected going forward, but existing historical data will be preserved.
-
-
Type – select the appropriate field type for the attribute:
-
Input Field – a free-text field for manual input.
-
Numeric Input Field – a field for entering numeric values only.
-
Checkbox – a yes/no selection.
-
Static List – a dropdown with predefined values.
-
-
-
Click Save.
Once saved, the attribute will appear in the list and will be available when users log time.
Due to technical limitations, Worklog Attributes cannot be deleted from the ActivityTimeline database. To remove an attribute from view, set its visibility to "hidden."
Importing Worklog Attributes from Tempo Timesheets (Cloud Only)
If your team already uses Tempo Timesheets, you can import existing worklog attributes directly:
-
Make sure you have established a connection between Tempo and ActivityTimeline via Tempo token.
-
Then, navigate to Configuration -> Timesheets Configuration -> Worklog Attributes.
-
Click on the Import Worklog Attribute button.
This will sync worklog attributes from Tempo and make them available in ActivityTimeline for use in timesheets.
Imported attributes are read-only in ActivityTimeline and must be managed directly within Tempo apps.
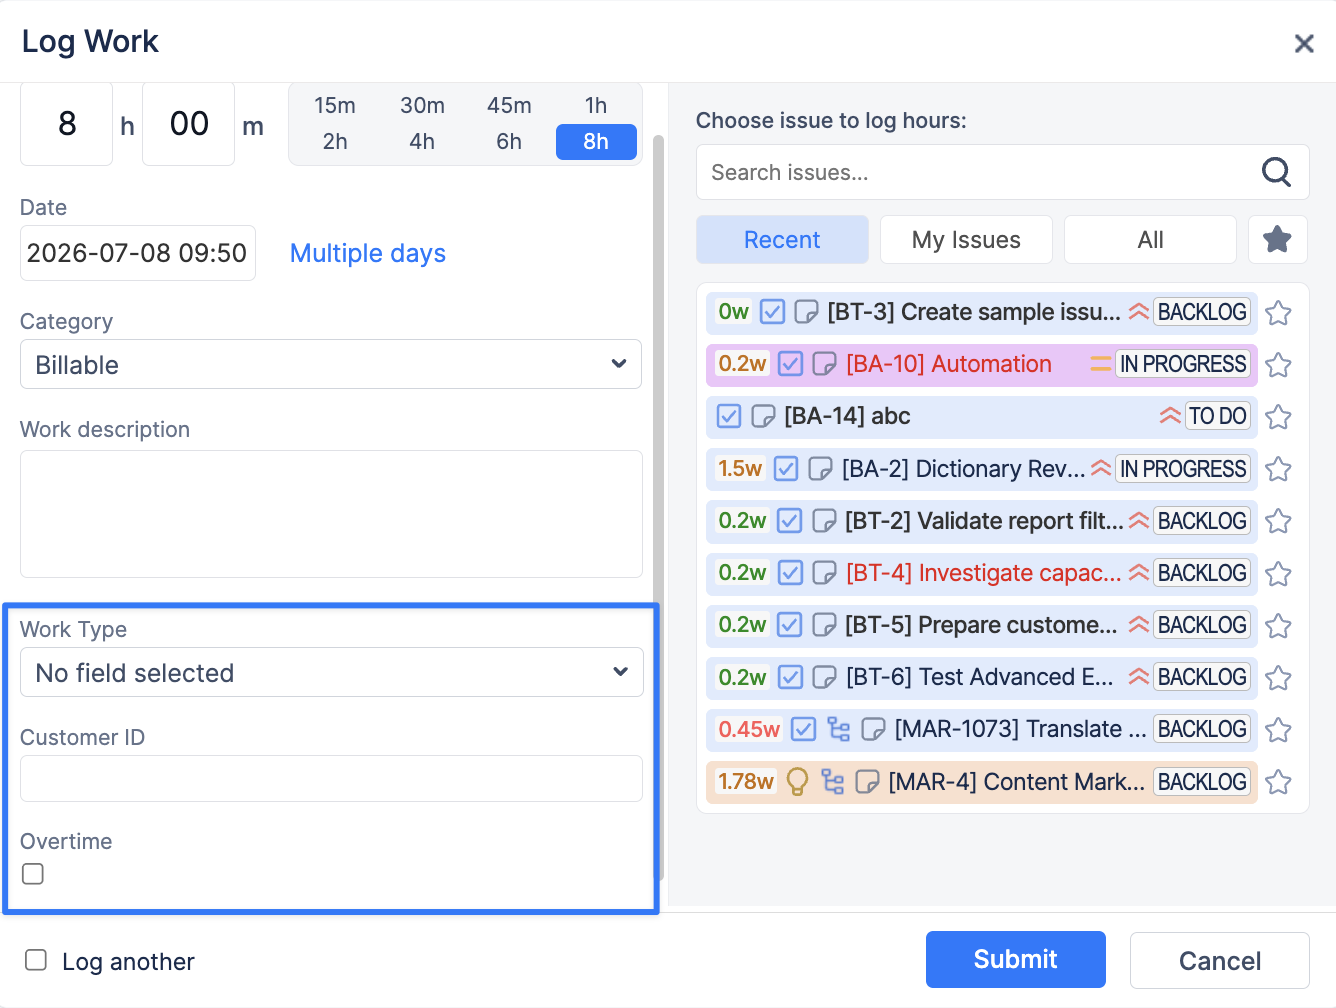
Using Worklog Attributes During Time Logging
When logging time, any configured attributes will be shown in the Log Work dialog. Their visibility depends on the attribute settings:
-
Required attributes must be filled in before submitting a worklog. If left blank, the system will prevent submission and display a validation message.

-
Optional attributes are hidden by default and can be accessed by clicking Show hidden fields in the logging dialog.
Managing Worklog Attributes
-
You can reorder attributes using drag-and-drop.
-
To hide no longer used attributes, make them “Hidden”.
-
For Tempo-synced attributes, visibility and values are inherited from Tempo and cannot be edited in ActivityTimeline.
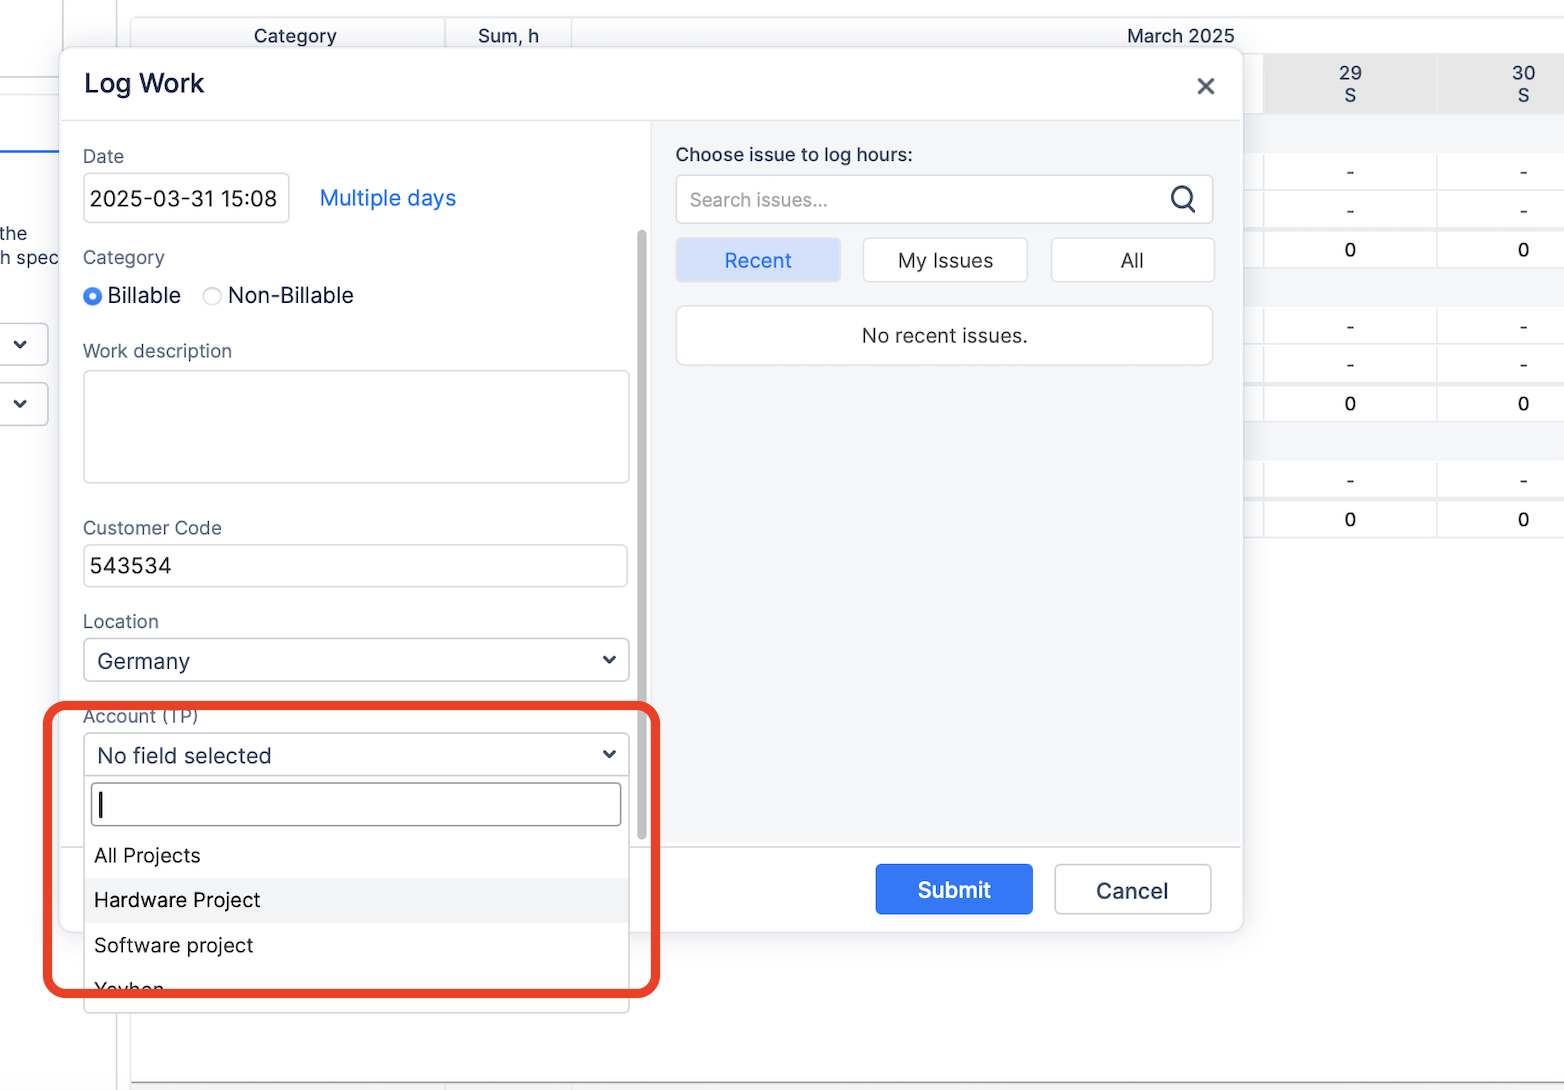
Logging Time Against Tempo Accounts in ActivityTimeline (Cloud)
If your organization uses Tempo Accounts, you can import them into ActivityTimeline as Static List worklog attributes. Once imported, users can record time against these accounts during time entry.
To log time against Tempo Accounts:
-
Ensure the account attribute is visible in the Log Work dialog (usually displayed as a dropdown list).
-
Select the appropriate account from the list during time logging.
Report by Worklog Attribute
The attribute values will be saved with each worklog entry and can later be used in reporting.
To view and analyze worklog data by account or any other attribute:
-
Navigate to the Timesheets module.
-
Select the Custom tab in the timesheet view.
-
Use the Group By dropdown to choose the imported Account attribute.
-
Choose any additional data fields to display alongside it (e.g., Category).
This setup enables your team to filter and group logged time by account across projects.

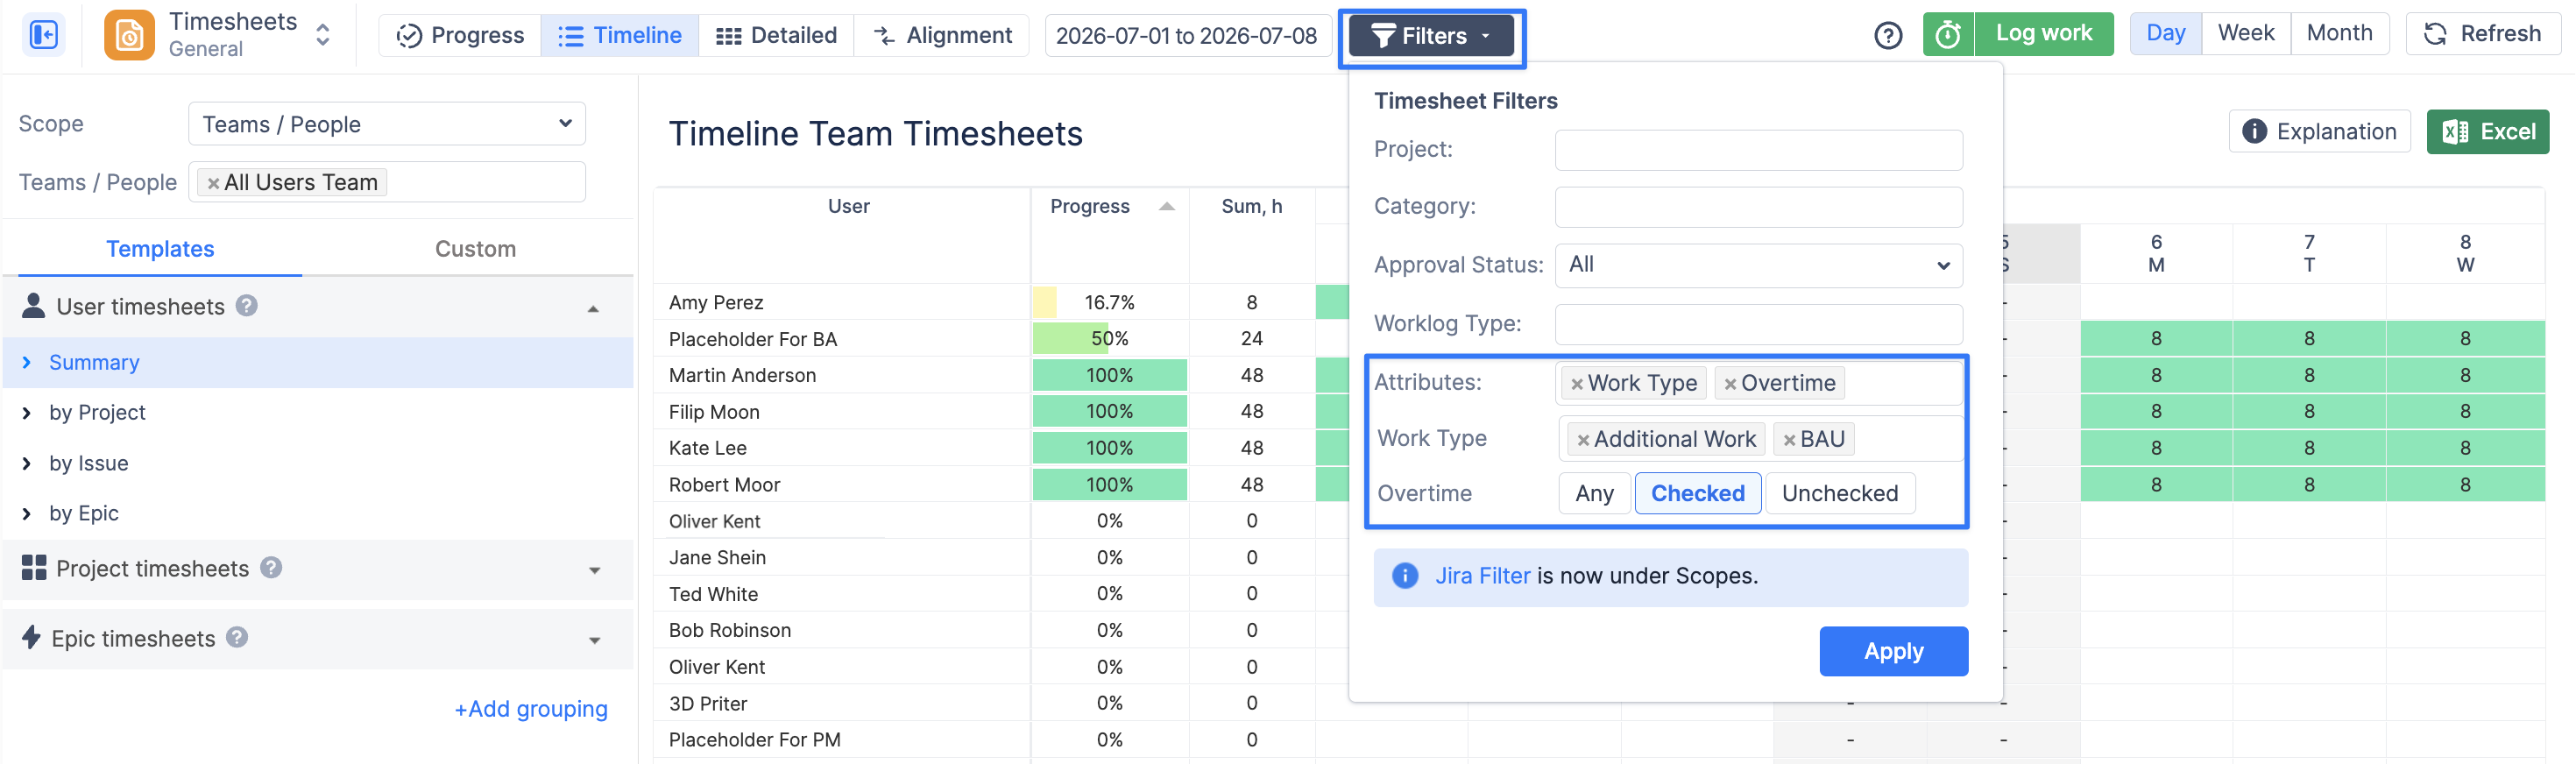
To filter Timesheets by Worklog Attributes:
-
Click Filters in the top menu.
-
Select the required Worklog Attributes.
-
Choose the attribute values you want to include.
-
Click Apply.
The Timesheet will then display only worklogs that match the selected attribute values.