
Integration between Jira Plans and ActivityTimeline is fairly simple to configure, but it can bring significant value for teams that use both tools.
By integrating Jira Plans and ActivityTimeline, you can:
-
Load Shared Teams (now Jira Teams) from Plans into ActivityTimeline
-
See changes in plans in both tools (i.e. 2-way sync between 2 plugins)
-
Allocated tasks & see the capacity of teams from Advanced Roadmaps in ActivityTimeline
Follow the steps below to set up the integration.
Step 1: Check Planned Start and End Date Fields
Open ActivityTimeline and go to:
Configuration → Jira Integration
By default, ActivityTimeline uses:
-
Start Date as the planned start date
-
Due Date as the planned end date
In most cases, no changes are needed here.
However, if Jira Plans is configured to use Target Start and Target End instead of Start Date and Due Date, select those fields in the Planned Issue Start/End Date dropdowns.
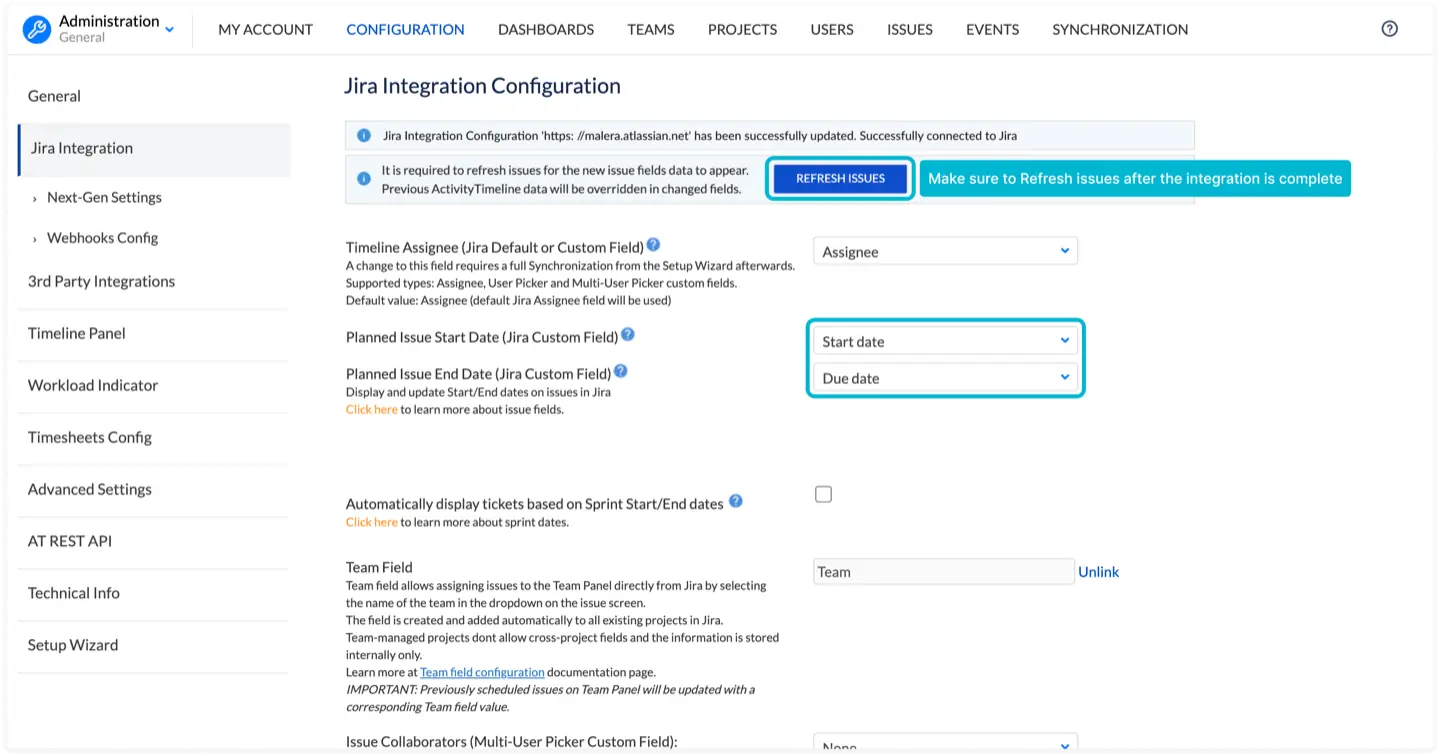
After confirming or updating the fields, make sure to refresh the tickets so ActivityTimeline can load the latest planning data.
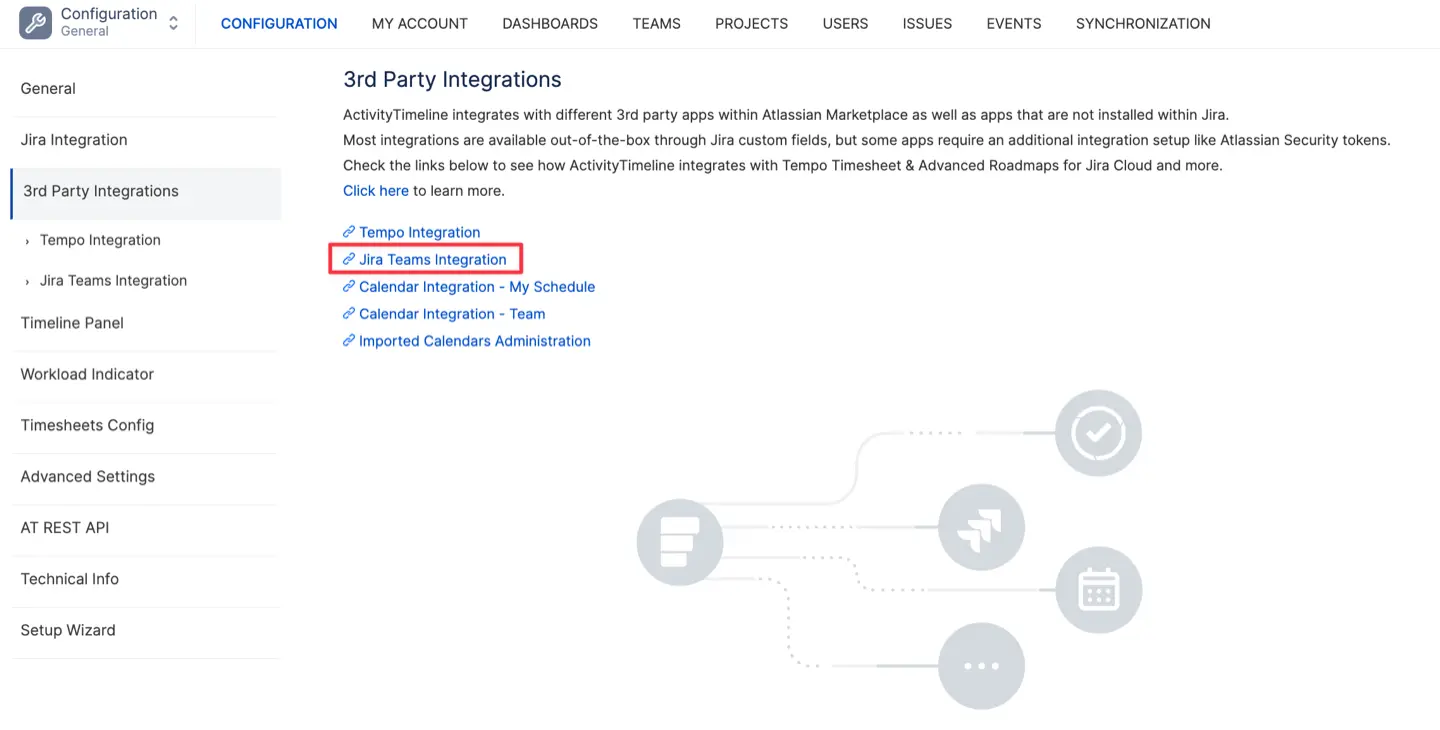
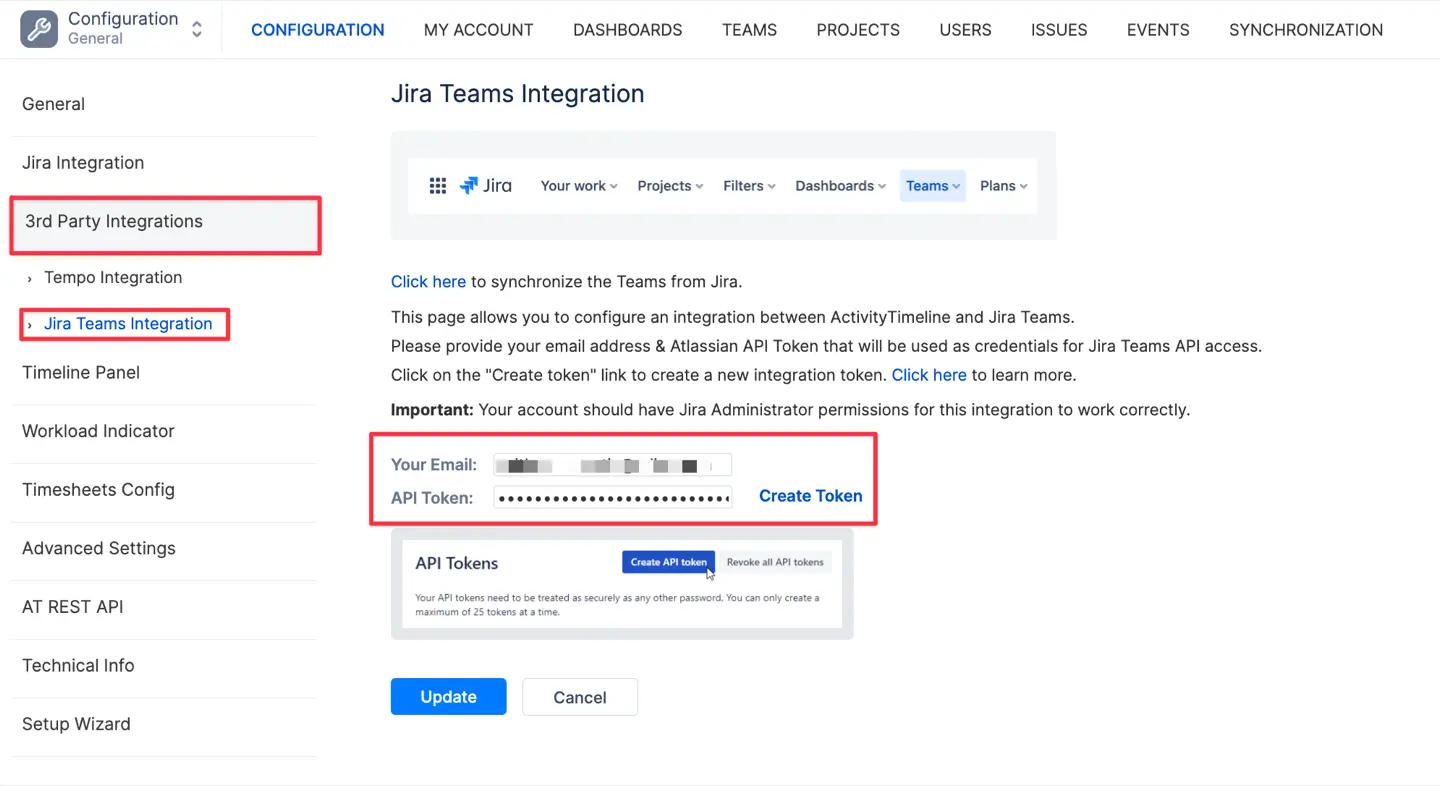
Step 2: Enable Jira Teams Integration
Go to:
Configuration → 3rd Party Integrations → Jira Teams Integration
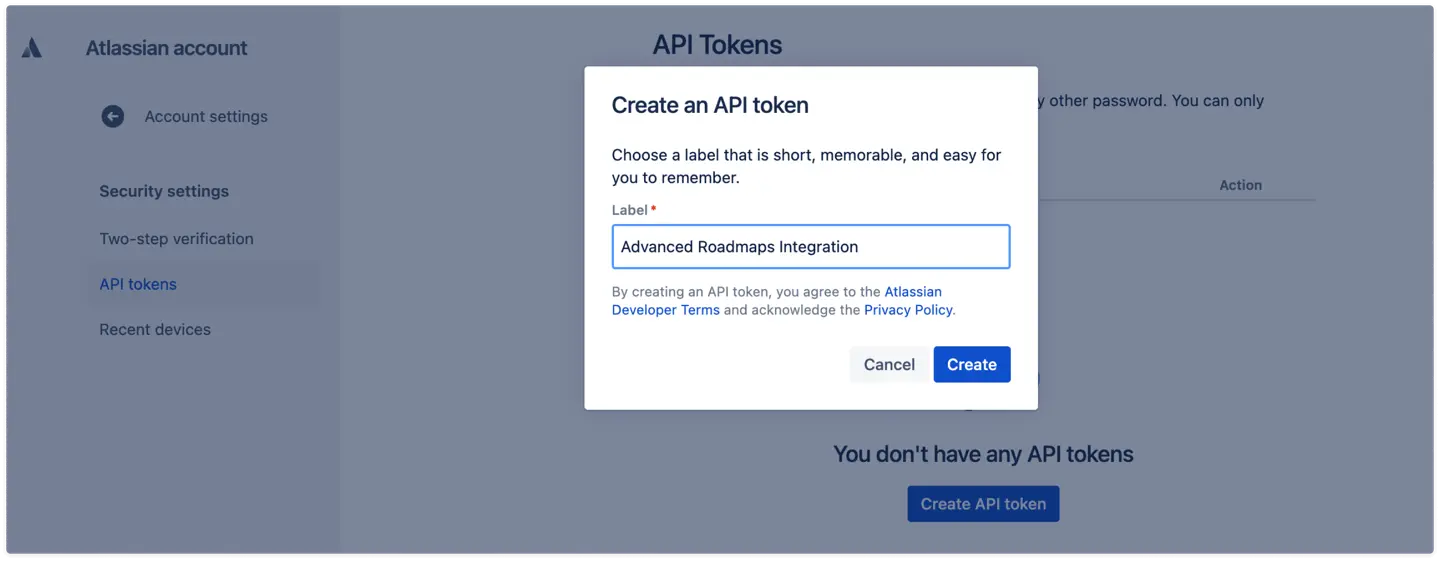
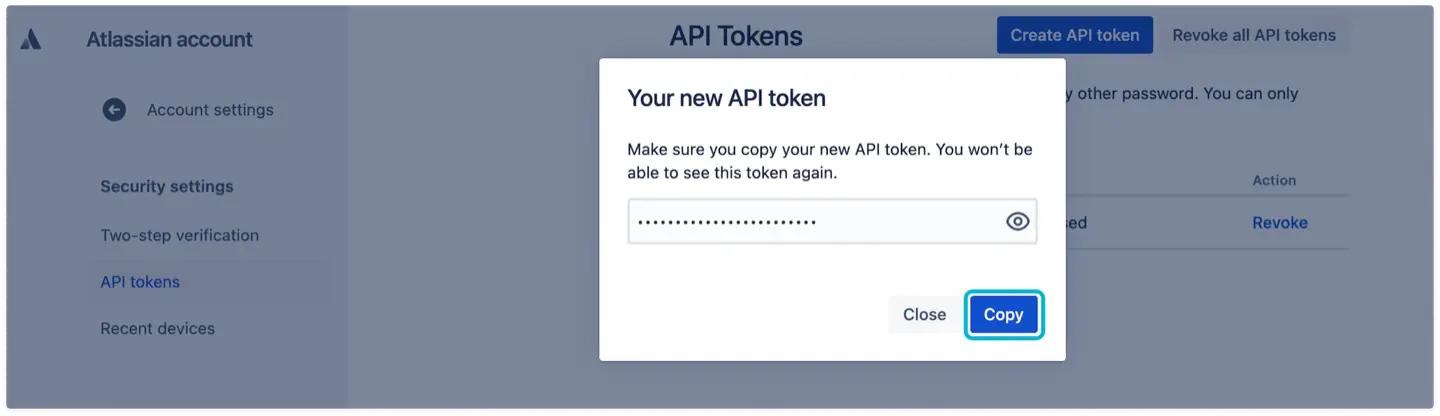
Enter your email address and click Create Token.
You will be redirected to the Atlassian page where you can create an API token. This token will be used as a password for the integration.
We recommend completing this step with a user who has full Jira Administrator permissions.
Once the token is created, copy it and paste it into the password field on the Jira Teams Integration page in ActivityTimeline.
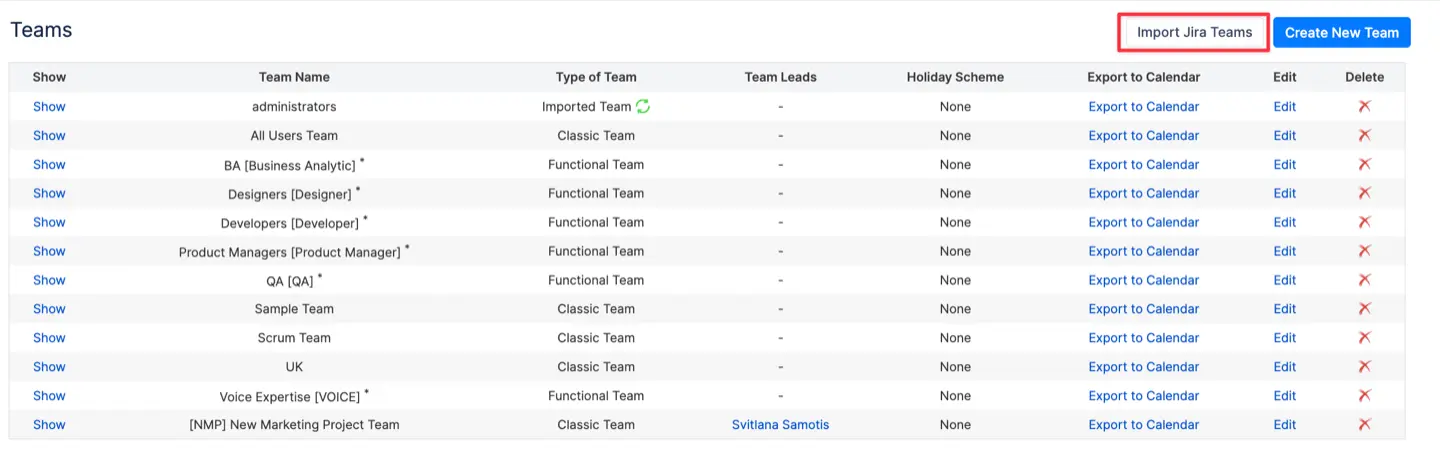
Step 3: Import Jira Teams into ActivityTimeline
Go to:
Configuration → Teams → Click Import Jira Teams.
Then:
-
Select the teams you want to import.
-
Click Update.
The selected Jira Teams will now be available in ActivityTimeline.
Step 4: Create the ActivityTimeline Team Field
Next, return to:
Configuration → Jira Integration → Click Create Team Field.
Enter the name of the new Team field that will be added to your Jira issue screens under Team Field Setting, then click Update.
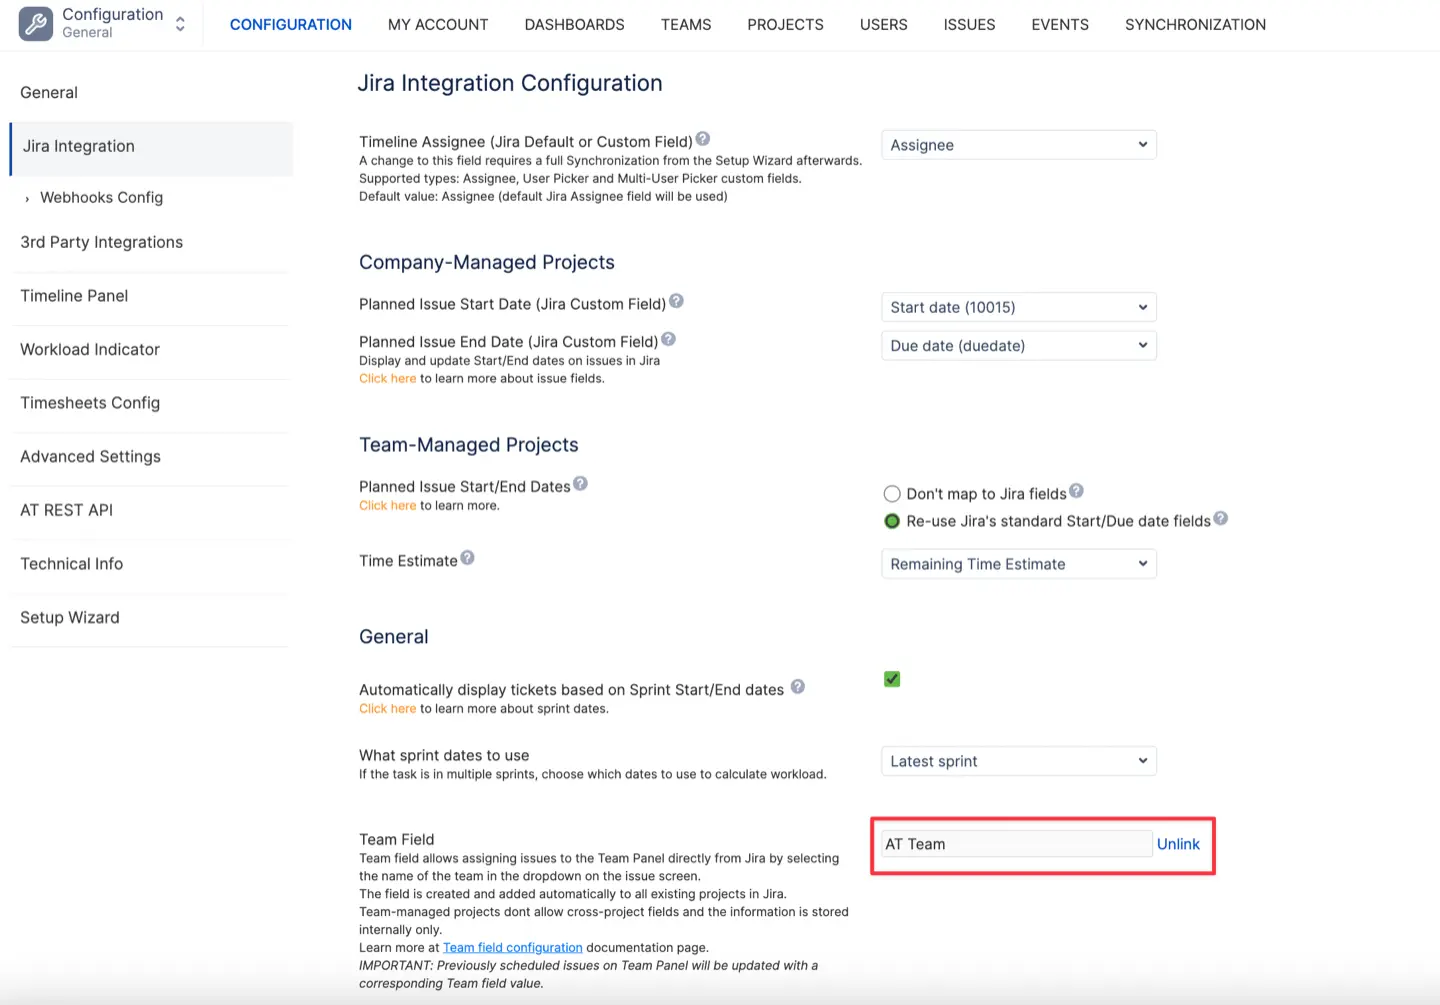
This field will be used to assign issues at the team level in both ActivityTimeline and Jira Plans.
Step 5: Add the ActivityTimeline Team Field to Jira Plans
The final step is to add the newly created Team field to Jira Plans.
Go to:
Plans → Fields → Manage Custom Fields
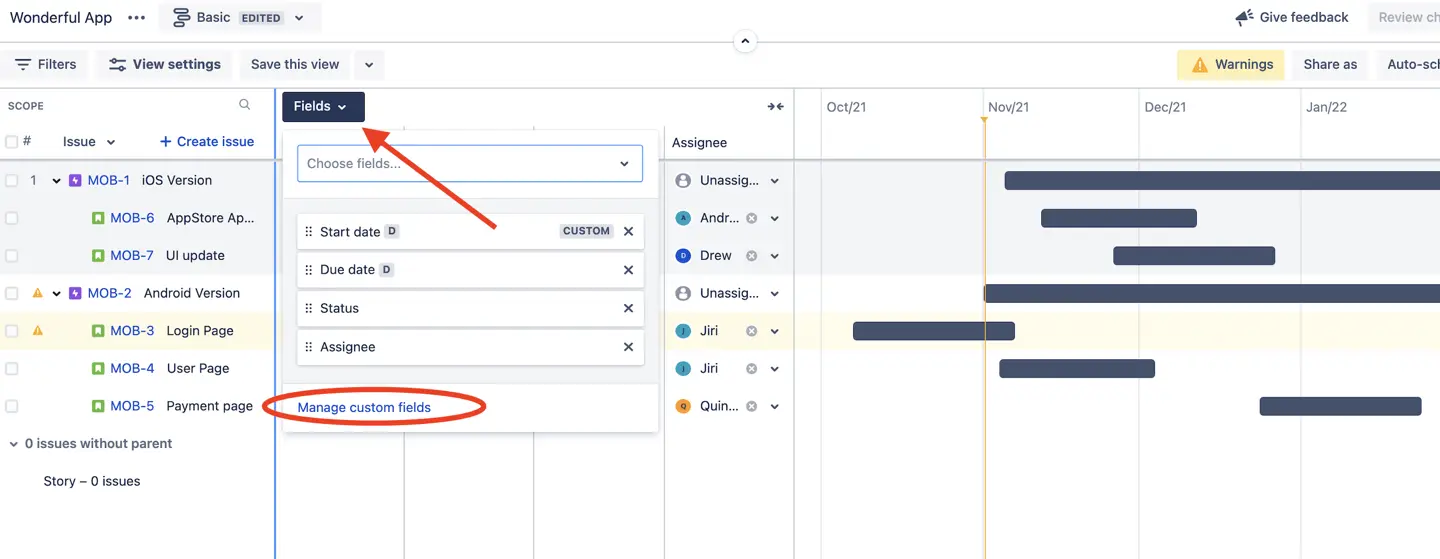
Choose to add a new custom field, then find and select the ActivityTimeline Team field from the list.
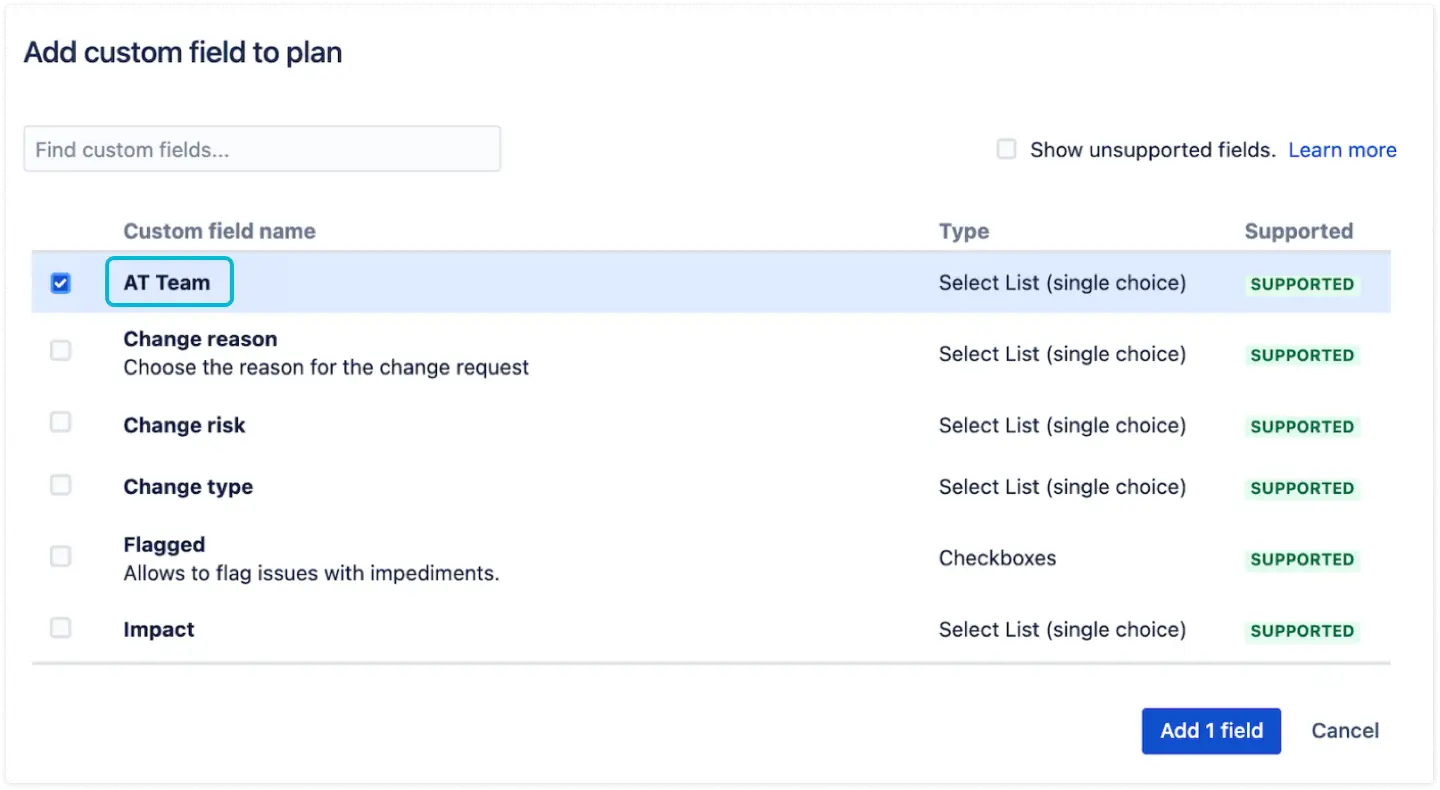
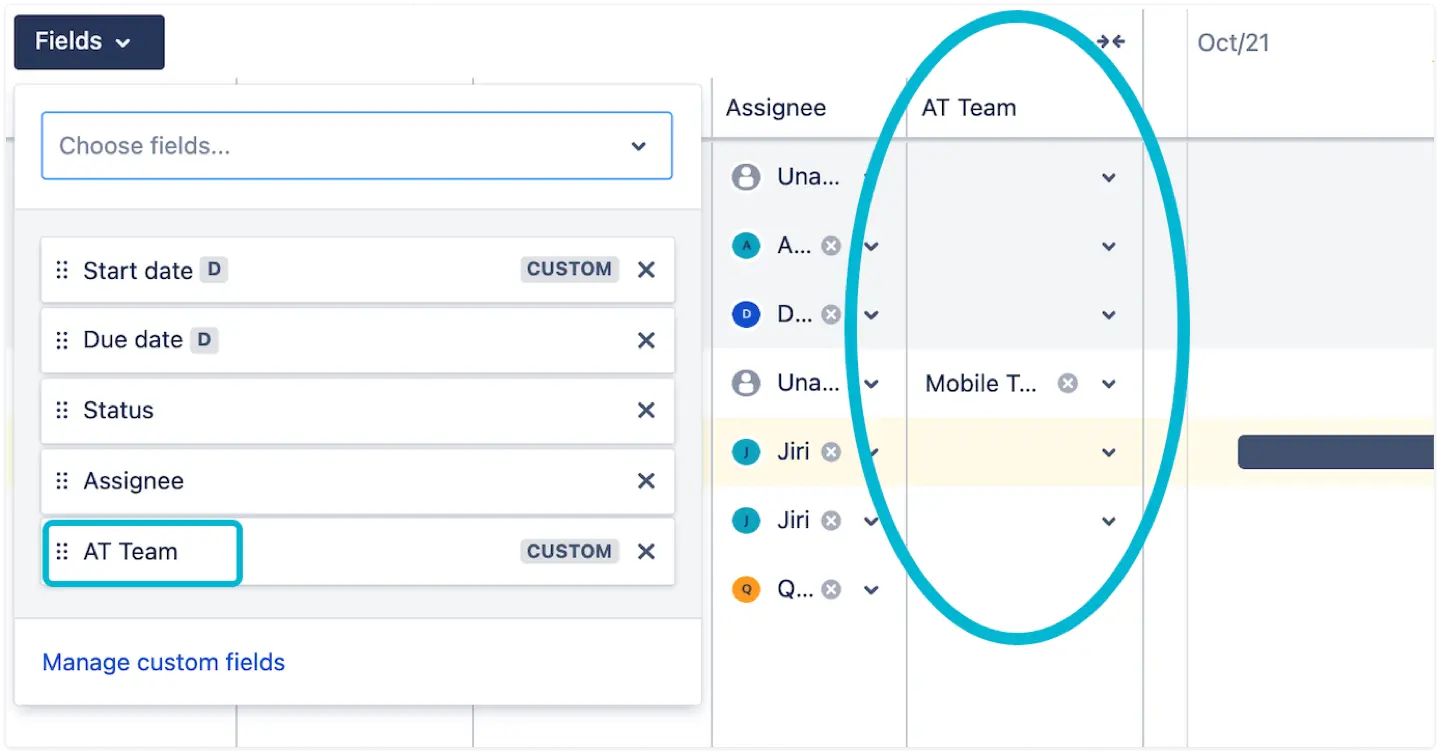
Once added, Jira Plans and ActivityTimeline will be connected through the same team assignment field.
Result
The integration is now configured.
You can now plan work at the team level and keep team assignments aligned between Jira Plans and ActivityTimeline. Changes made in one tool will be reflected in the other, helping teams maintain a consistent planning process across both apps.
Important Note About Team Fields
ActivityTimeline Team field and the native Jira Team field are separate fields and are not automatically synchronized with each other.
This means that users may need to update both fields, depending on how team-level planning is managed in your Jira instance.
As a workaround, you may consider setting up Jira Automation to copy the value from one team field to the other. This can help keep team assignments consistent between Jira Plans and ActivityTimeline and reduce the need for manual updates.
Video guide is available: https://www.youtube.com/watch?si=U-XmJy_kOyR0nL38&v=QoDOl21p67k&feature=youtu.be