
As a manager, ActivityTimeline becomes your central workspace for planning, resource management, time tracking, and reporting. After your administrator completes the initial setup, you can immediately start assigning work, balancing workloads, monitoring progress, and analyzing your team’s performance.
In ActivityTimeline, managers have access to all the essential modules, allowing you to view and oversee the entire team’s schedule and workload.
This guide will help you navigate through the basics, so you can get started quickly, focus on resource allocation, and keep your projects on track.
Let’s dive in and walk through your first steps!
Step 1: Configuring Your Teams and Users
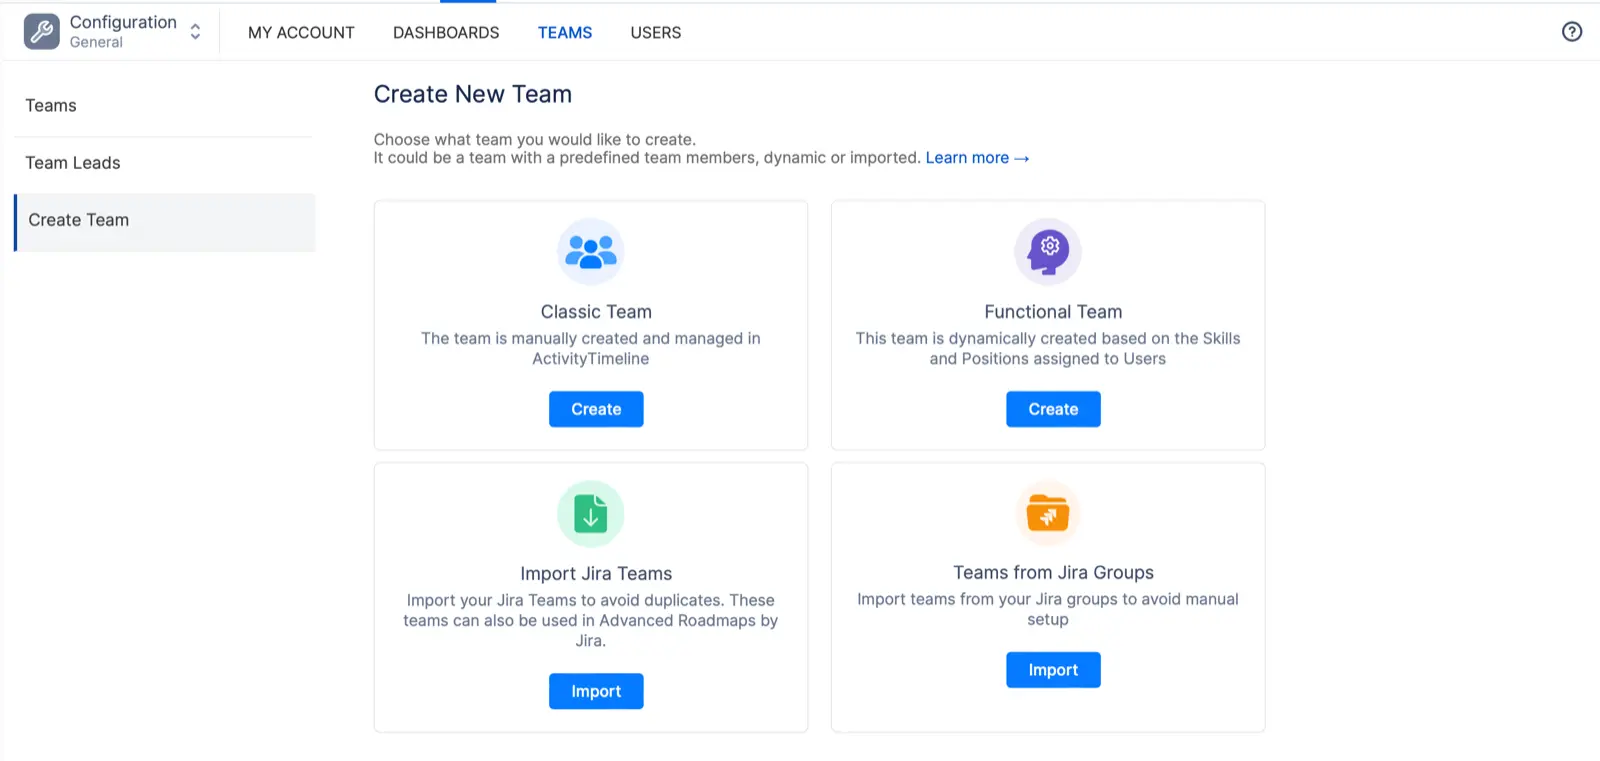
What to do first: Start by configuring your teams, as this is the foundation of your resource management. Navigate to the Configuration → Teams page, where you can create and manage your team structure. Here, you’ll be able to set up the teams that you manage, assign team members
Key actions:
-
Create a new team: On the Teams page, click “Create New Team.” Name the team and define its purpose (e.g., development, marketing, etc.).
-
Add team members: Assign the right people to each team by selecting their names from the user list.
-
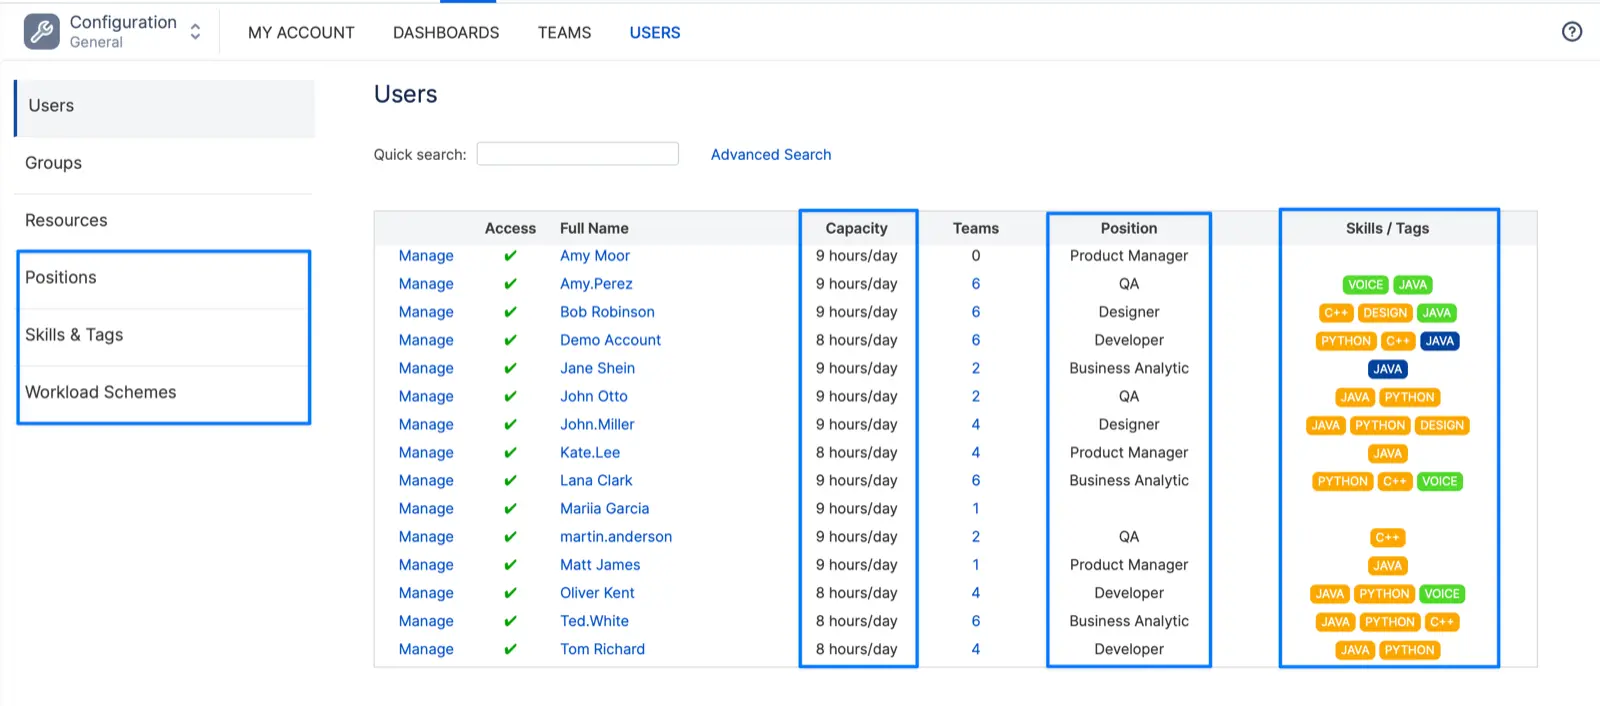
Set roles and responsibilities: Under the Users page you can define the capacity (How many hours a day a user can work), position, or skills of each user. Learn more User Roles and Permissions, Skills and Proficiency Levels,User Positions.
Step 2: Getting Started with the Planner
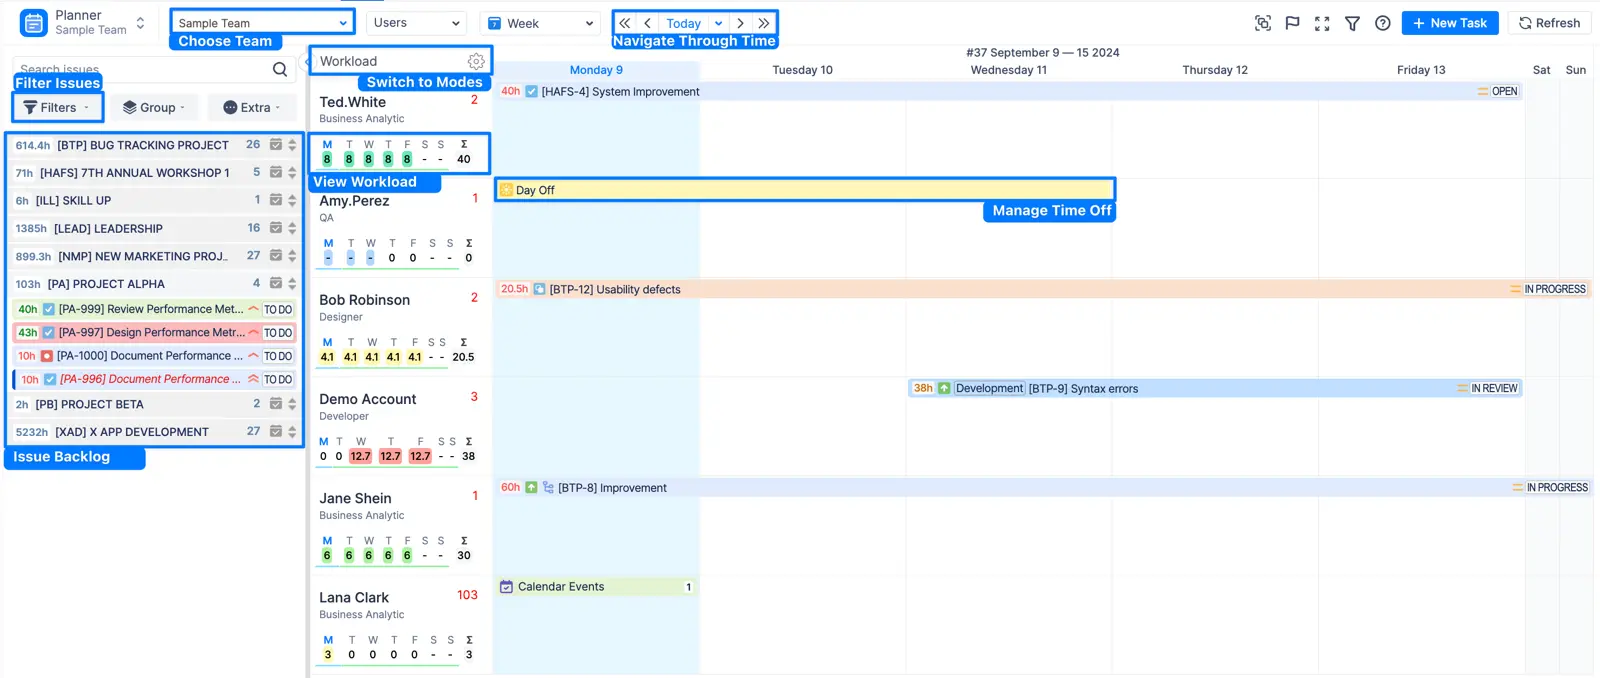
What to look for next: Now that your teams and users are configured, head over to the Planner to get an overview of your team’s schedules and workloads. This is where you will spend most of your time as a manager.
Key actions:
-
Switch between teams or view users from multiple teams at once.
-
Review your team’s current tasks, deadlines, and availability across multiple projects and teams in a single, unified timeline.
-
Use the Issue Panel on the left to view and manage the backlog. It provides a quick and easy way to assign tasks to team members based on their availability and skill sets simply by dragging them.
-
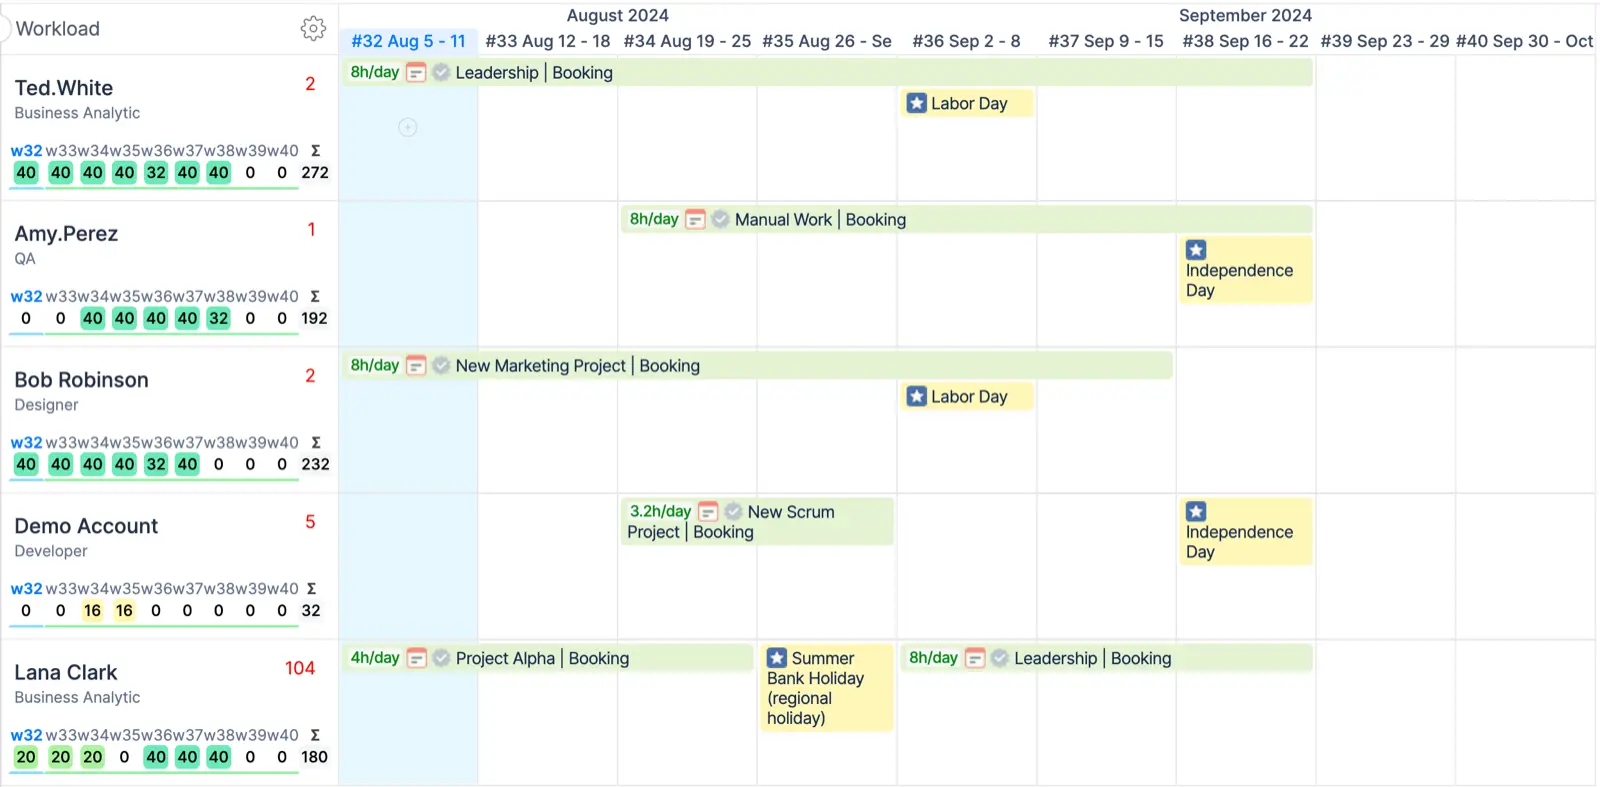
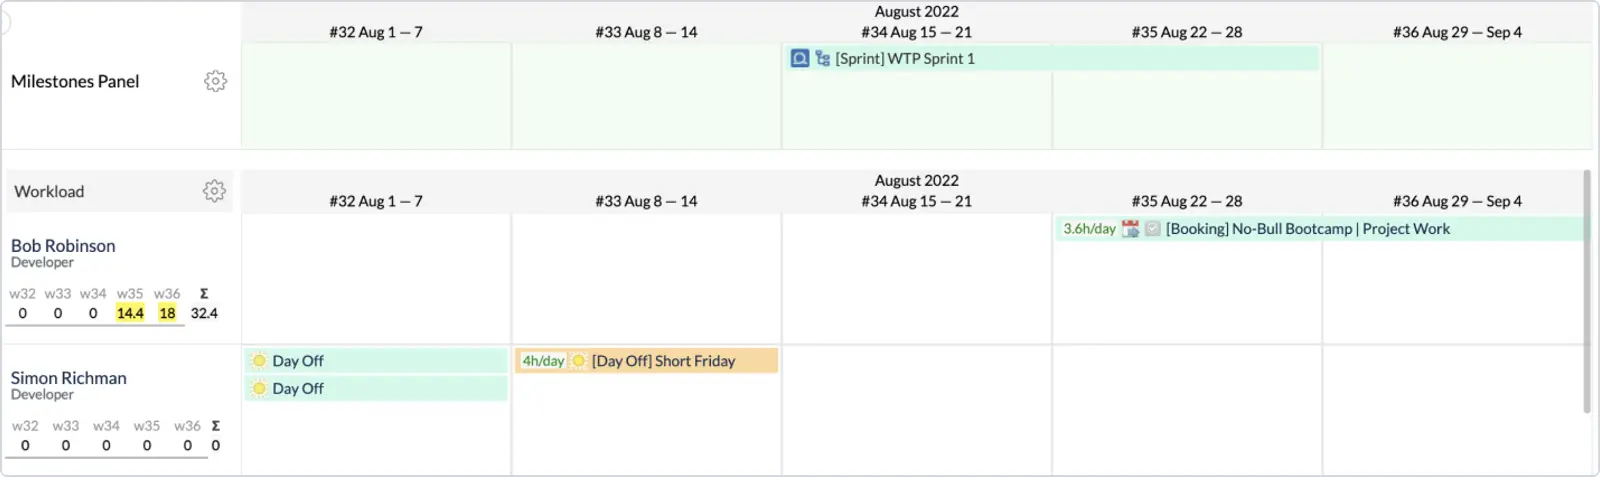
Allocate tasks with precision using the Workload and Availability Indicator, which appears under each team member’s name. This feature provides real-time insights into their workload and availability, displayed in hours, days, or percentages, over daily, weekly, or monthly periods. Learn more about Workload Indicator.
-
Track and manage team members’ vacations, leaves, and absences simply by clicking on the cell on the timeline or the ‘New Task’ button. This feature ensures that planned and unplanned absences are accounted for in project schedules, preventing last-minute surprises.
-
Navigate seamlessly through different periods to plan for the future or review past allocations. To return to the current week or month, simply click ‘Today.’
-
Create Custom Events such as Bookings and Placeholders that enable you to plan resources and schedules over extended periods without a need to have Jira issues. To create it simply click on the cell on the timeline or the ‘New Task’ button. Learn more Custom Events in ActivityTimeline.
-
Utilize the Milestone Panel to view your sprints. Click the flag icon located on the right panel toolbar. Then, click on the ⚙️ icon to select the Projects and Boards you wish to display.
-
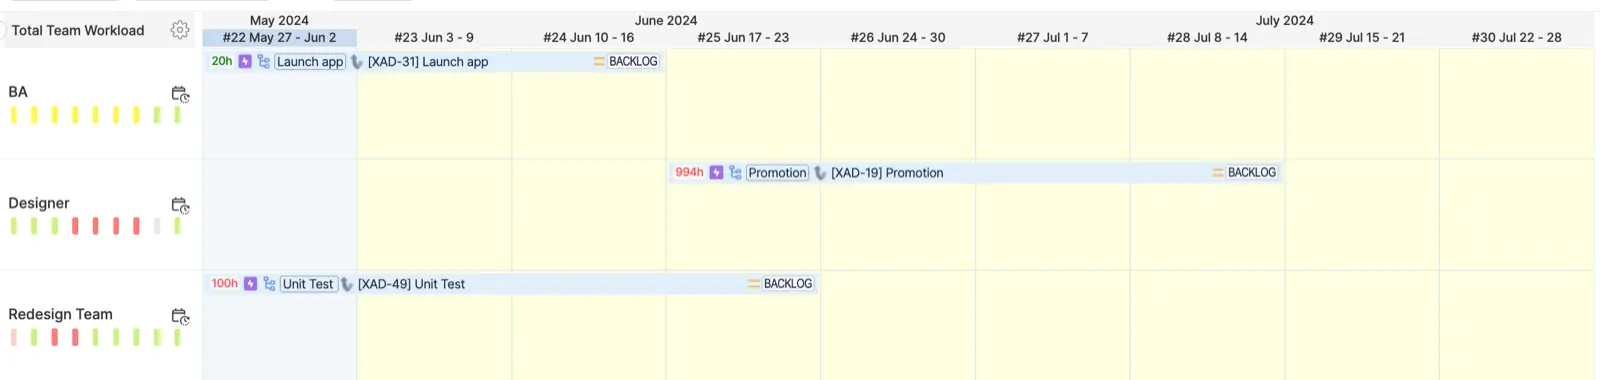
Use Team Timeline to see aggregated data for the entire team, including overall availability and workload. Team Panel can serve as a high-level planning view of the team’s assigned work, typically represented by Jira Epics or initiatives, and can be utilized as a delivery roadmap. To open Team Panel simply switch from ‘Users' on the top toolbar to ‘Team with Users’ or ‘Teams’ view. Learn more Team Panel.
Step 3: Get Familiar with Timesheets
What to focus on: Monitoring your team’s progress is essential. Head to the Track Module to start tracking the progress of time logged by each team member.
Key actions:
-
Monitor required hours, logged hours, and the completeness of timesheets based on your involvement for any selected period, compare time planned vs time spent, and track approval progress. Learn more Progress Timesheets.

-
View the total logged hours for a chosen period and daily time logs. Learn more Timeline Timesheets
-
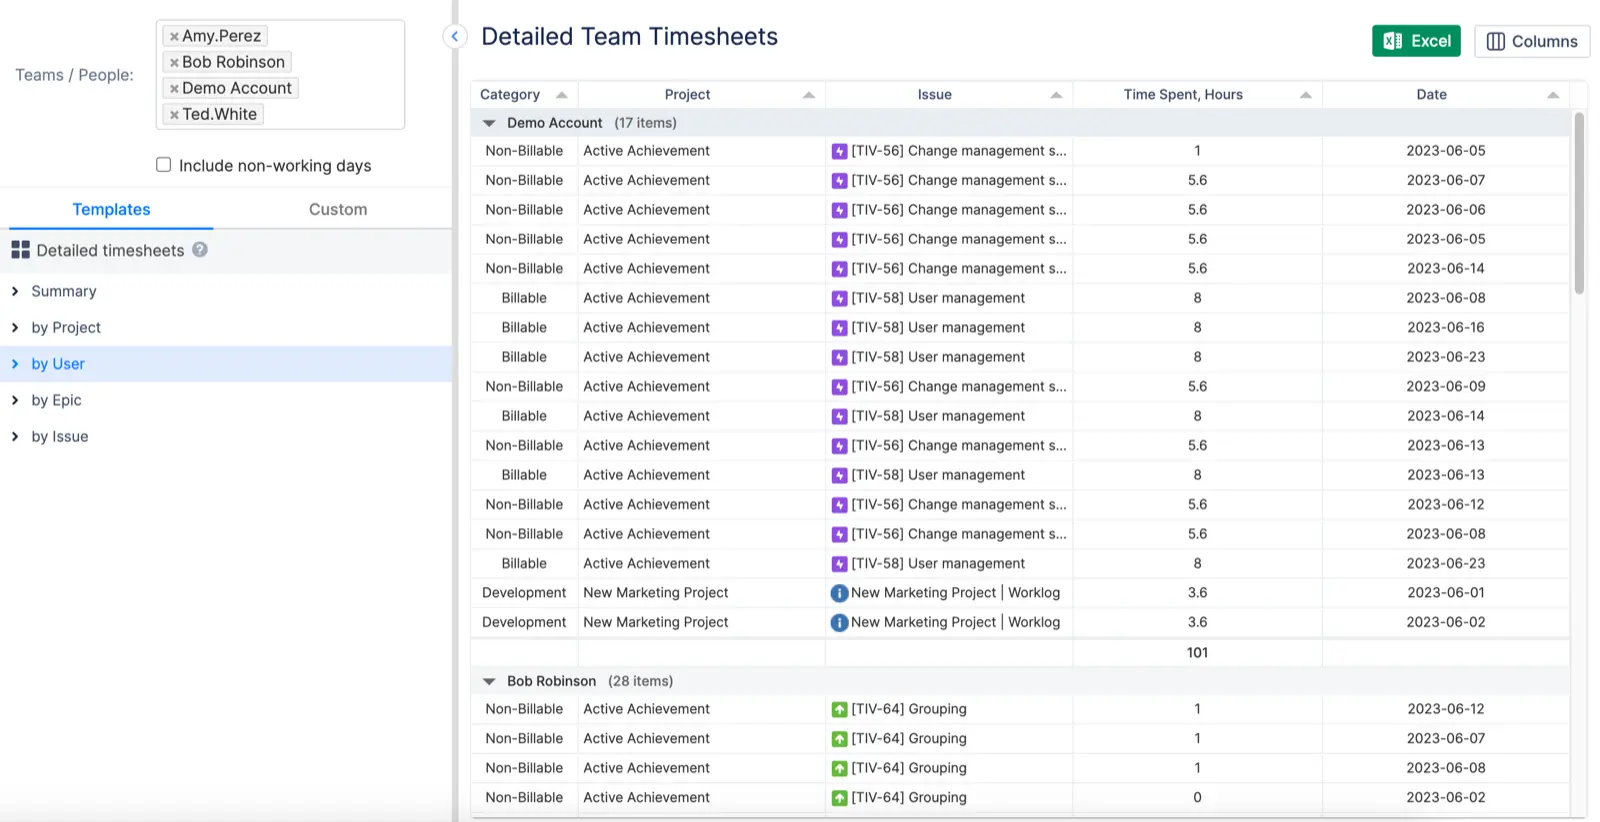
Inspect individual worklogs, making it easier to approve timesheets, verify approvals, and review details like user, project, issue, time spent, date, and comments. Editing options are also available directly in this view. Learn more Detailed Timesheets.
Step 4: Analyze Reports and Forecast Capacity
What to analyze: The Reports Module is where you generate forecasting and project reports that provide insights into resource planning.
Key actions:
-
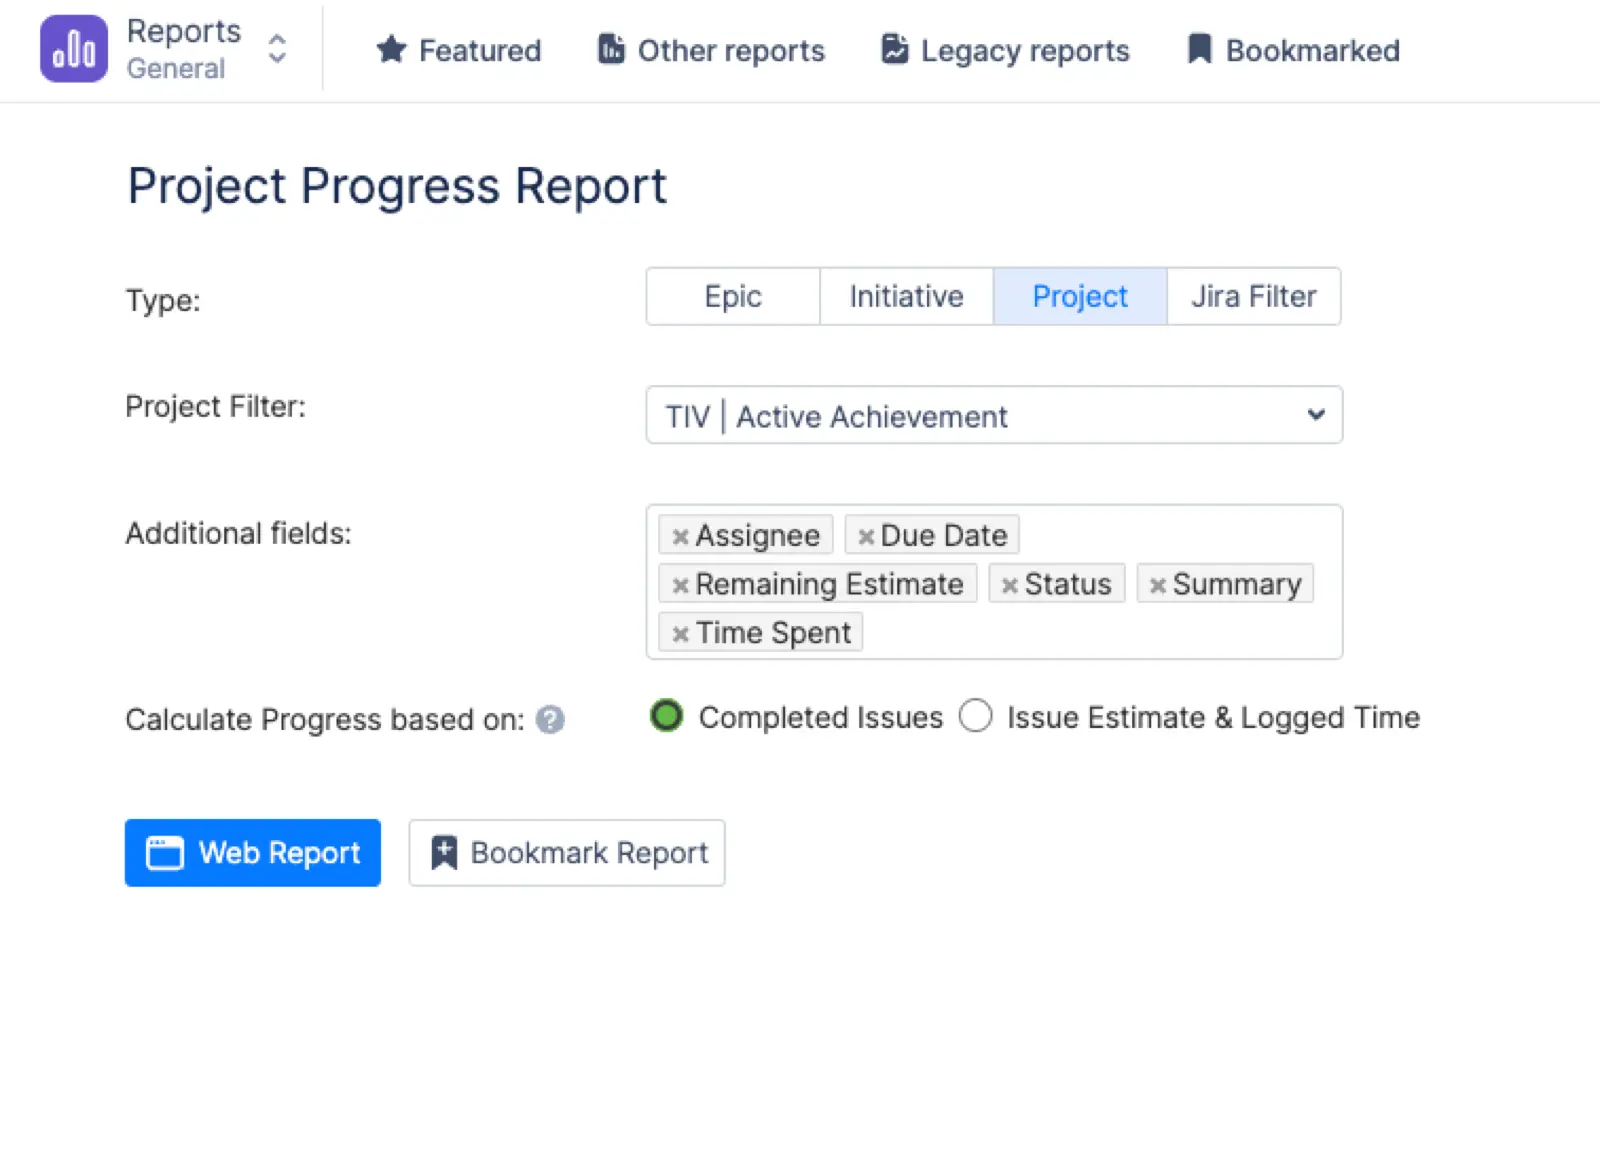
Choose from a variety of reports based on key project and team metrics such as workload, skill level, availability, and timesheet entries. The main suite of reports is readily accessible from the Reports page, for a broader range of reporting options, click on ‘Other Reports’. Learn more Reports & Analytics.
-
All reports can be customized to suit your specific needs. You have the flexibility to select the time frame, team, and project. Additionally, you can apply a Jira filter to refine the data further and add extra columns to some of the reports for more detailed analysis.
-
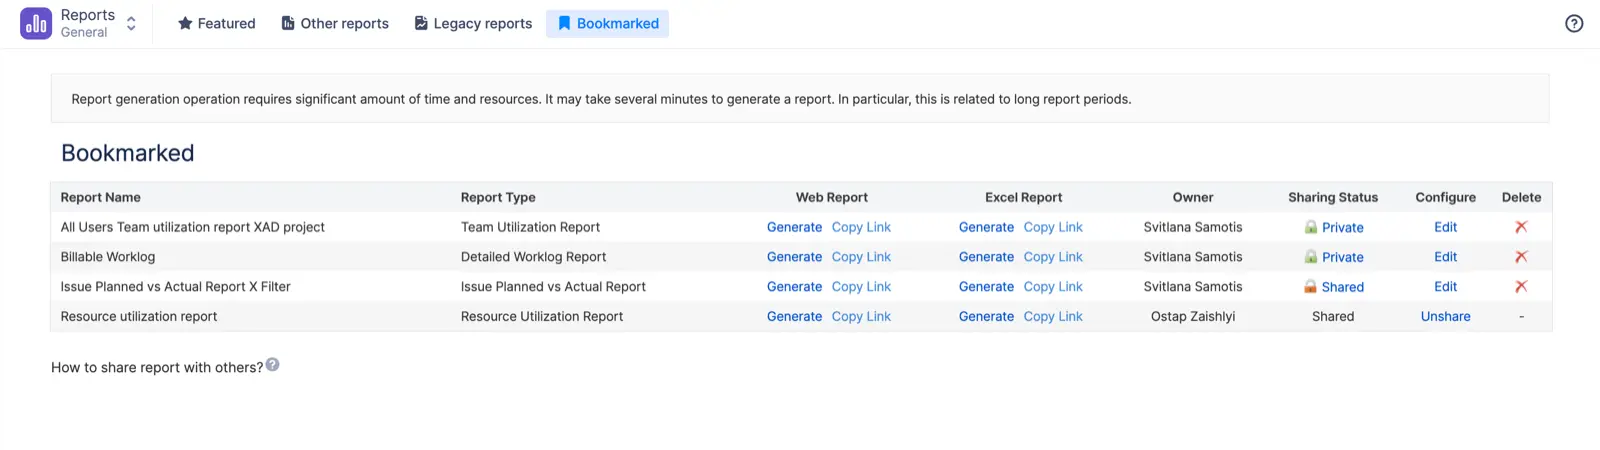
Store and share already created and configured report(s) for later use. To save the configuration of a report, simply click 'Bookmark Report' on the report generation page, or use the bookmark icon on the generated web report page.
Step 5 (Optional): Create Your First Budget (Advanced Edition)
What to explore next:
If you’re using ActivityTimeline Advanced Edition, you can extend resource planning by creating project budgets and tracking financial performance.
The Finances module helps you compare planned costs and revenue with actual work, monitor project profitability, and keep spending under control.
Key actions:
-
Create a budget for a project or initiative.
-
Define planned costs and revenue.
-
Monitor budget consumption as work is completed.
-
Compare planned vs actual costs and effort.
-
Use Budget vs Spend reports to track financial performance throughout the project lifecycle.
Learn more: Finances