
This page describes the procedure of ActivityTimeline’s data migration from Jira Data Center to Jira Cloud.
1. Prerequisites
-
Active Jira Data Center instance with ActivityTimeline installed v13.2+ (migration source)
-
Active Jira Cloud instance (migration target)
2. Preparation (Jira DC side)
-
Make sure that each Jira DC user has an email address specified.
-
Perform the standard Jira Data Center to Jira Cloud migration to migrate Jira’s data.
-
Open Jira Data Center → ActivityTimeline app → Configuration → Advanced Settings page:
-
enter “IMPORT_EXPORT“ into the Custom Functionality field (separate by comma if you already have some values there)
-
click “Update” button
-
-
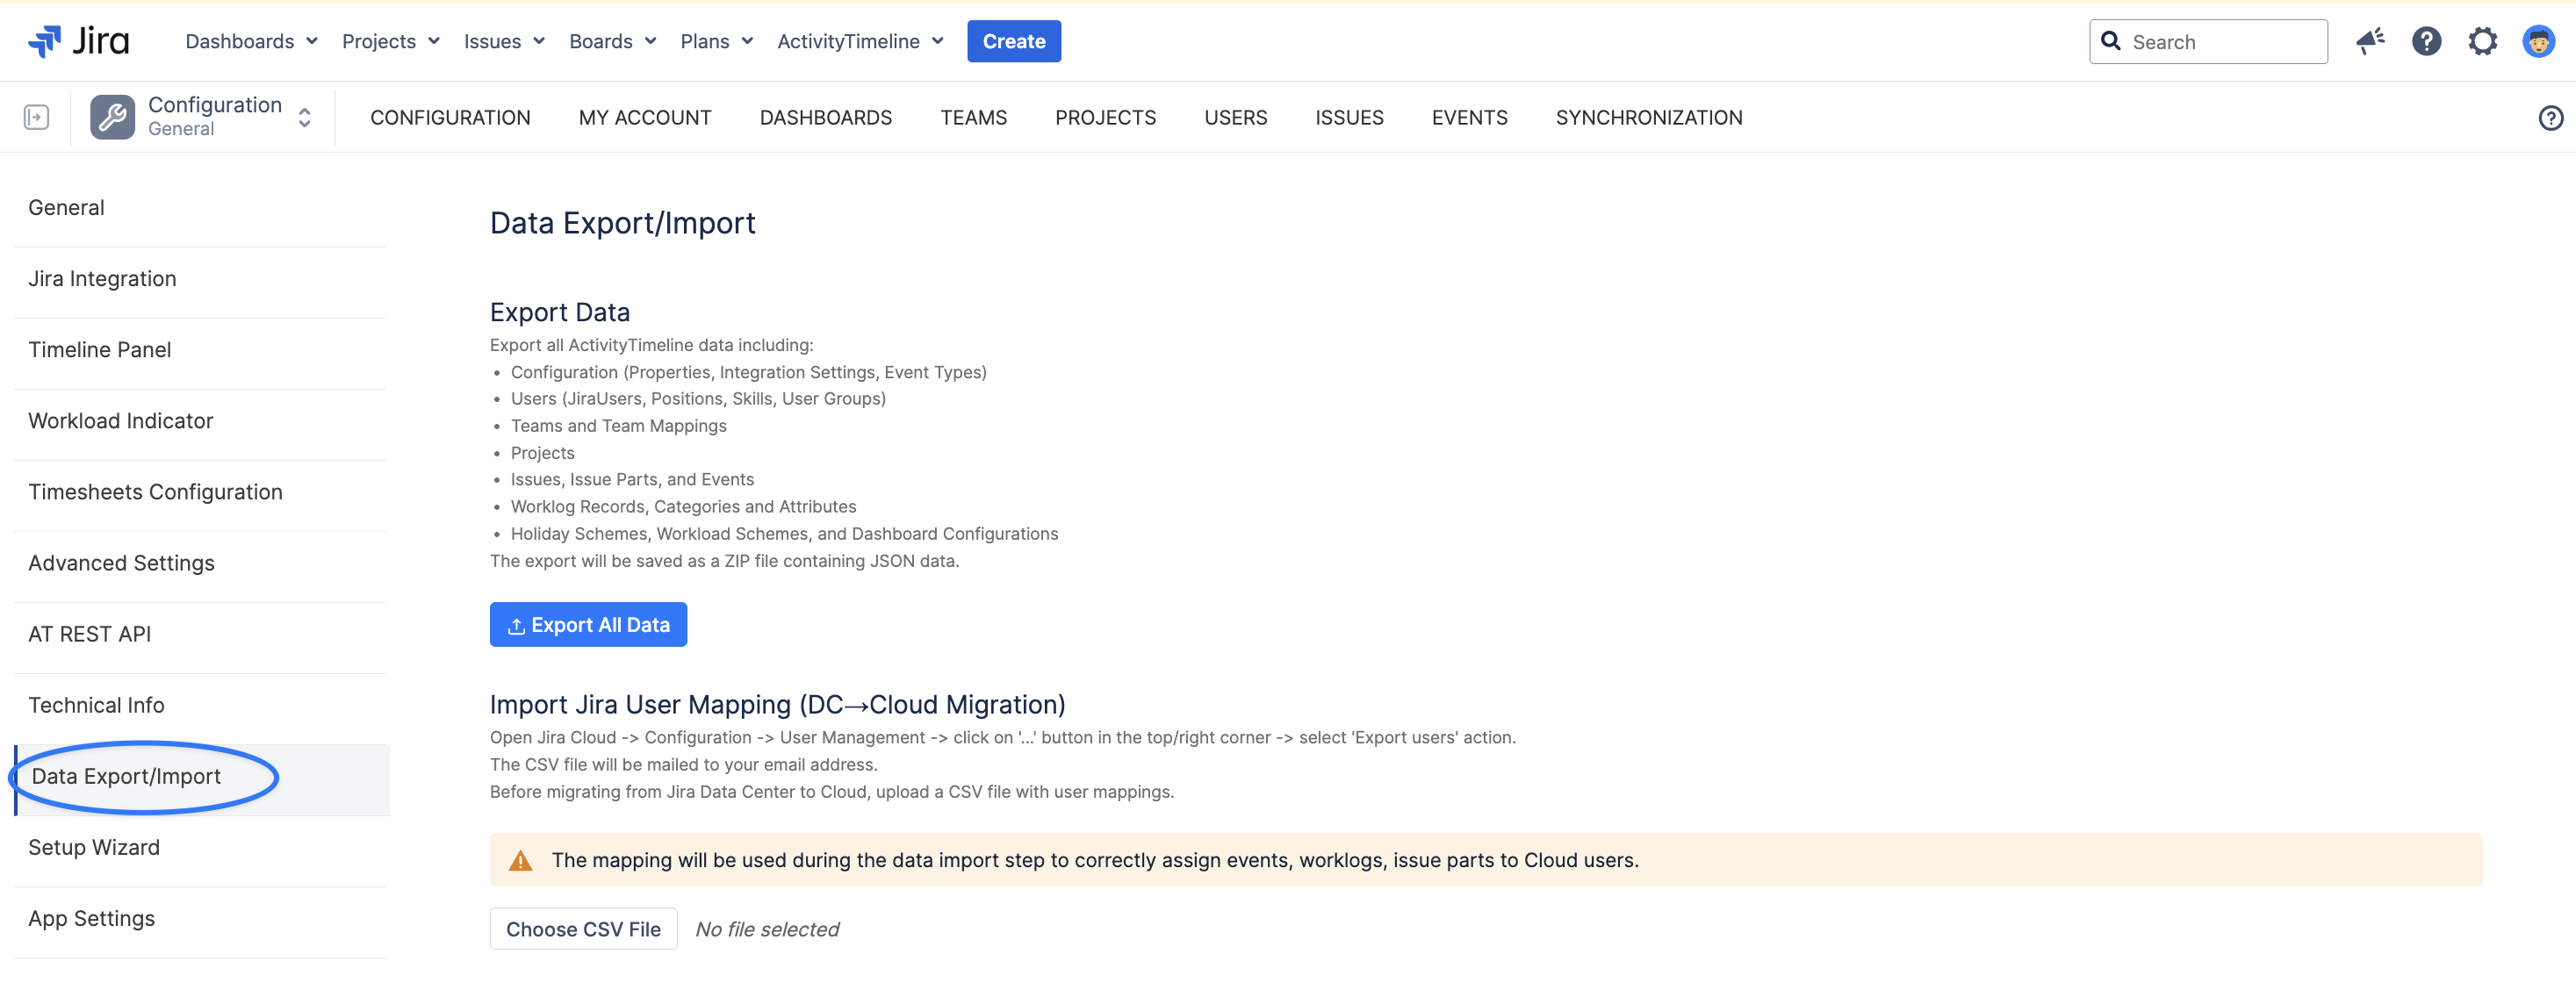
Open the new “Data Export/Import“ item on the left of the Configuration page.
-
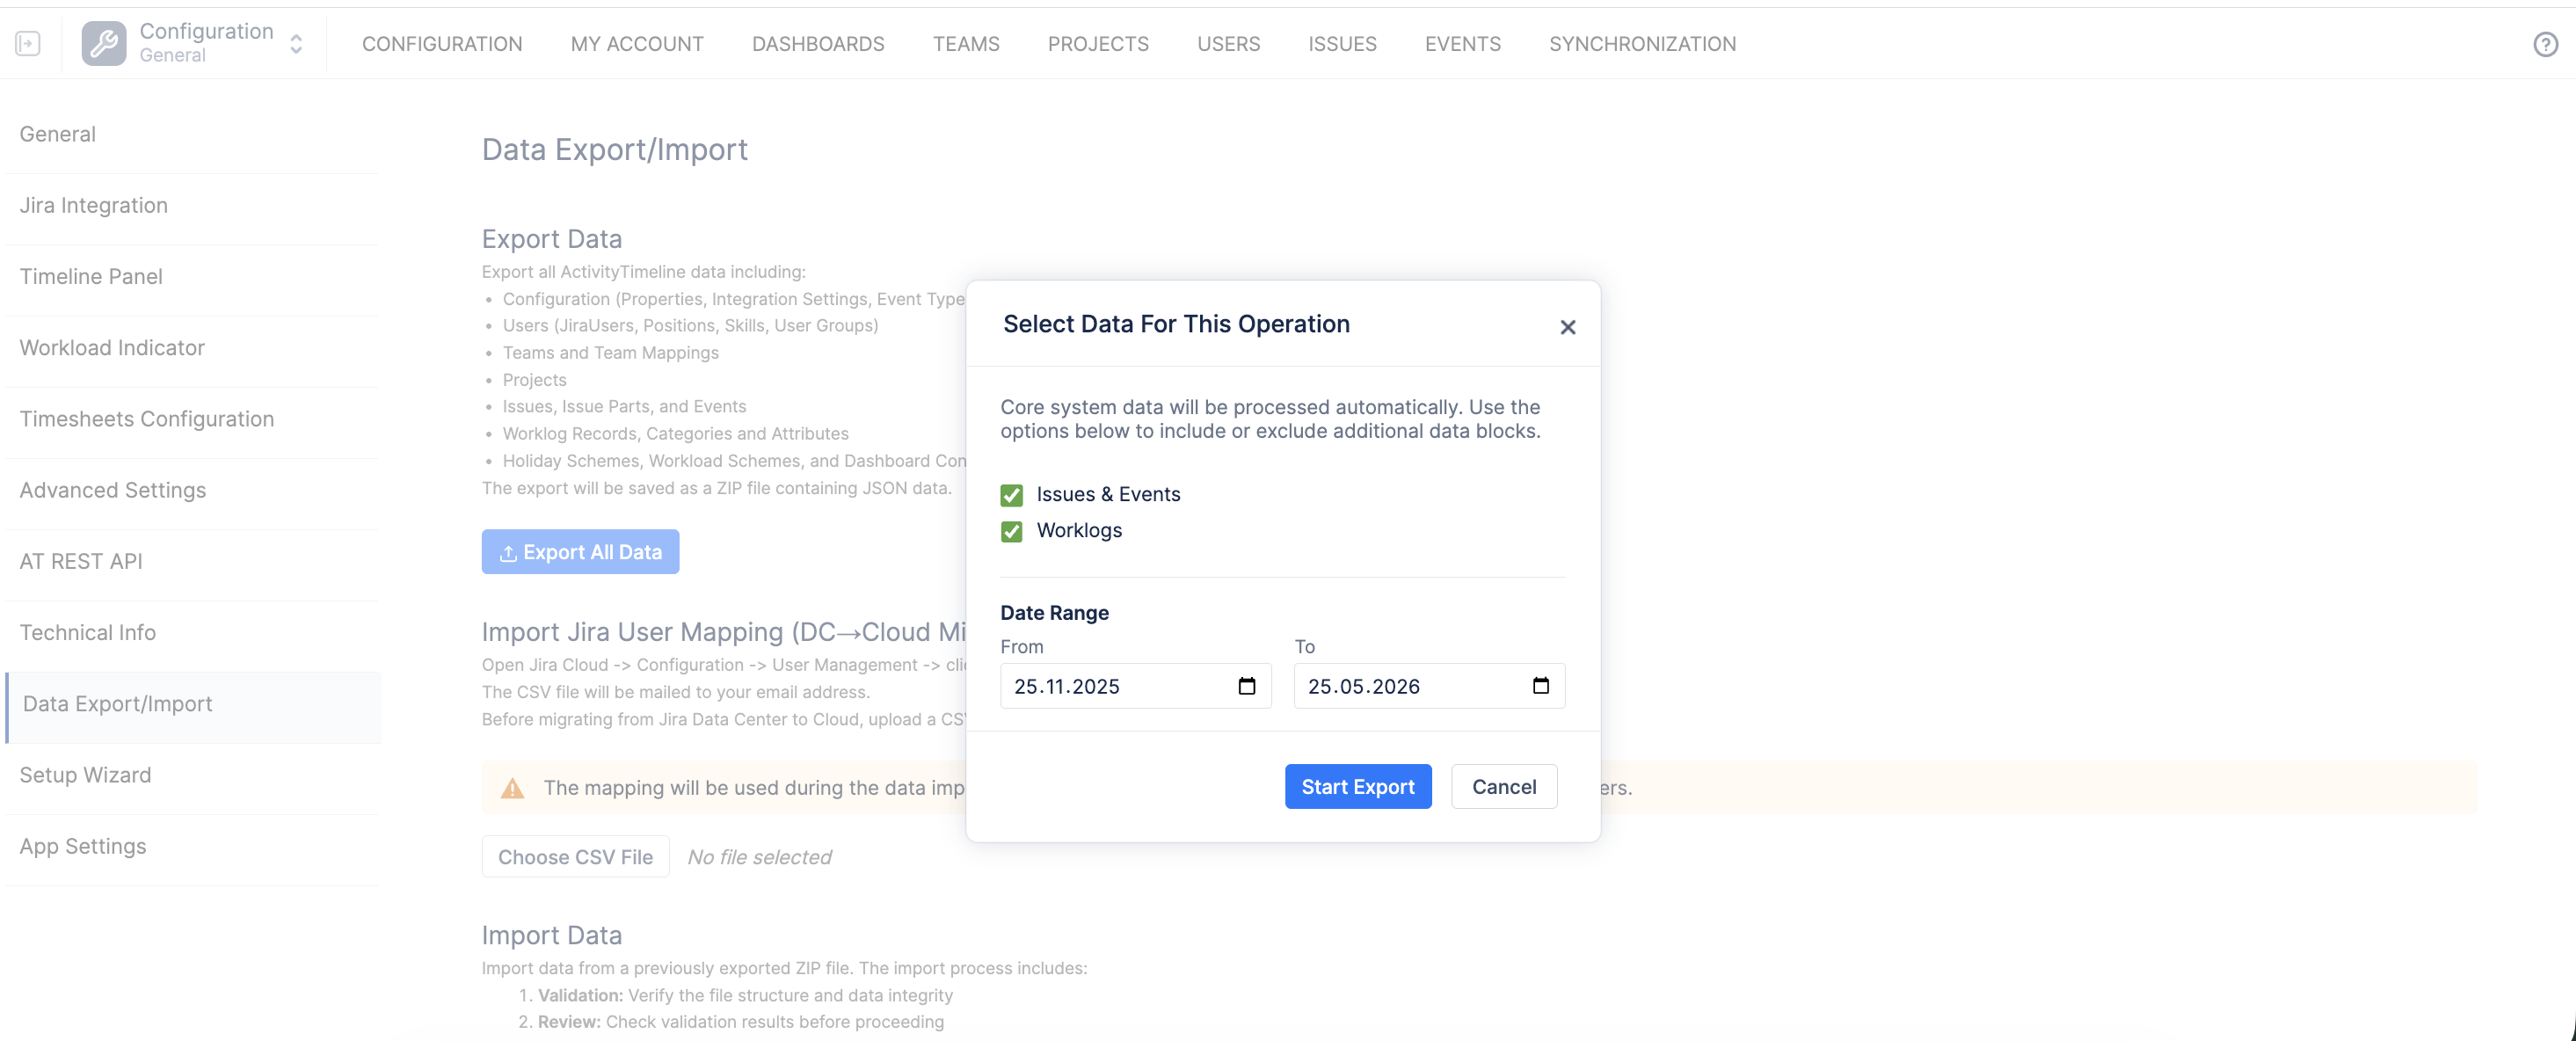
Click “Export All Data“ button
-
select both “Issues & Events“ and “Worklogs“ checkboxes
-
select a date range period that you would like to migrate to Jira Cloud
-
the shorter the period - the faster the migration
-
you may perform multiple migrations so we recommend to start with the smallest possible date period like a few months
-
-
click “Start Export“ button
-
activitytimeline_export_<date>.zip data file should be downloaded in a web browser
-
save it.
-
The data file will be used during the data import step in ActivityTimeline Cloud app.
3. Preparation (Jira Cloud side)
-
Make sure that each Jira Cloud user has an email address specified (user’s will be mapped based on email address because Jira Cloud uses accountId instead of username).
-
Open Jira Cloud -> Configuration -> User Management -> click on '...' button in the top/right corner -> select 'Export users' action.
-
select “All users“, “All users“ statuses and no “Additional data”
-
the users data CSV file will be mailed to your email address.
-
open that email and click “Download CSV file“ button in the email to download the file
-
Save that instance-export-users.csv file on your computer.
-
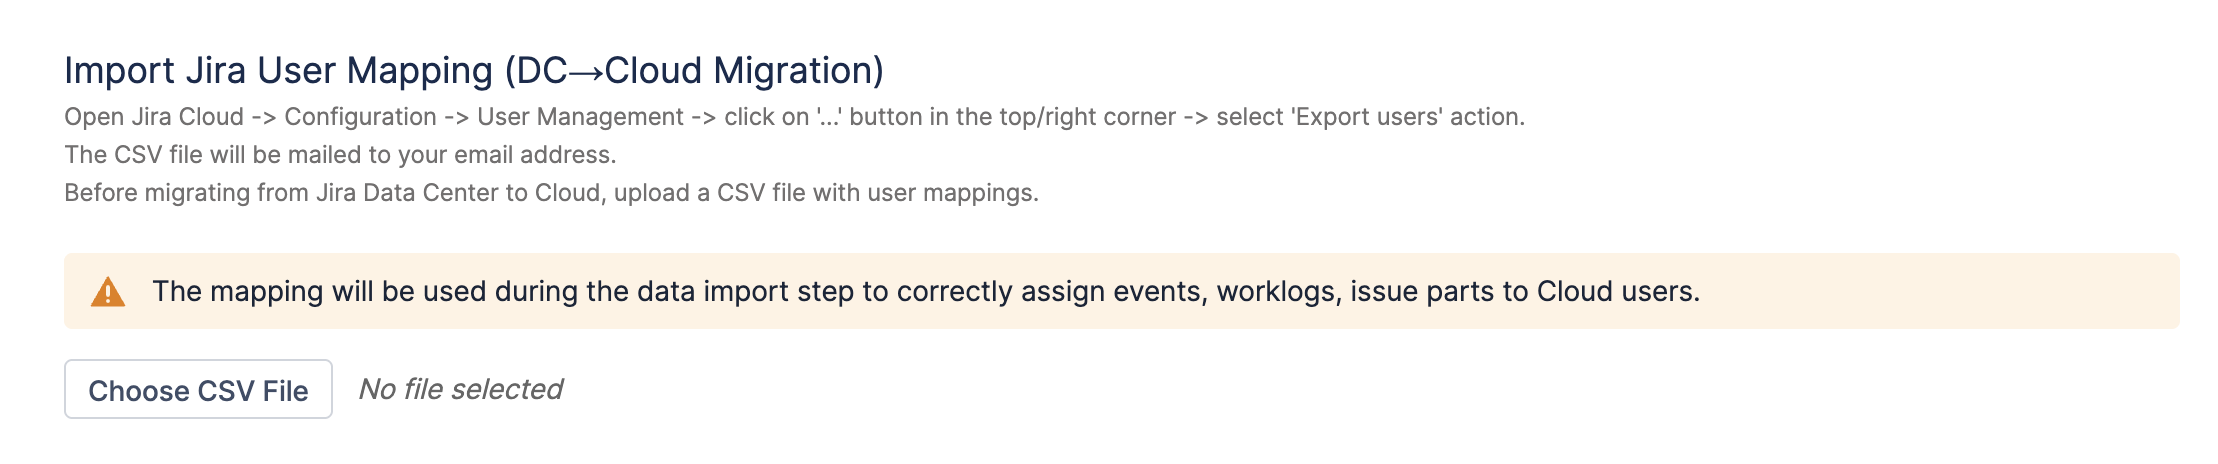
The mapping will be used during the next data import step to correctly assign events, worklogs, issue parts etc. to Cloud users.
4. Migration Procedure (Jira Cloud)
-
Install ActivityTimeline app in your Jira Cloud instance
-
Open ActivityTimeline app and open the Setup Wizard screen:
-
select all migrated Jira DC Projects that should be managed in Jira Cloud instance
-
click Proceed button to finish the Setup Wizard process (it could take some time)
-
this will initialize a new ActivityTimeline Cloud app with the basic Jira’s migrated data
-
-
Open Jira Cloud → ActivityTimeline app → Configuration page
-
click on the “Jira Integration” page and make sure all the necessary fields are mapped to the new Jira issue fields in Jira Cloud
-
click “Update” button at the bottom
-
-
Open Jira Cloud → ActivityTimeline app → Configuration → Advanced Settings page:
-
enter “IMPORT_EXPORT“ into the Custom Functionality field (separate by comma if you already have some values there)
-
click “Update” button
-
-
Open the new “Data Export/Import“ item on the left of the Configuration page.
-
Click “Choose CSV File“ button and select instance-export-users.csv file that was obtained above (step 2. b. of 3. Preparation (Jira Cloud side) section above)
-
click the “Validate & Preview” button
-
if everything is OK then click the “Apply Mapping“ button
-
this should associate Jira Cloud users to Jira DC users through the email address
-
Important!
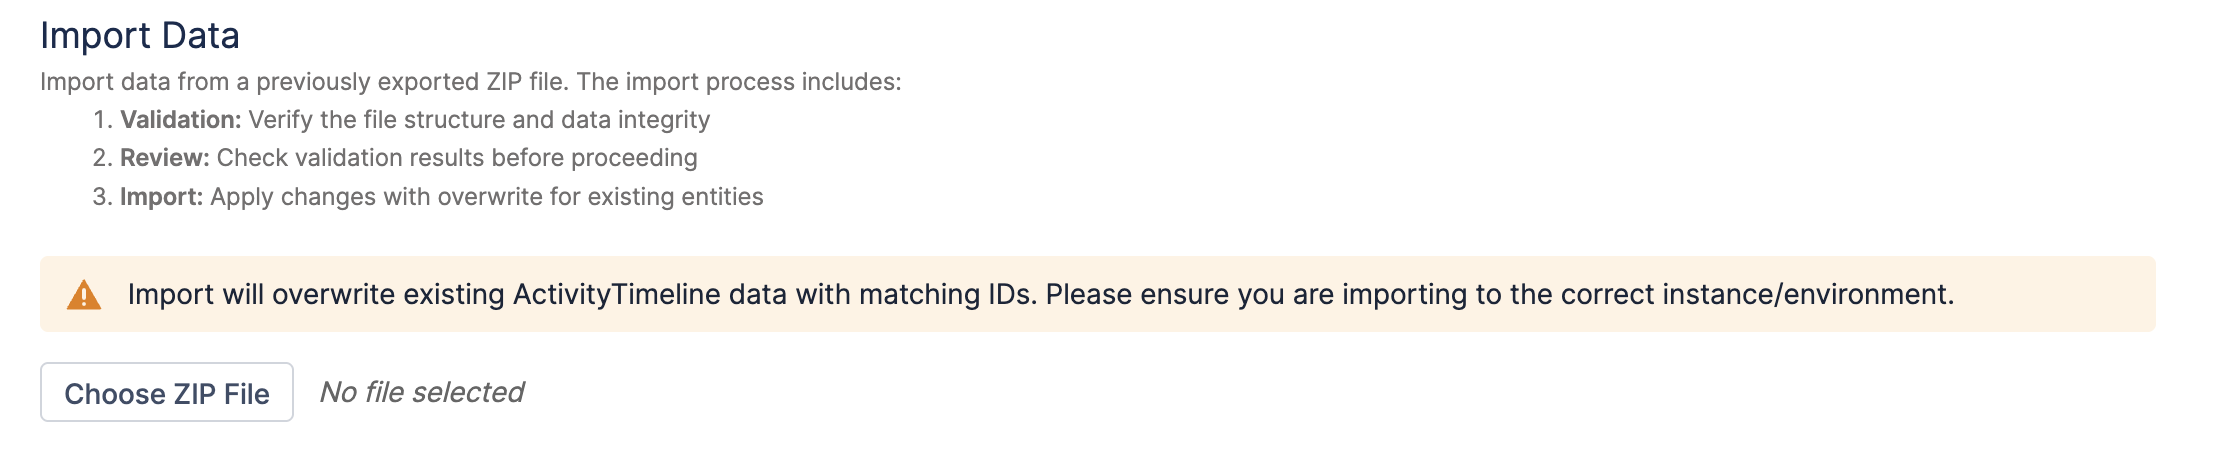
The next Step 7 will add new and augment/overwrite the existing ActivityTimeline Cloud data with matching data from the selected ZIP data file.
Please make sure you are importing to the correct instance/environment.
-
Click “Choose ZIP File“ button and select the previously saved activitytimeline_export_<date>.zip file from Jira Data Center that was obtained above (section 2. Preparation (Jira DC side))
-
click the “Validate File” button
-
if everything is OK then click the “Import Data“ button
-
the system should start the import process asynchronously,
-
the page itself make time-out while continuing to import the data
-
Please contact our support team at Reliex Support if you need any assistance with the migration process or encounter any questions, issues, or errors along the way.