

The Situation
A Project Manager is preparing a Jira Initiative for the upcoming quarter. They know how much development and testing capacity will be needed, but individual assignments are not confirmed yet. Resource Managers need to review incoming requests, check availability and approve allocations before the team commits.
They want to work at a high level without creating a separate Jira ticket for every resource request.
The Primary Goal
Submit resource requests linked by reference to a Jira Initiative, notify the right Resource Manager, review capacity, approve or adjust each request, and monitor how much team capacity has been reserved.
What You’ll Use
|
Feature |
Purpose |
|---|---|
|
Existing Jira Initiative |
A shared business reference for all resource requirements. |
|
Placeholders linked to a Jira issue |
Plan separate total estimates for each team, person or phase without updating Jira during draft planning. |
|
Teams / Team with Users |
Review available capacity before accepting an allocation. |
|
Team Utilization Forecast |
Review the impact of planned Placeholders on team utilization. |
Before You Begin
Make sure that:
-
Confirm that the Jira Initiative exists, its project is enabled in ActivityTimeline, and the Initiative issue type is configured under Configuration → Jira Integration.
-
Create the relevant teams and verify team membership, working hours, holidays and already scheduled work.
-
Ensure requesters and Resource Managers have the ActivityTimeline permissions needed to create, edit and review Placeholders.
-
If you need emails, confirm Jira outbound email is enabled and that a Notification Scheme can be created by an ActivityTimeline Administrator.
Example: Three Resource Requests for One Initiative
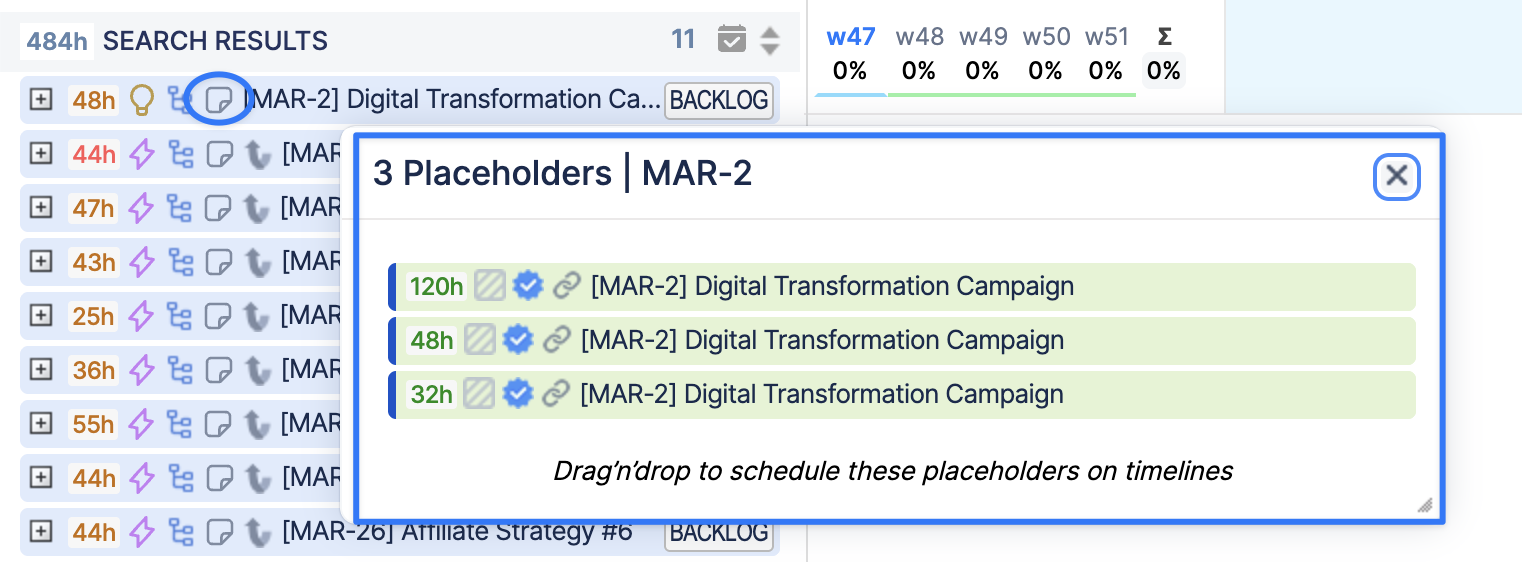
Imagine an existing Jira Initiative, MAR-2: Digital Transformation Campaign The Project Manager needs the following capacity. Each requirement is planned as a separate Placeholder, but all three reference MAR-2:
|
Resource requirement |
Separate Placeholder / total estimate |
|
Development Team |
MAR-2 | Development capacity | 120 h |
|
QA Team |
MAR-2 | Testing capacity | 48 h |
|
UX Design Team |
MAR-2 | UX design capacity | 32 h |
You can adjust each estimate and date range independently as requirements become clearer.
Step 1: Review the Teams’ Availability
-
Open ActivityTimeline → Planner and select Teams or Team with Users.
-
Select the Development, QA and UX teams and choose a Month or Quarter view.
-
Set the Team Panel workload indicator to Total Team Availability.
-
Check remaining capacity for the proposed period.
This helps the requester avoid placing an unrealistic demand on a team that is already committed to other initiatives.
Step 2: Create a Separate Placeholder for Each Resource Need
-
Find MAR-2 in the Issues Panel (or use Quick Issue Search from the Placeholder creation dialog).
-
Create a Placeholder linked to this existing Jira issue. You can drag the issue with Ctrl (Windows) or Command (Mac) onto the intended timeline, or click the timeline and select Placeholder → Create Placeholder for existing Jira Issue.
-
Set the relevant team or user, expected dates and the total estimate (for example, 120 hours for development).
-
Repeat for QA (48 hours) and UX (32 hours), each with its own estimate and schedule.
-
Review the three Placeholders on Planner. Each represents a separate resource requirement, although the linked Jira Initiative is the same.
Learn more: Placeholder Custom Event
Why Placeholders? They use an independent total estimate for the full period. Multiple Placeholders can reference one Jira issue, and draft scheduling changes do not update that issue in Jira.
Step 3: Notify the Resource Manager
An Administrator can configure notifications when Placeholders are created or changed:
-
Go to Configuration → Users → Notification Schemes → Create Notification Scheme.
-
Choose Event (Triggered) and select Placeholder as the event type.
-
Add a Team condition so the message applies only to requests for the relevant team.
-
Select the responsible Resource Manager under Recipients; a Team condition does not automatically select who receives the email.
-
Write a short message asking them to review the resource request in Planner, then enable the scheme and test it.
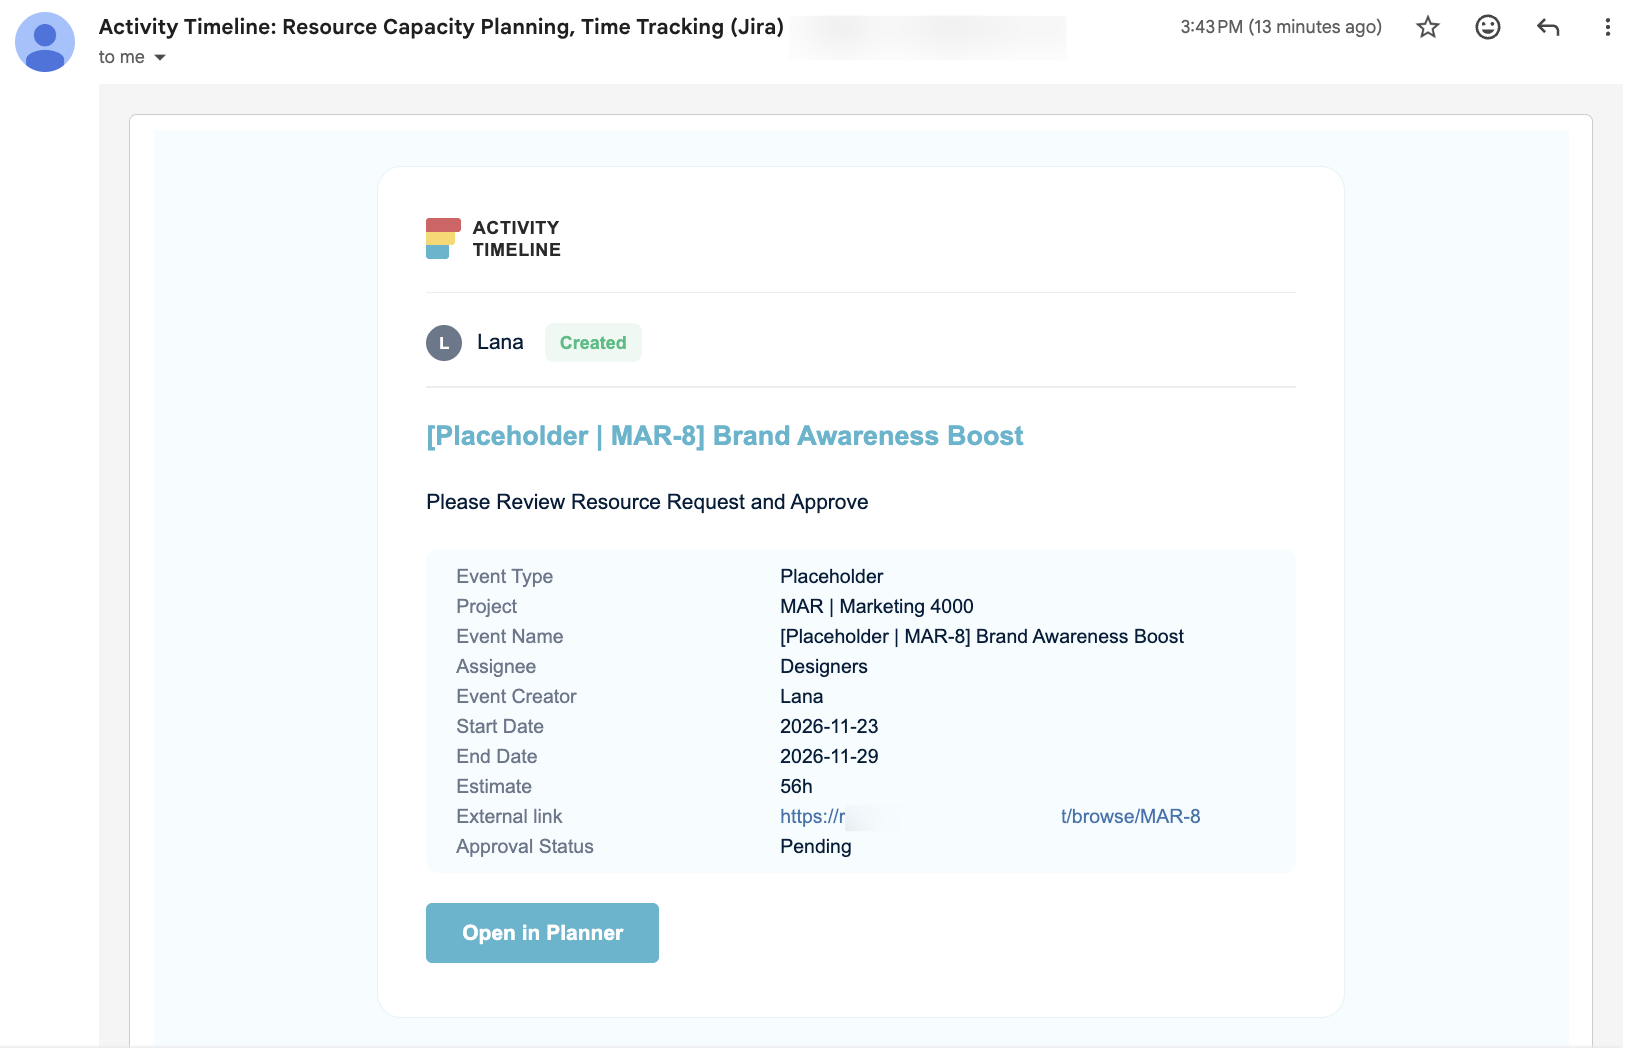
Learn more: Notification Schemes
Step 4: Review and Confirm Resource Demand
-
The Resource Manager opens Planner and locates the requested Placeholder.
-
Check Total Team Availability and, if appropriate, individual availability and required skills.
-
If the estimate or schedule is unrealistic, adjust the Placeholder or discuss a different team or date range.
-
When the allocation is accepted, use an approval process that retains the Placeholder as a planning item rather than converting it into the Jira issue.
The goal is to keep linked Placeholders as standalone planning items. When approving placeholder make sure to choose ‘Do not choose Replace Placeholder with Jira Task’ for this workflow.
Step 5: Review Team Reports
-
Open Reports → Project Resources Forecast. Choose the relevant period and select or group by Issue.
-
Include Placeholders in the report’s data sources and check how the three linked requirements appear under MAR-2.
-
Open Resource Utilization Forecast for the same period. Include Placeholders and review each user’s utilized and remaining capacity.
-
Compare the totals against the 120-hour Development, 48-hour QA and 32-hour UX requests. Adjust the individual Placeholders if a team is overloaded.
Learn more: Project Resources Forecast
Learn more: Resource Utilization Forecast
Step 6: Keep the Plan Accurate
As staffing decisions change, update each Placeholder independently. Avoid scheduling the full Jira Initiative on top of the same Placeholder allocations: if the same effort is represented twice, capacity forecasts may be inflated. If detailed Jira tasks are eventually scheduled for the work, reduce or remove the overlapping Placeholders.
You can also enable Configuration → Issues → Issue Placeholder Icon to see how many Placeholders are linked to a Jira issue from the Issues Panel.
Other Ways to Plan Resources
This scenario is most useful when you need high-level resource demand for an Initiative, a separate total estimate for each team or person, and a review step before committing capacity. Placeholders let you explore allocations without immediately scheduling Jira work. An approval step can also be configured, but it is not exclusive to Placeholders: Bookings support approval too.
|
Planning option |
When to use it |
Main benefits |
|
Placeholders |
Tentative Initiative-level demand, with separate estimates and optional review. |
Give each requirement its own total estimate and dates; link multiple requirements to one Jira issue without immediately changing Jira. |
|
Bookings |
Reserve a defined amount of capacity for a project or activity. |
Plan hours per day, protect availability, and approve a reservation without creating Jira tasks. |
|
Issue Split |
Multiple contributors or separate work periods for the same Jira issue. |
Keep work associated with one Jira issue while giving each issue part its own person, dates, and estimate. |
|
Jira tasks |
Confirmed work that the team is ready to execute and track. |
Schedule real Jira work, keep assignees and dates synchronized, and connect the plan to issue progress and logged hours. |
Which one should you choose? Use Placeholders for tentative demand with independent estimates, Bookings for daily capacity reservations, Issue Split for shared work on one existing Jira issue, and regular Jira tasks when the work is ready for execution.
As the plan becomes more detailed: You can replace high-level demand with split issues or scheduled tasks. Adjust or remove any overlapping Placeholders or Bookings so the same hours are not counted twice in capacity reports.
Learn more: Placeholders | Bookings | Split Jira Issues | Planning Jira Issues
Expected Result
-
One Jira Initiative acts as the common reference for several separate resource requests.
-
Each requirement retains its own estimated hours, team or user and schedule.
-
Resource Managers can review capacity before accepting work, with optional email notifications.
-
The team can see future demand without creating additional Jira tasks for each request.