
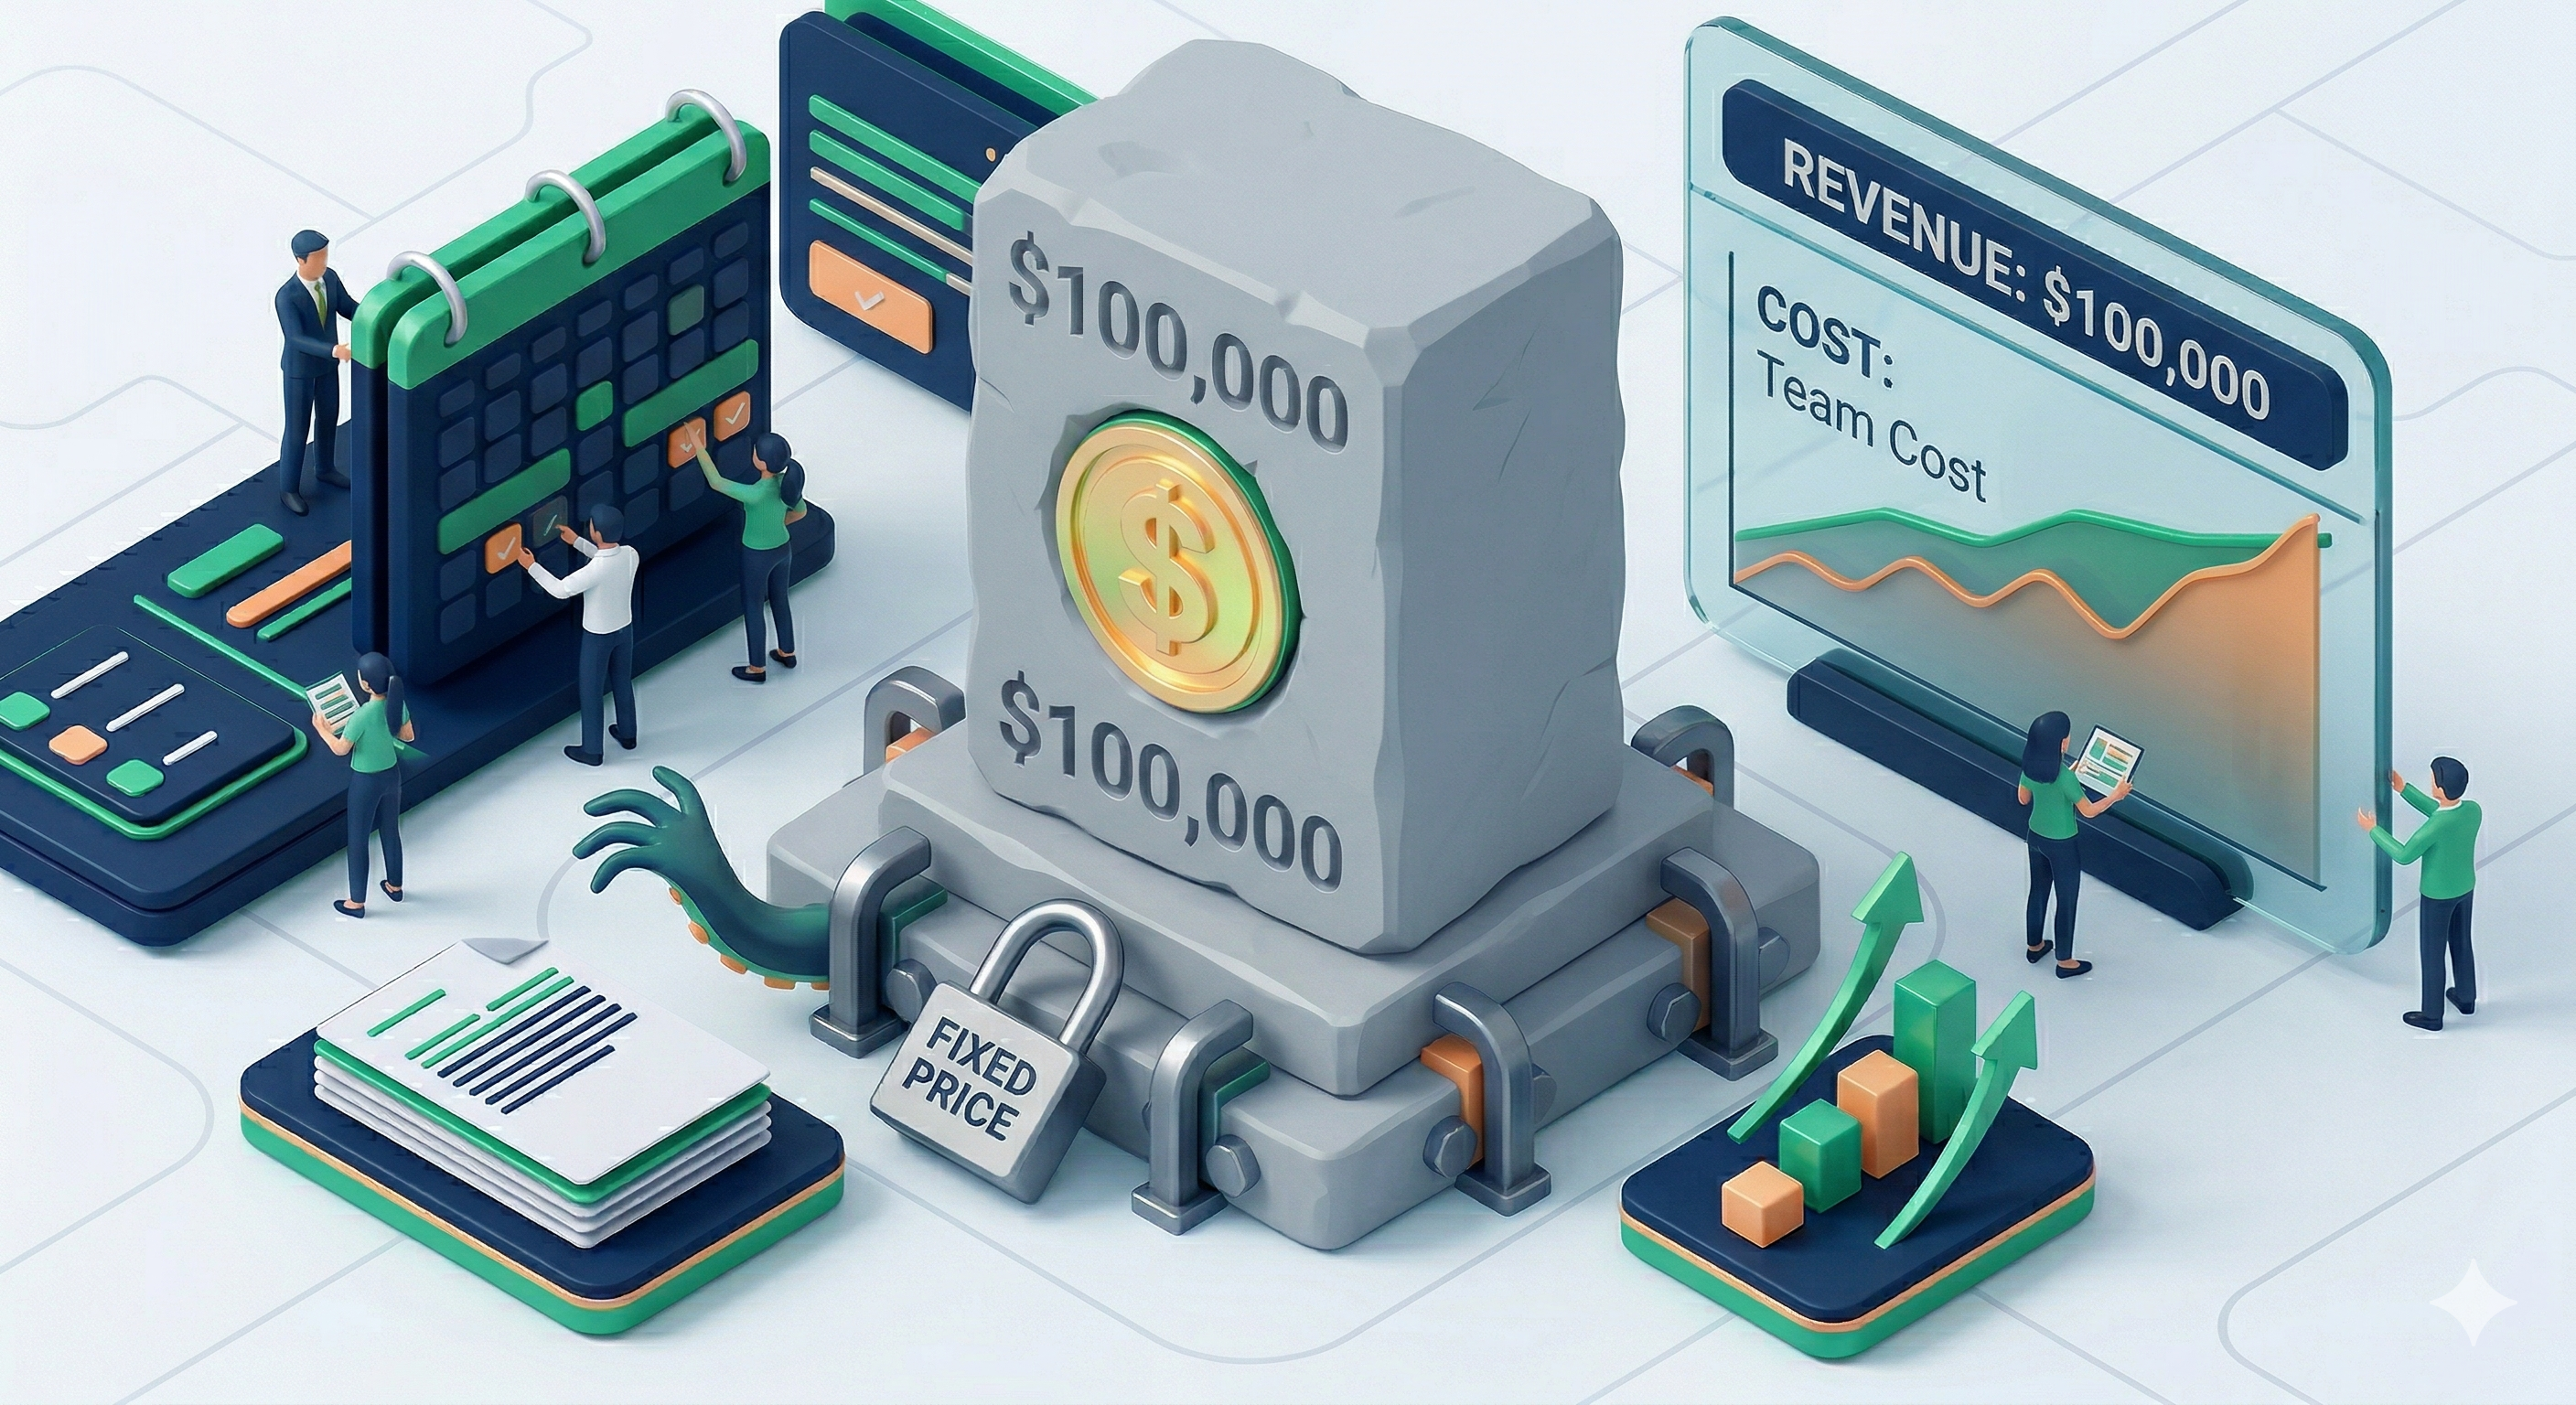
The Profile: A Project Manager or Agency managing a delivery project for an external client where the price is agreed upon upfront (e.g., "We will deliver this application for a fixed fee of $100,000").
The Primary Goal: Delivering the project successfully without exceeding the fixed budget. Every dollar spent on internal labor or external expenses eats directly into the agency's profit margin. The wider the gap between the actual cost and the fixed budget, the higher the profit.
The Challenge: You need to track the true cost of your team's time, but you cannot bill the client for those hours. The revenue is a single, fixed event.
How to Configure This Scenario in ActivityTimeline
To accurately reflect a fixed-price contract, you must decouple your team's logged hours from the revenue calculation, while still tracking their cost.
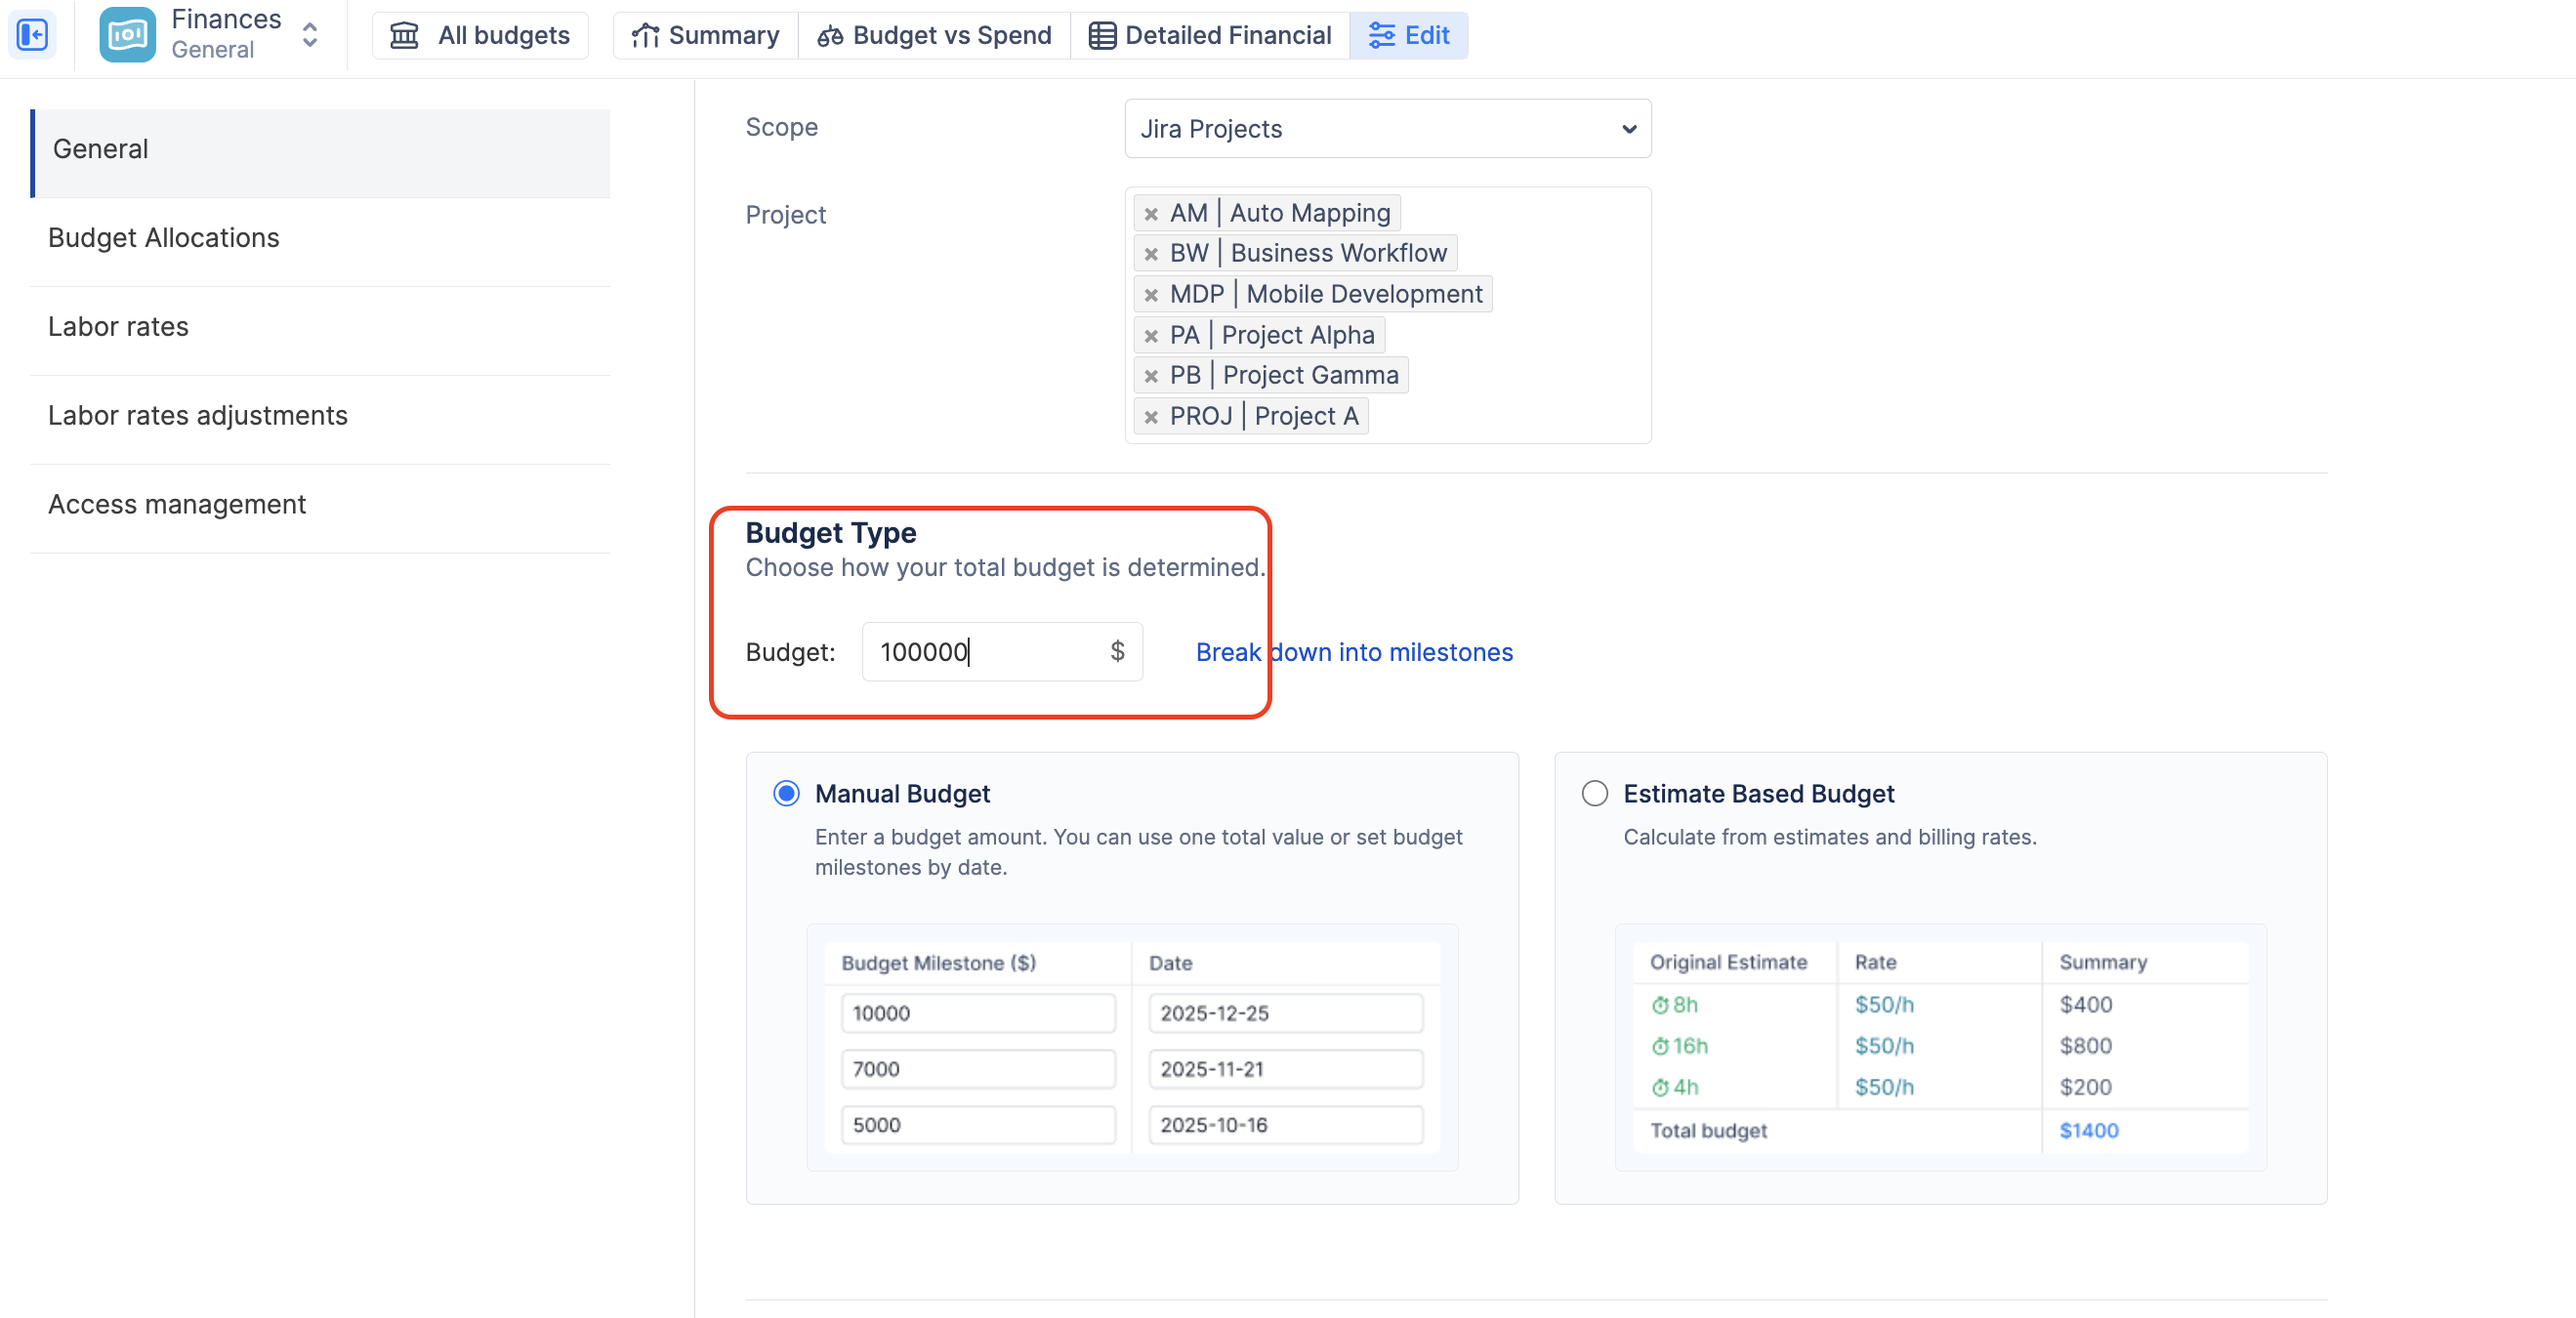
Step 1: Set the Fixed Budget Container
-
Create a new budget and select your relevant Jira Projects or Epics.
-
In the Budget Type section, select Manual Budget.
-
Enter the agreed-upon fixed price of the contract (e.g., $100,000) as the Total Budget.
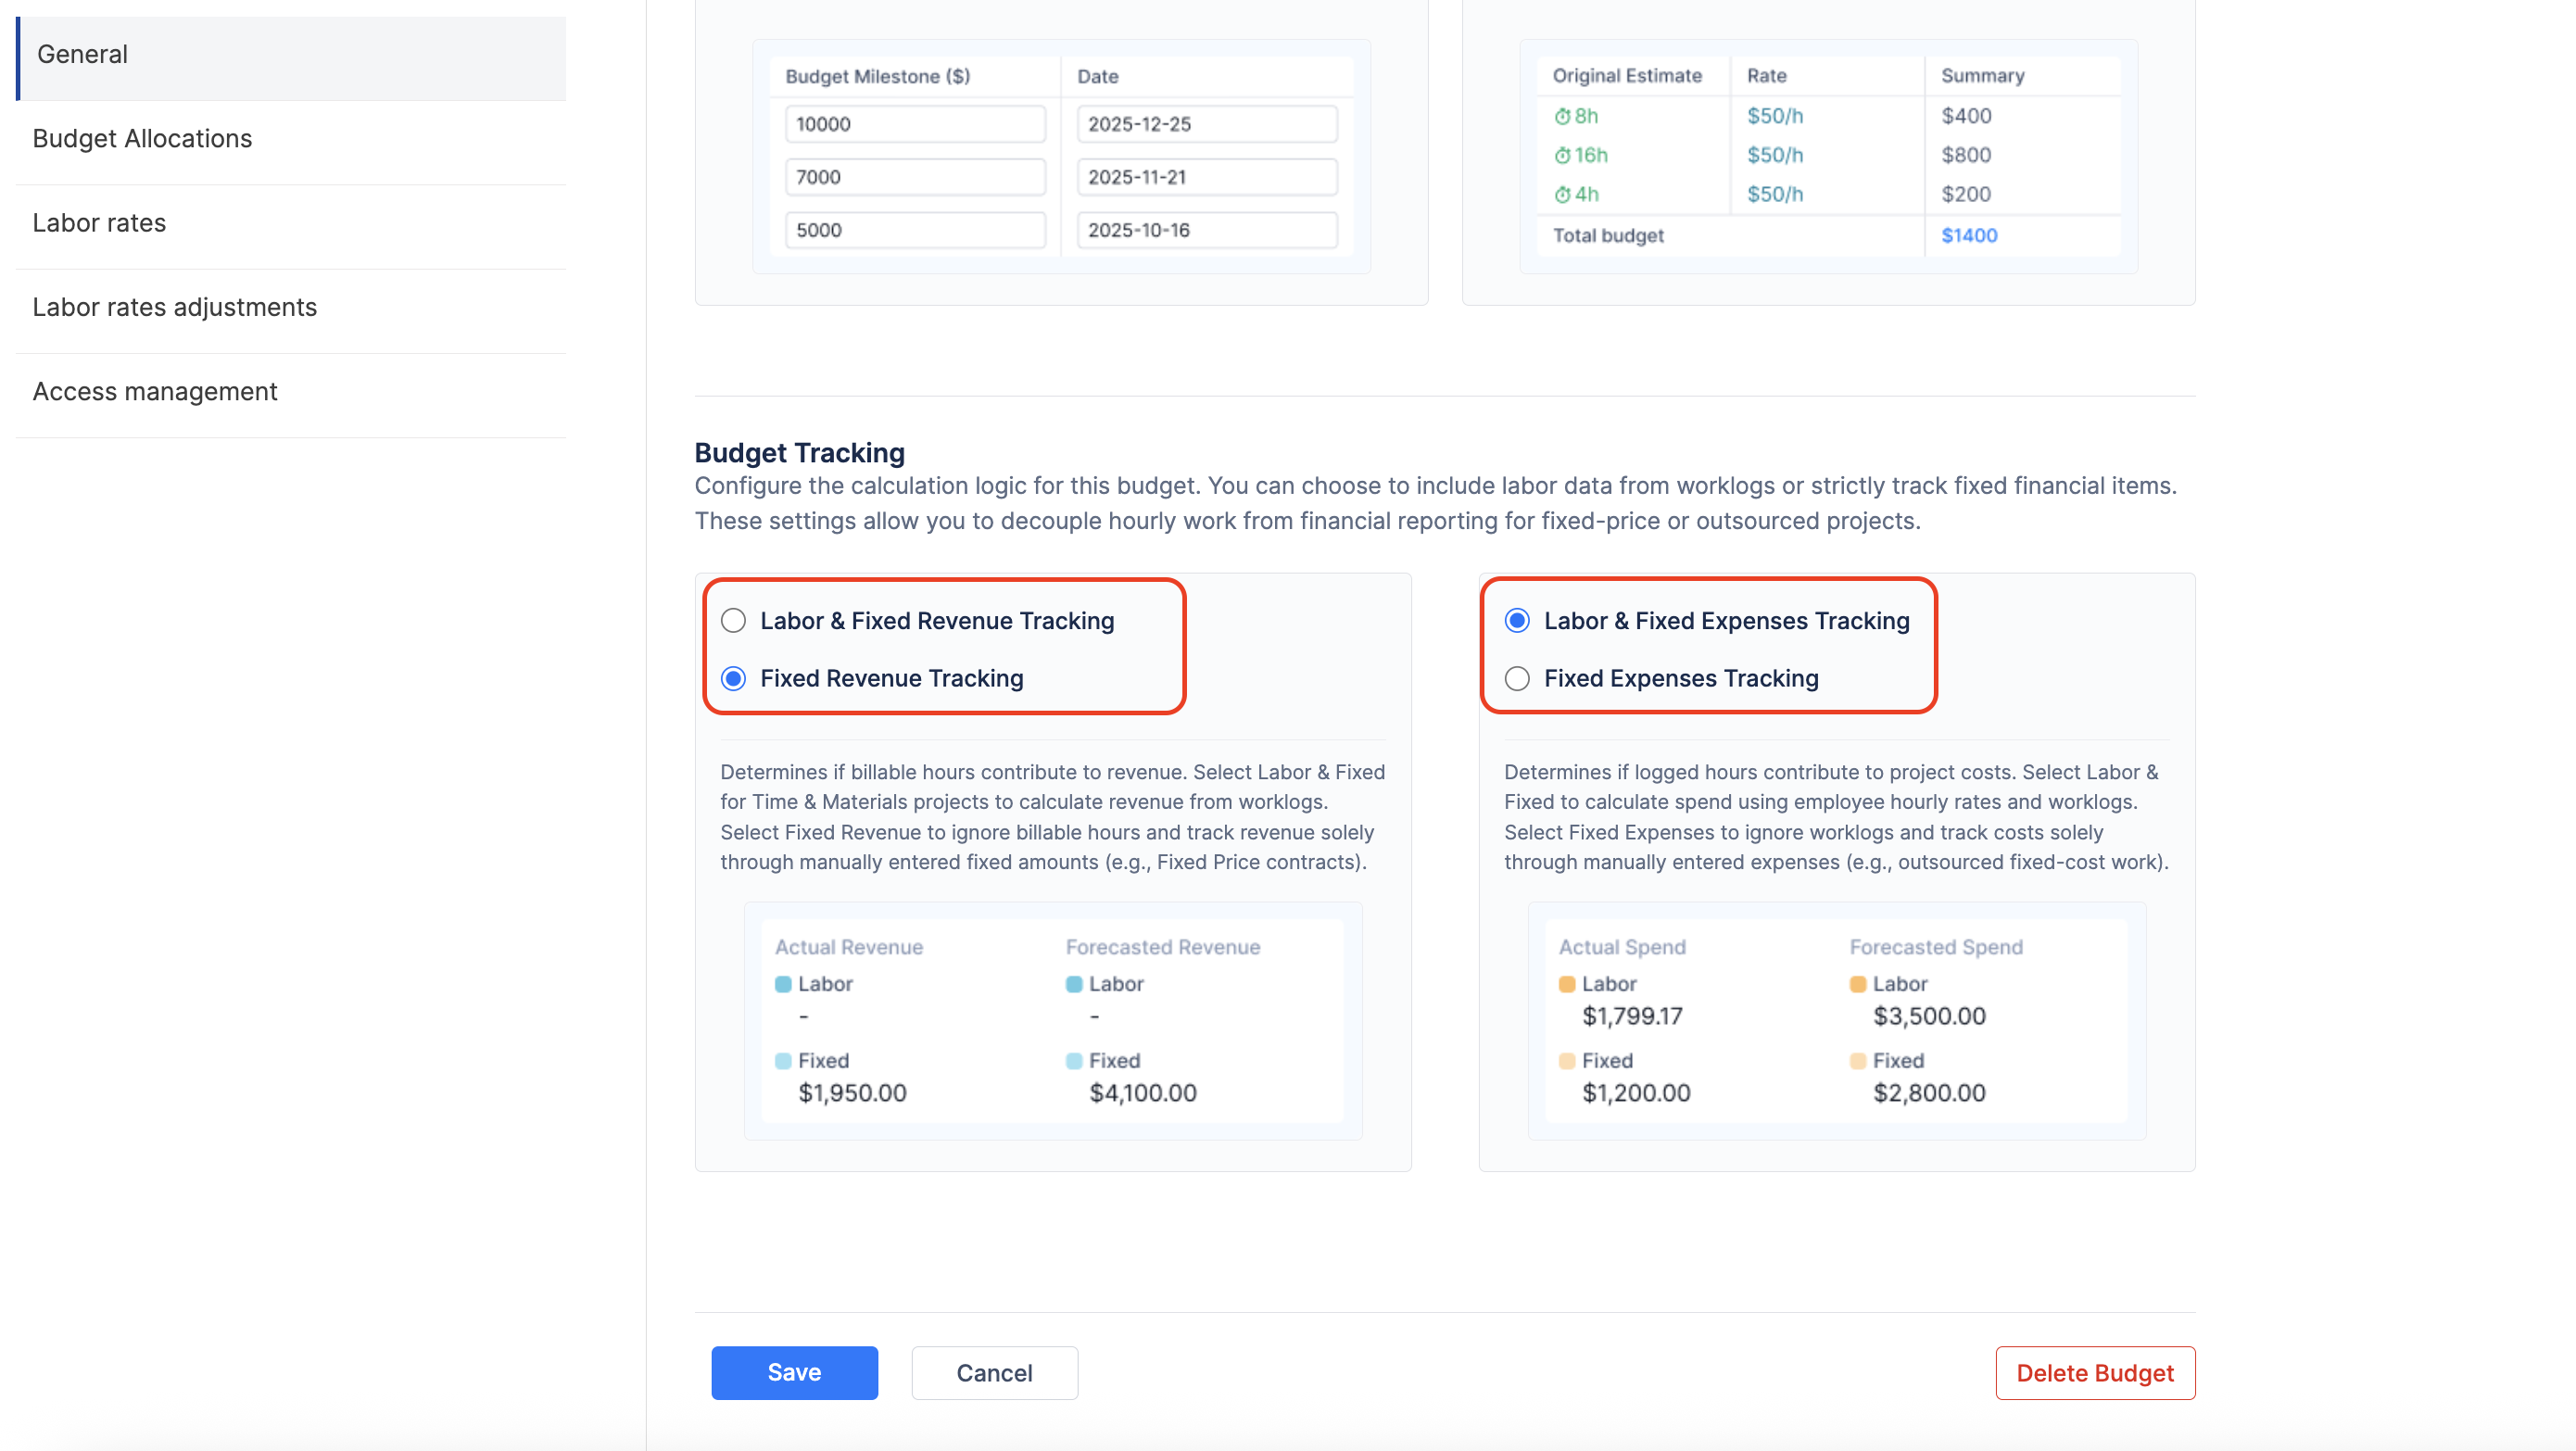
Step 2: Configure the Tracking Rules (Crucial)
This is the most important step for fixed-price projects. You must tell the system not to calculate revenue based on the hours your team works.
-
Navigate to the Configuration → General tab of your budget.
-
Under Cost Tracking, ensure Labor & Fixed Expenses is selected. (You need to track what your team costs you).
-
Under Revenue Tracking, you must select Fixed Revenue Tracking. (This tells the system to ignore billable hours entirely).
Step 3: Define Internal Costs
-
Navigate to the Labor rates tab.
-
You only need to define the Cost Rate for your team members (e.g., $50/hr).
-
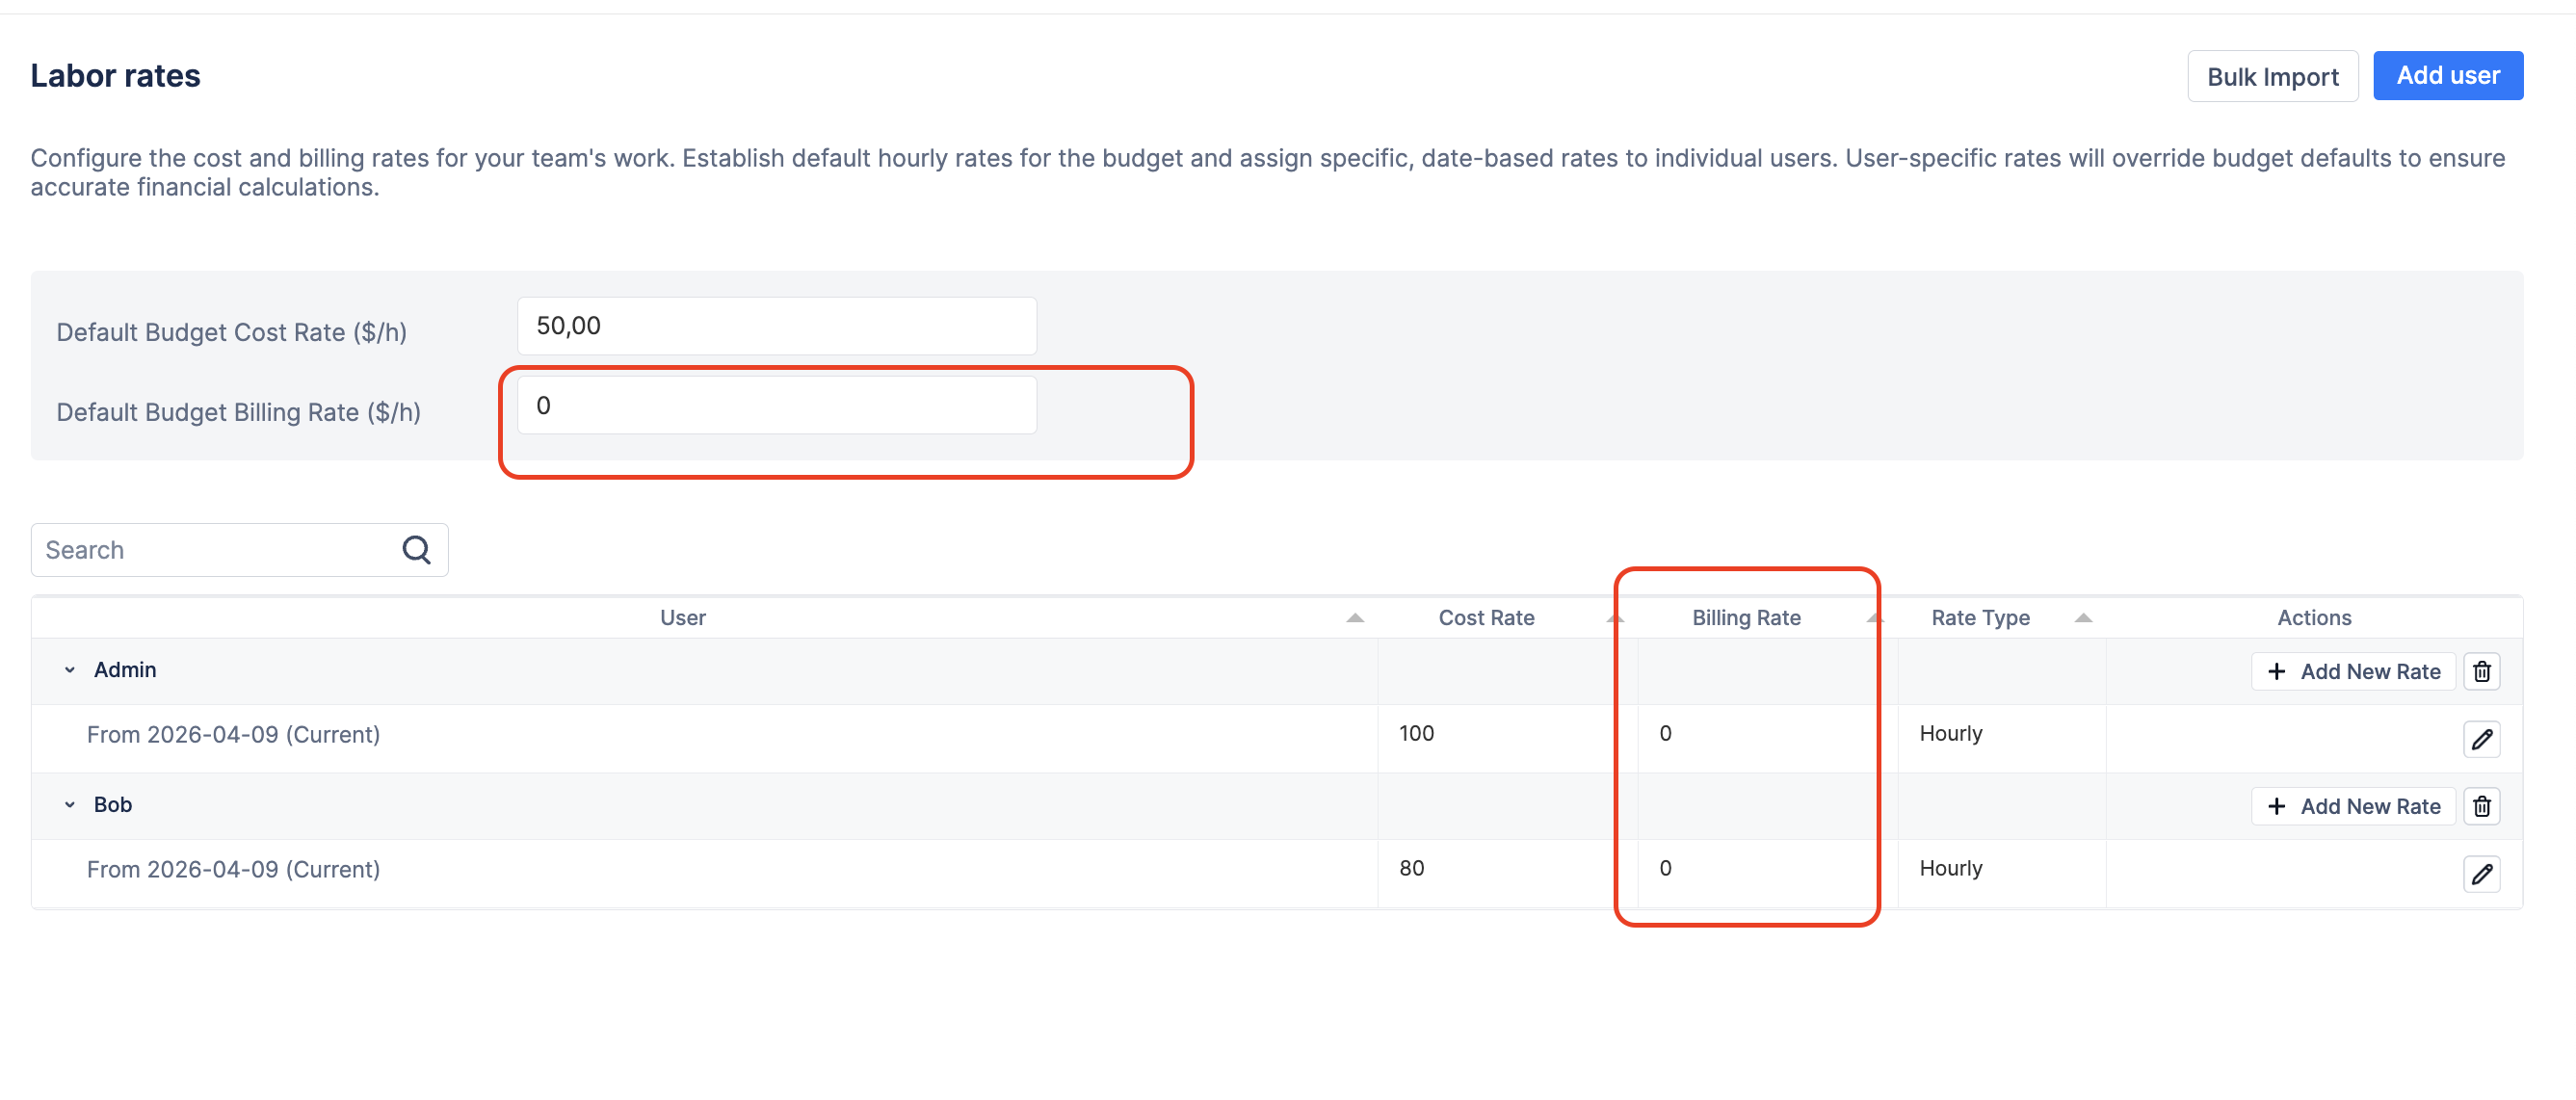
Note: You can leave the "Billing Rate" blank or set it to zero, as the system will ignore it anyway due to the "Fixed Revenue" setting in Step 2.
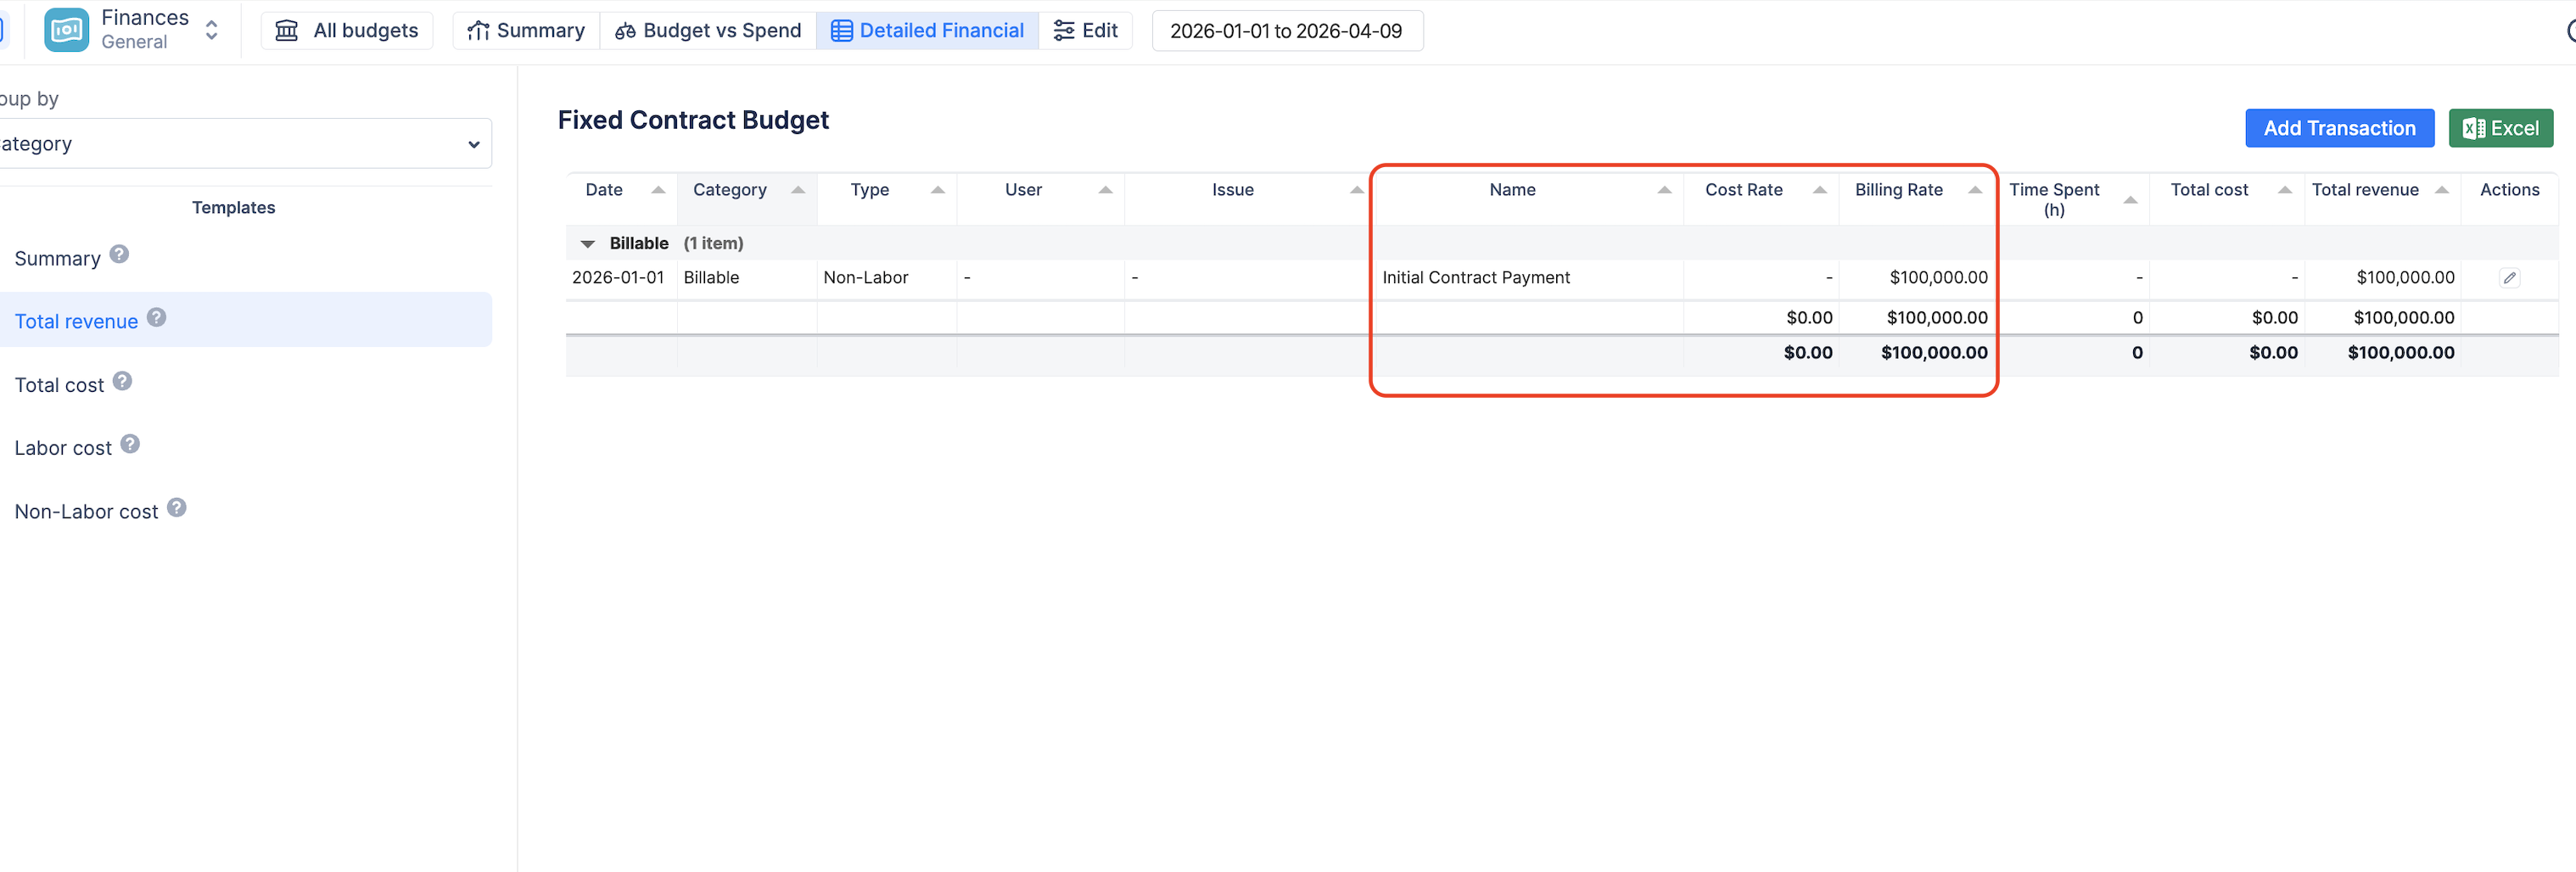
Step 4: Log the Contract Revenue
Since you disabled labor revenue, you must manually enter the fixed contract value so the system knows how much money is coming in.
-
Navigate to the Detailed Financial report tab.
-
Click + Add Transaction.
-
Select Revenue.
-
Name it "Initial Contract Payment" (or similar), enter the amount (e.g., $100,000), and select the date it was secured.
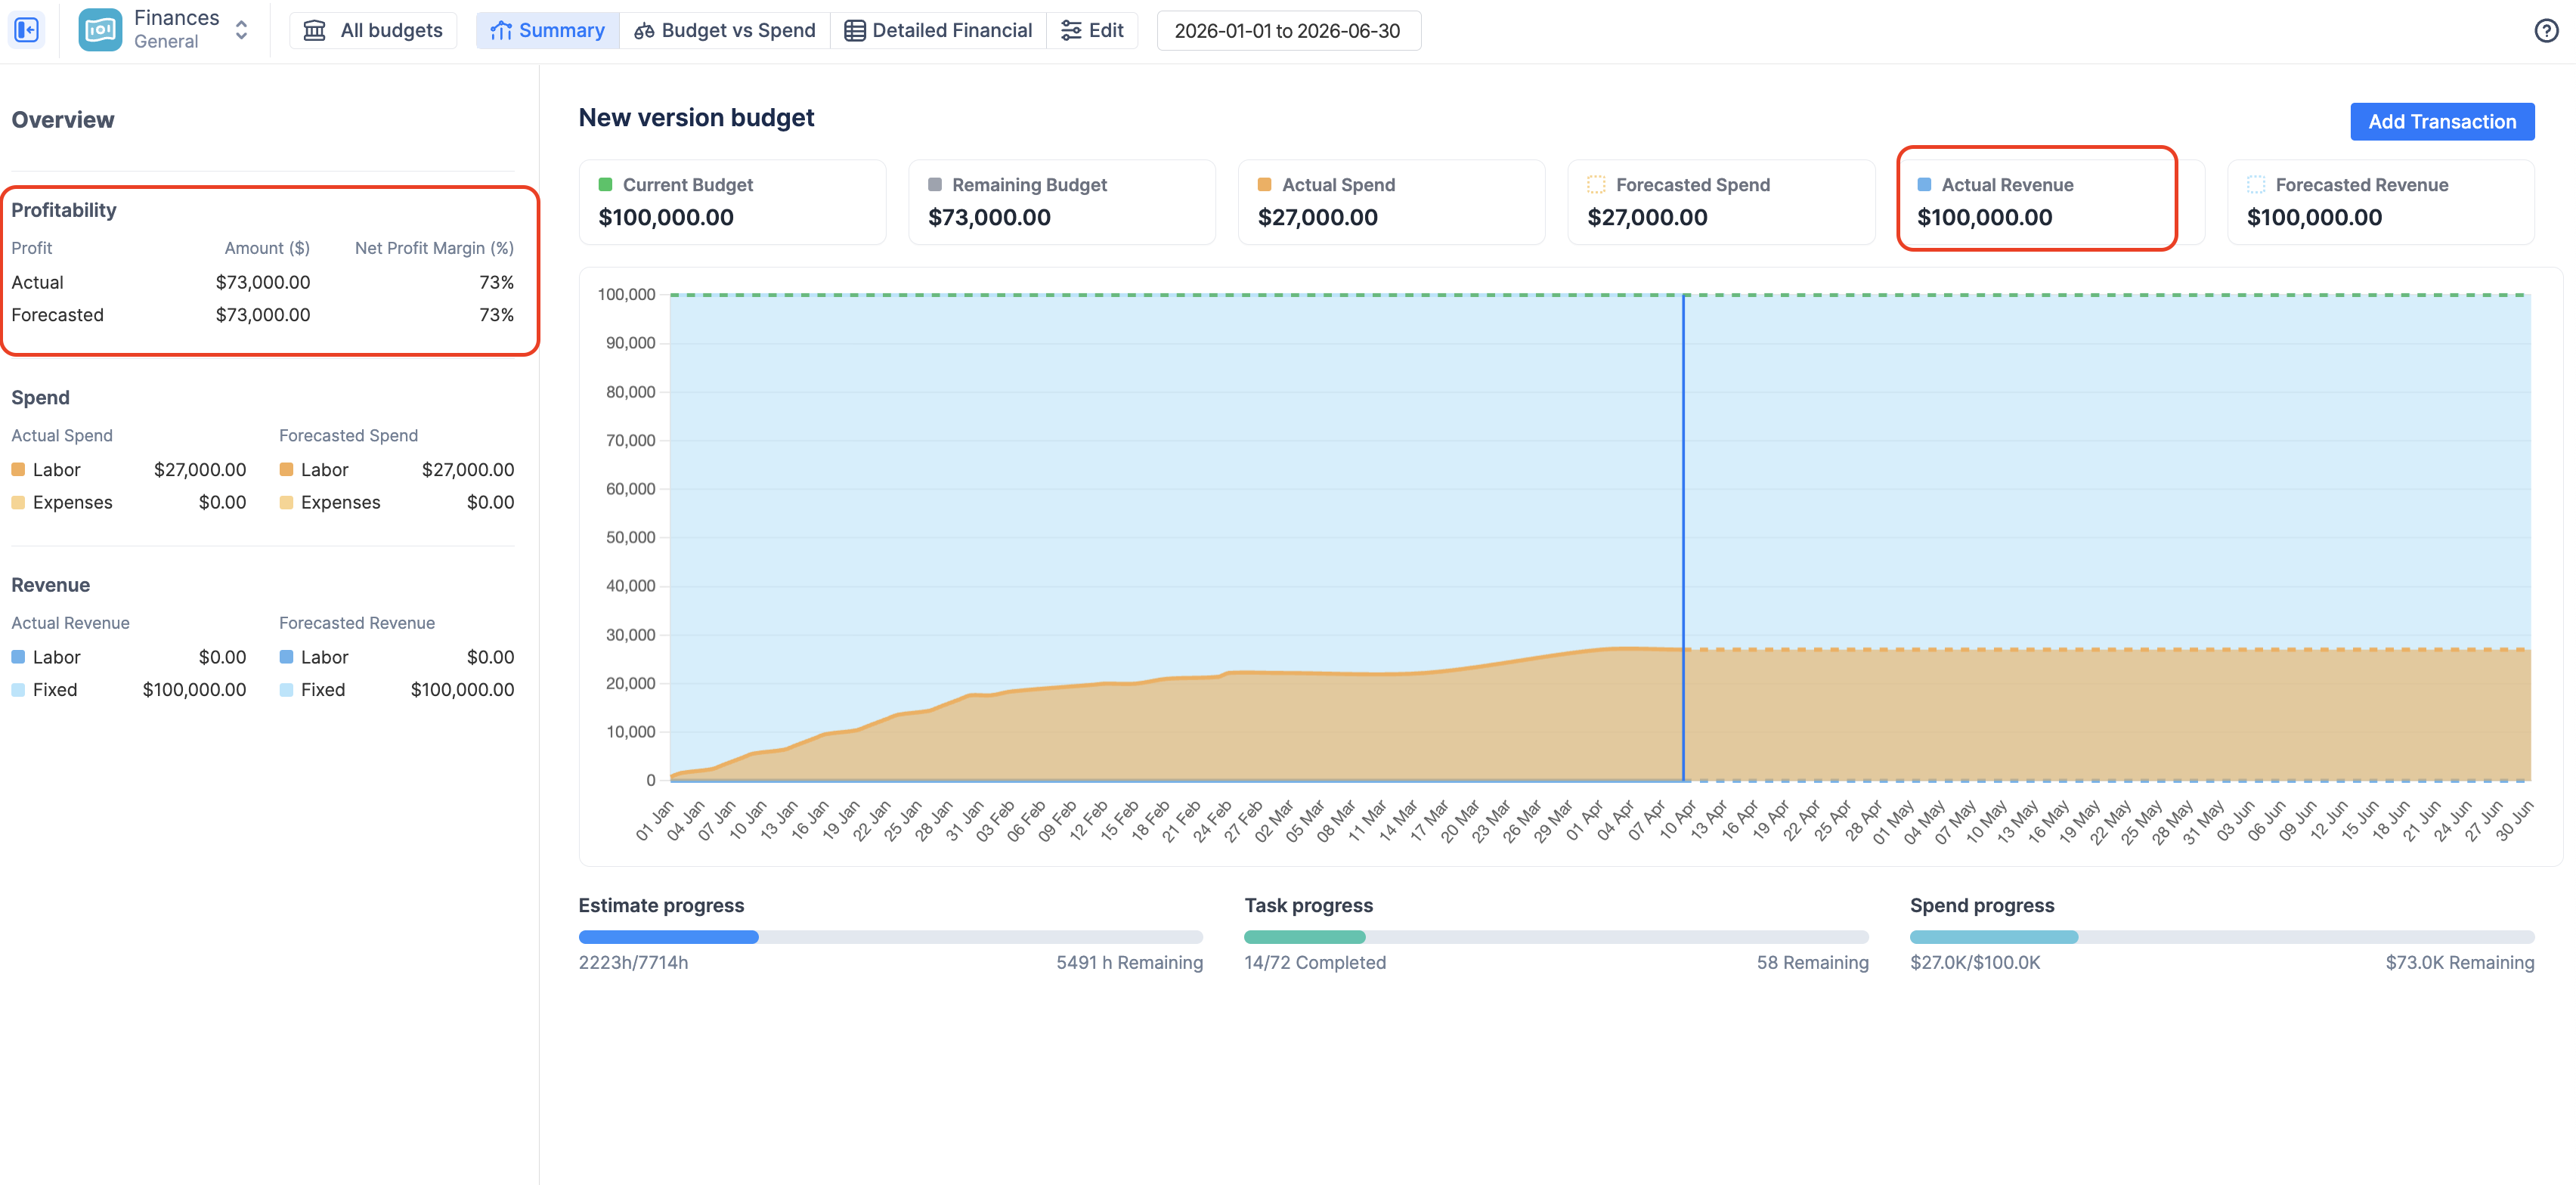
The Payoff: Monitoring the Margin
With this configuration, your Summary Dashboard becomes a powerful, real-time monitor of your profit margin:
-
The Flat Lines: Because you logged a single fixed revenue item, your Actual Revenue (Blue line/area) and your Current Budget (Green line) will likely be flat, straight lines at the top of the chart.
-
The Rising Cost: As your team logs hours in Jira, your Actual Spend (Orange line) will steadily rise from the bottom.
-
The Margin: The visual gap between the rising Orange line (Costs) and the flat Green/Blue lines (Revenue/Budget) is your real-time profit margin.
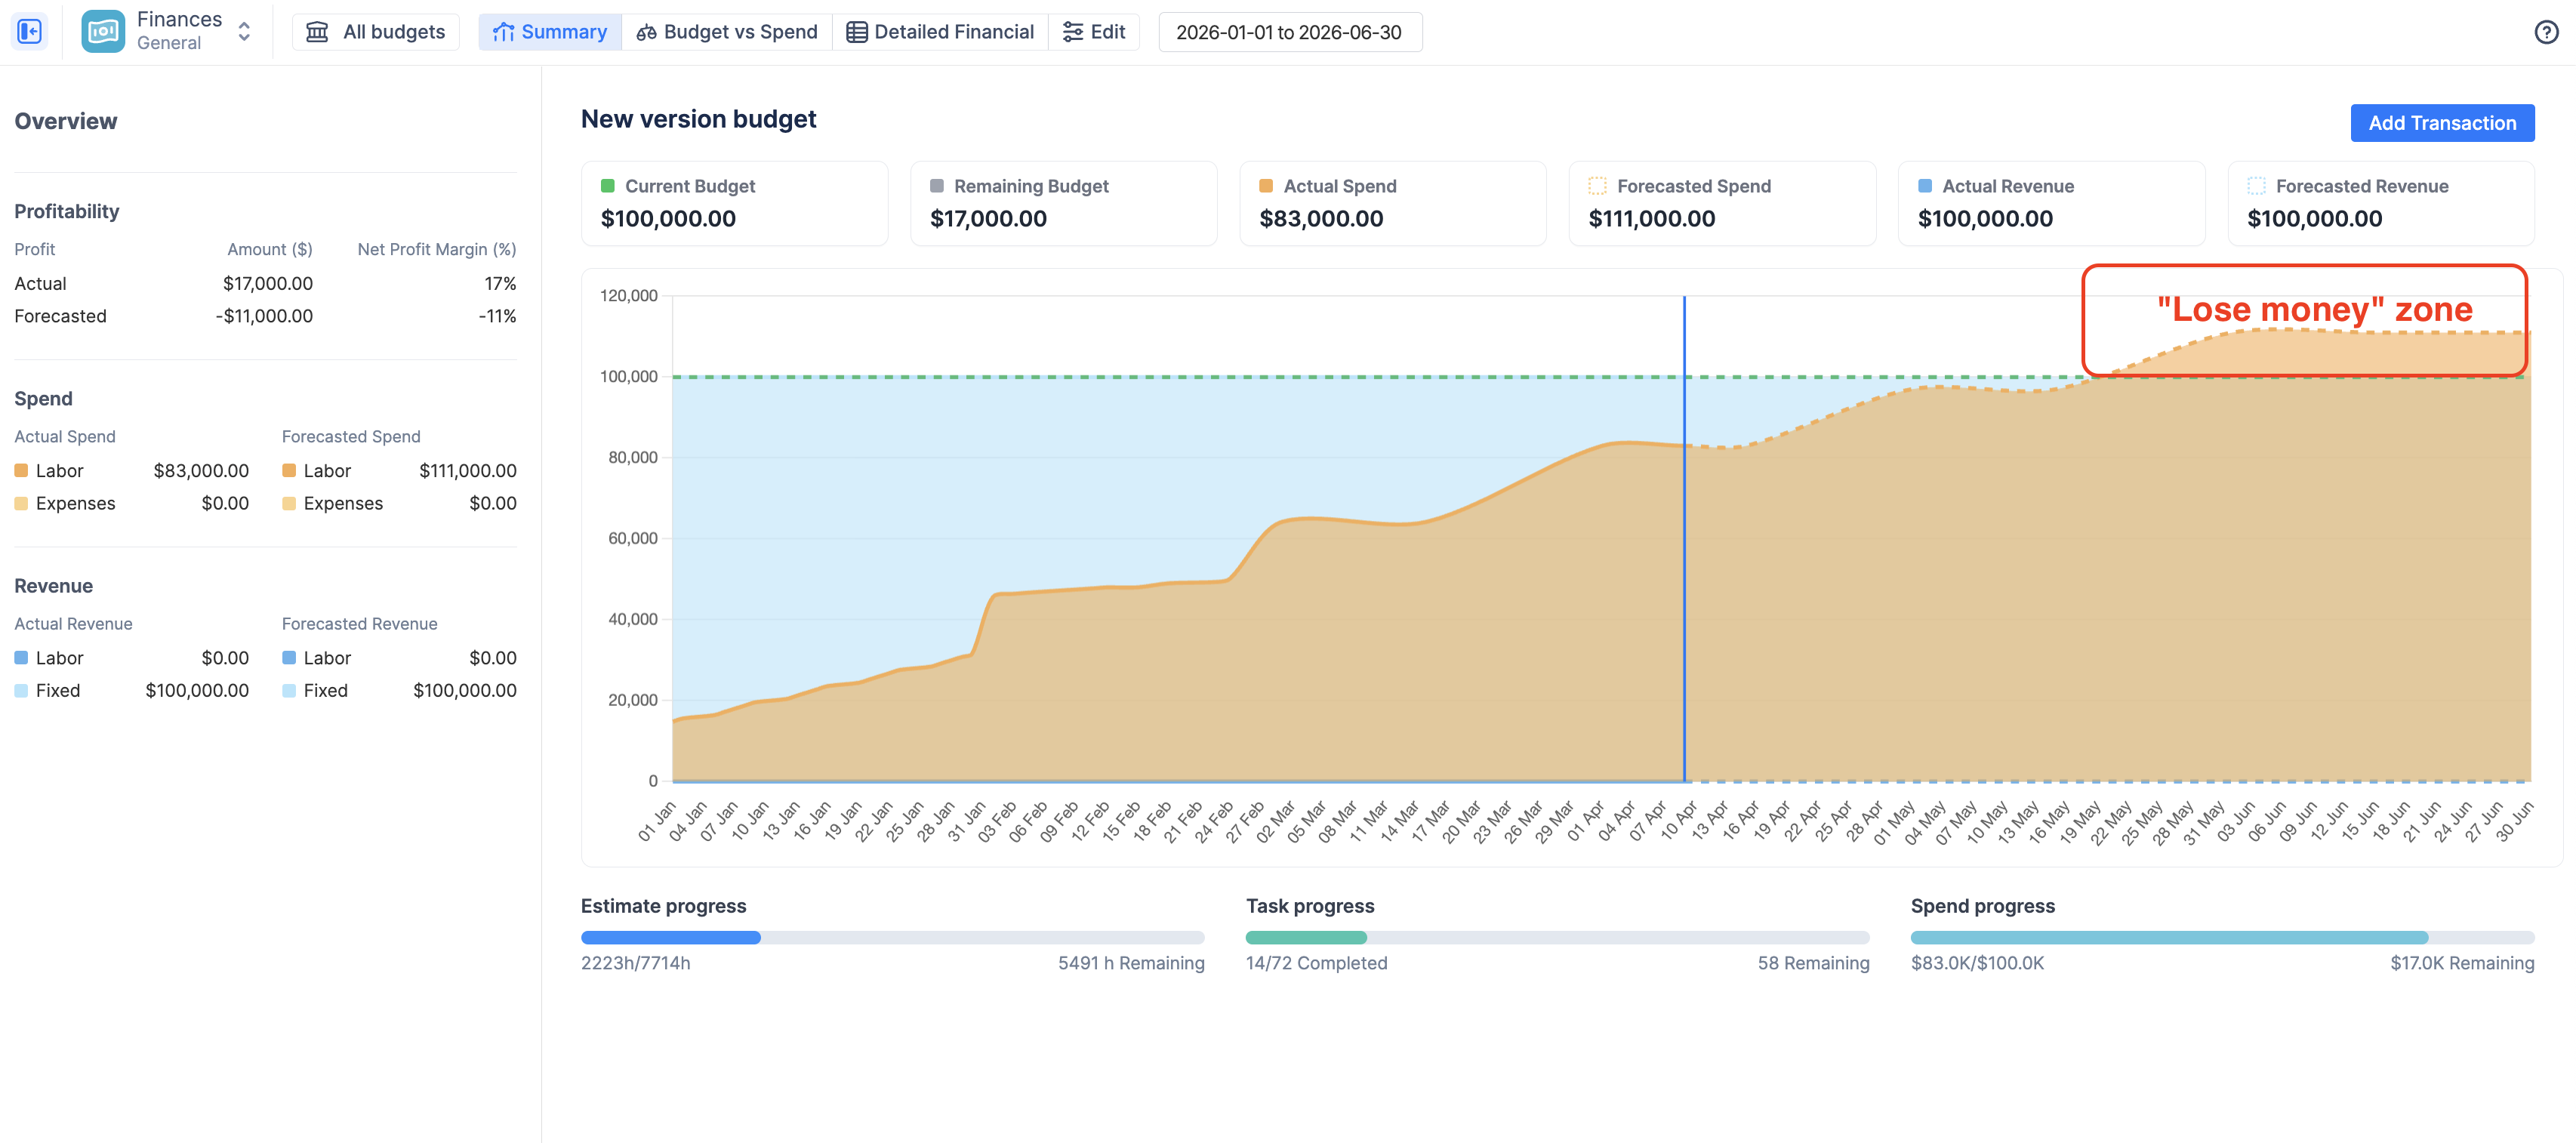
-
The Danger Zone: If the Orange "Forecasted Spend" line intersects or crosses above the flat budget lines before the project end date, the chart is warning you that the project is currently forecasted to lose money.
💡 Scenario Recap: Fixed-Price Delivery
By configuring your budget this way, you've transformed ActivityTimeline from a simple time-tracker into a powerful profitability monitor for your fixed-price contracts.
The Key Takeaways:
-
The Setup: Use a Manual Budget (the contract value) + Fixed Revenue Tracking (ignoring billable hours) + Labor & Fixed Expenses Tracking (tracking internal costs).
-
The Action: You must manually log the total contract value as a single Revenue transaction so the system knows your income ceiling.
-
The Value: The Summary Dashboard trend chart now visually represents your profit margin in real-time. The gap between your flat Revenue line (top) and your rising Spend line (bottom) is your profit. If the lines cross, you are losing money.
Related Features for Fixed-Price Projects:
To get even more out of this scenario, consider exploring these other ActivityTimeline features:
-
Budget Milestones: If your fixed-price contract is billed in stages (e.g., 25% upfront, 50% at beta, 25% at launch), you can define these dates when setting up your Manual Budget. This turns your flat "Budget" line into a realistic, stepped curve reflecting your cash flow.
-
Budget Allocations: Even though your revenue is fixed, you might want to control how that budget is spent internally. Use Allocations to set internal spending targets (e.g., $10k maximum for Design, $30k for Development) and track them on the Budget vs Spend pie charts.
-
Non-Labor Expenses: Don't forget that fixed-price projects often incur hard costs outside of your team's time. Use the
+ Add Transactionbutton to log any contractor fees, travel, or software licenses as Expenses to ensure your profit margin calculation is accurate.