The Profile: An internal IT, marketing, or operations department within a larger organization.
The Goal: Delivering a specific project or maintaining standard operations without exceeding a predetermined, hard financial limit granted by leadership. Generating revenue is not the objective; controlling costs is everything.
Scenario Summary
When managing internal budgets, you need to track the "burn rate" of your team's time and external expenses against a strict ceiling. You do not need to track income.
To set this up in ActivityTimeline:
-
Budget: Use a Manual Budget to establish the exact, unmoving dollar amount approved by leadership.
-
Tracking: Set Revenue Tracking to Fixed Revenue Tracking (and add no transactions) to effectively mute revenue data. Set Cost Tracking to Labor & Fixed Expenses Tracking.
-
Rates: Define only Cost Rates for your team. Billing rates can be ignored entirely.
-
Allocations: Divide your hard limit into manageable categories to monitor exactly where the money is going.
Step-by-Step Configuration
Step 1: Set the Financial Limit
-
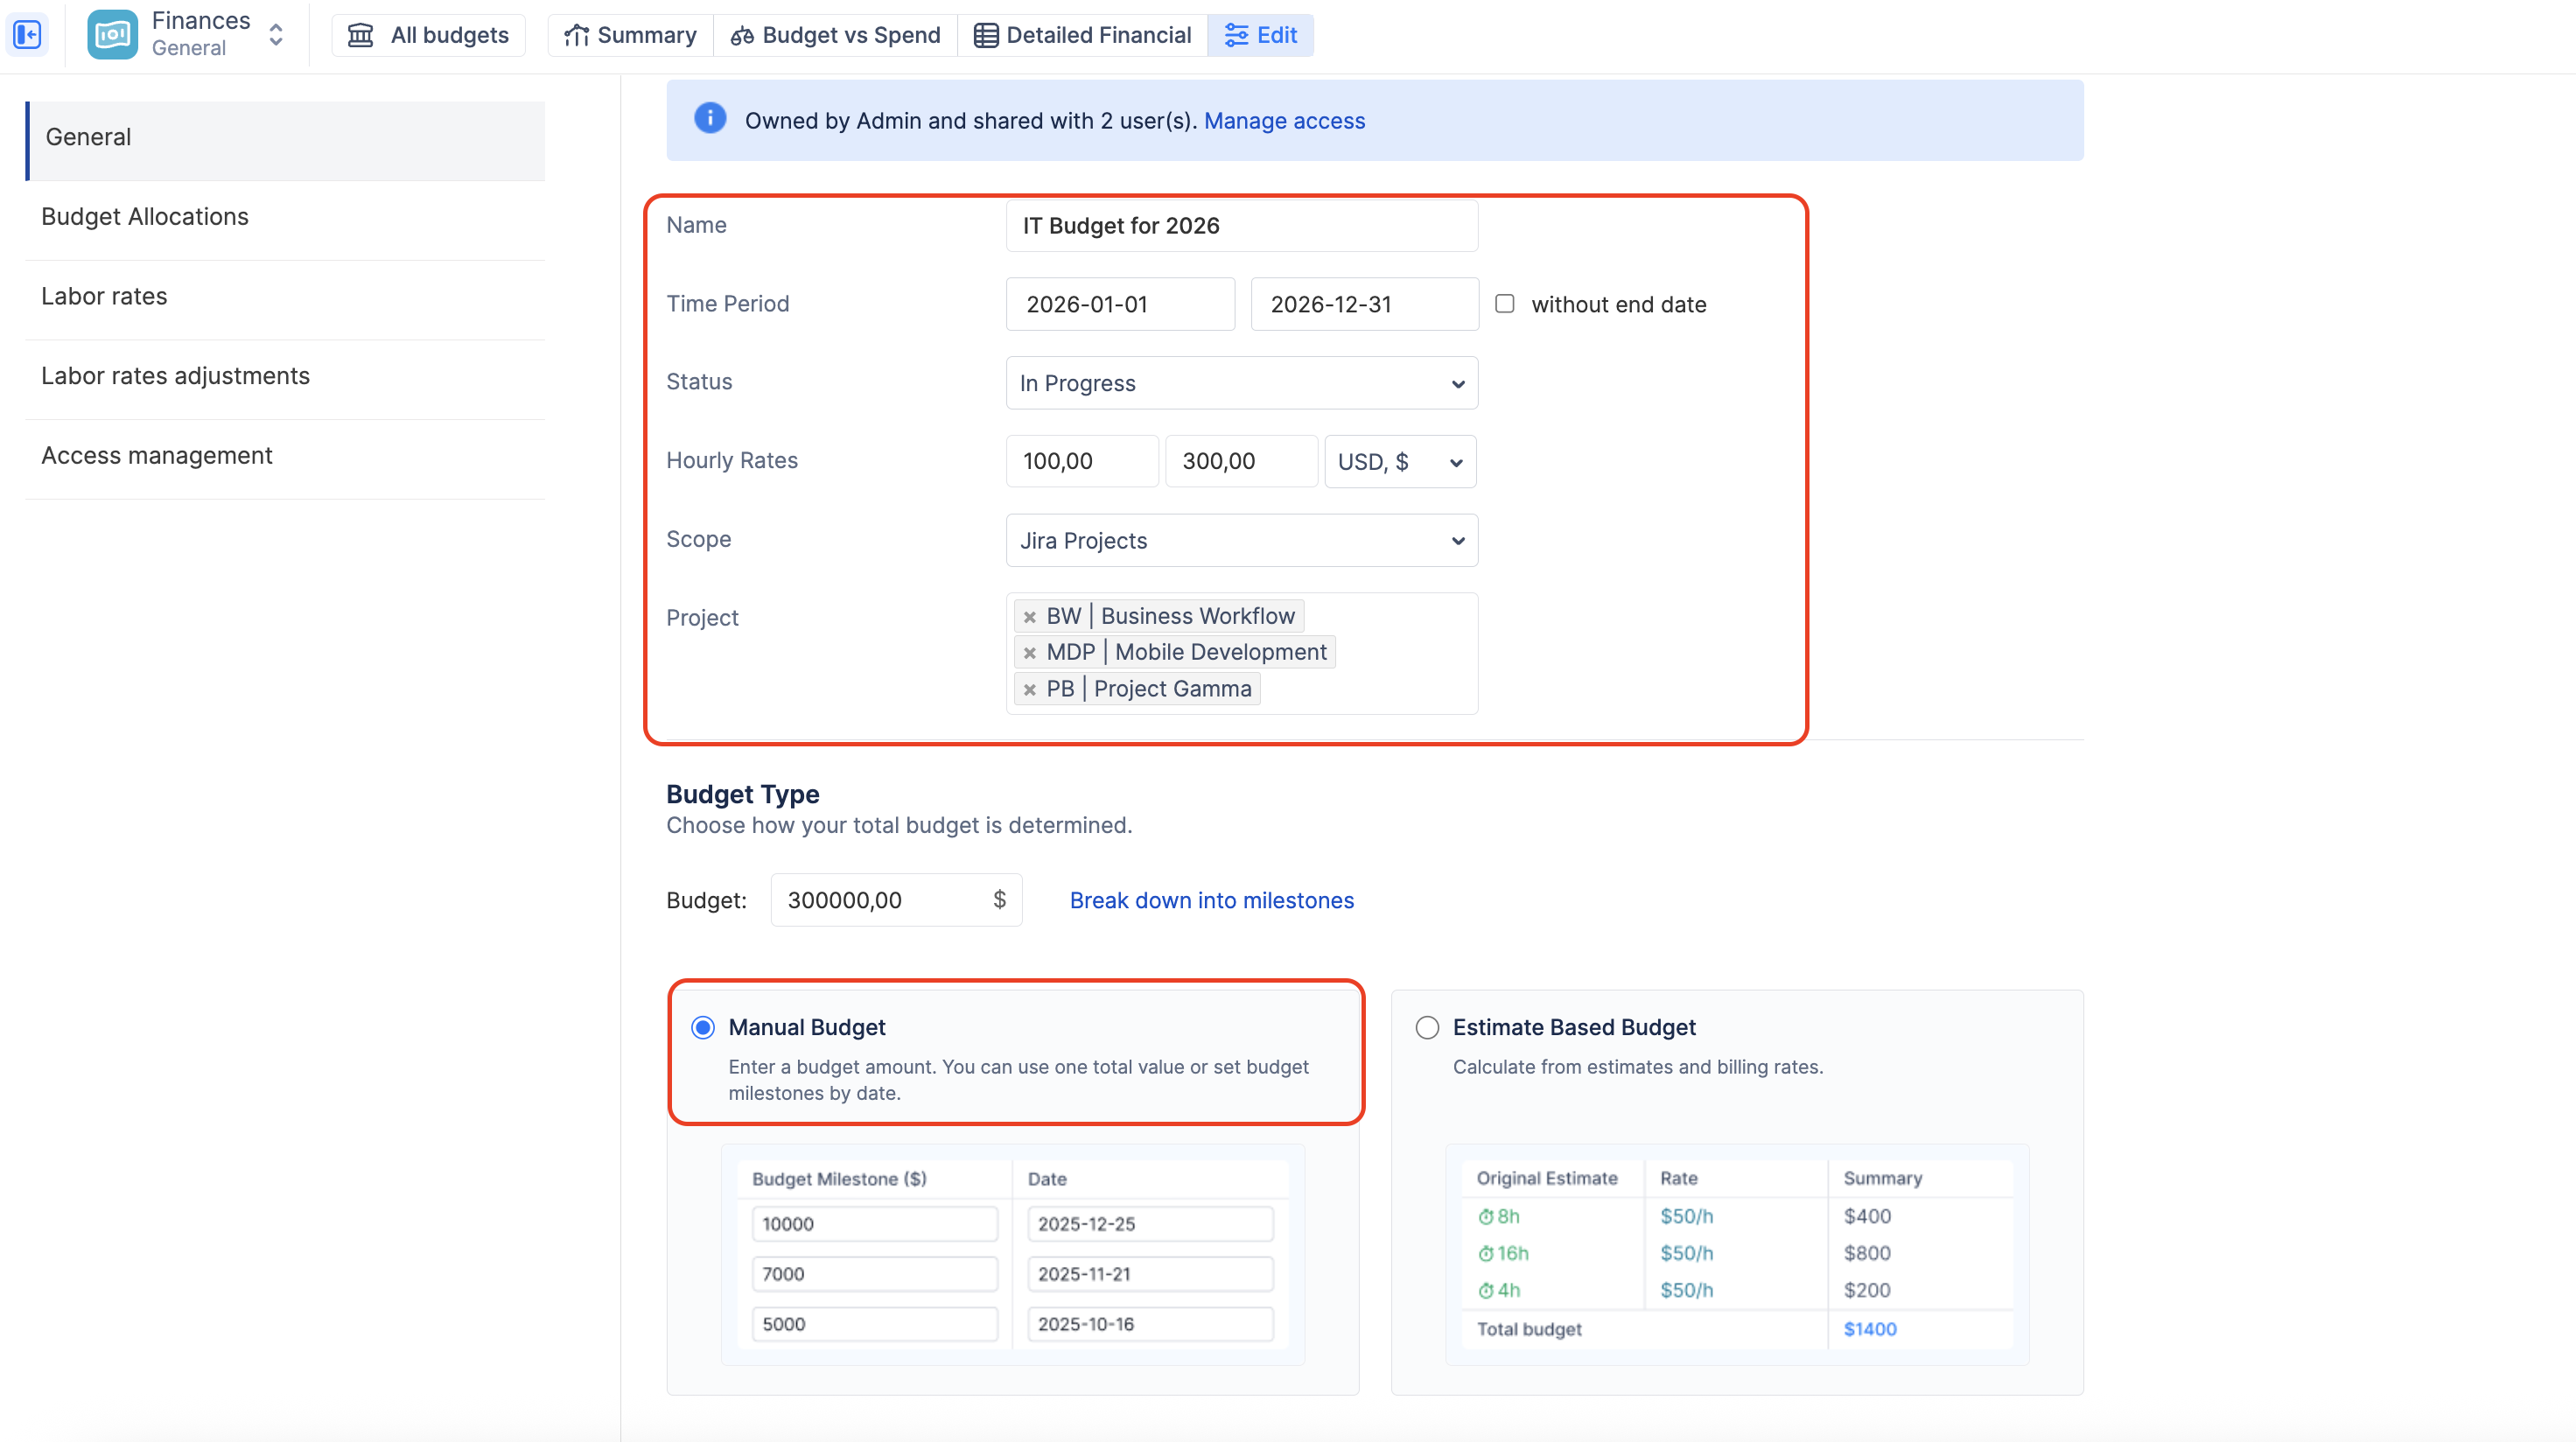
Create a new budget and select the relevant Jira Projects or Epics your department is working on.
-
In the Budget Type section, select Manual Budget.
-
Enter the exact dollar amount approved for the project or quarter (e.g., 300000).
Step 2: Configure Tracking for "Cost-Only"
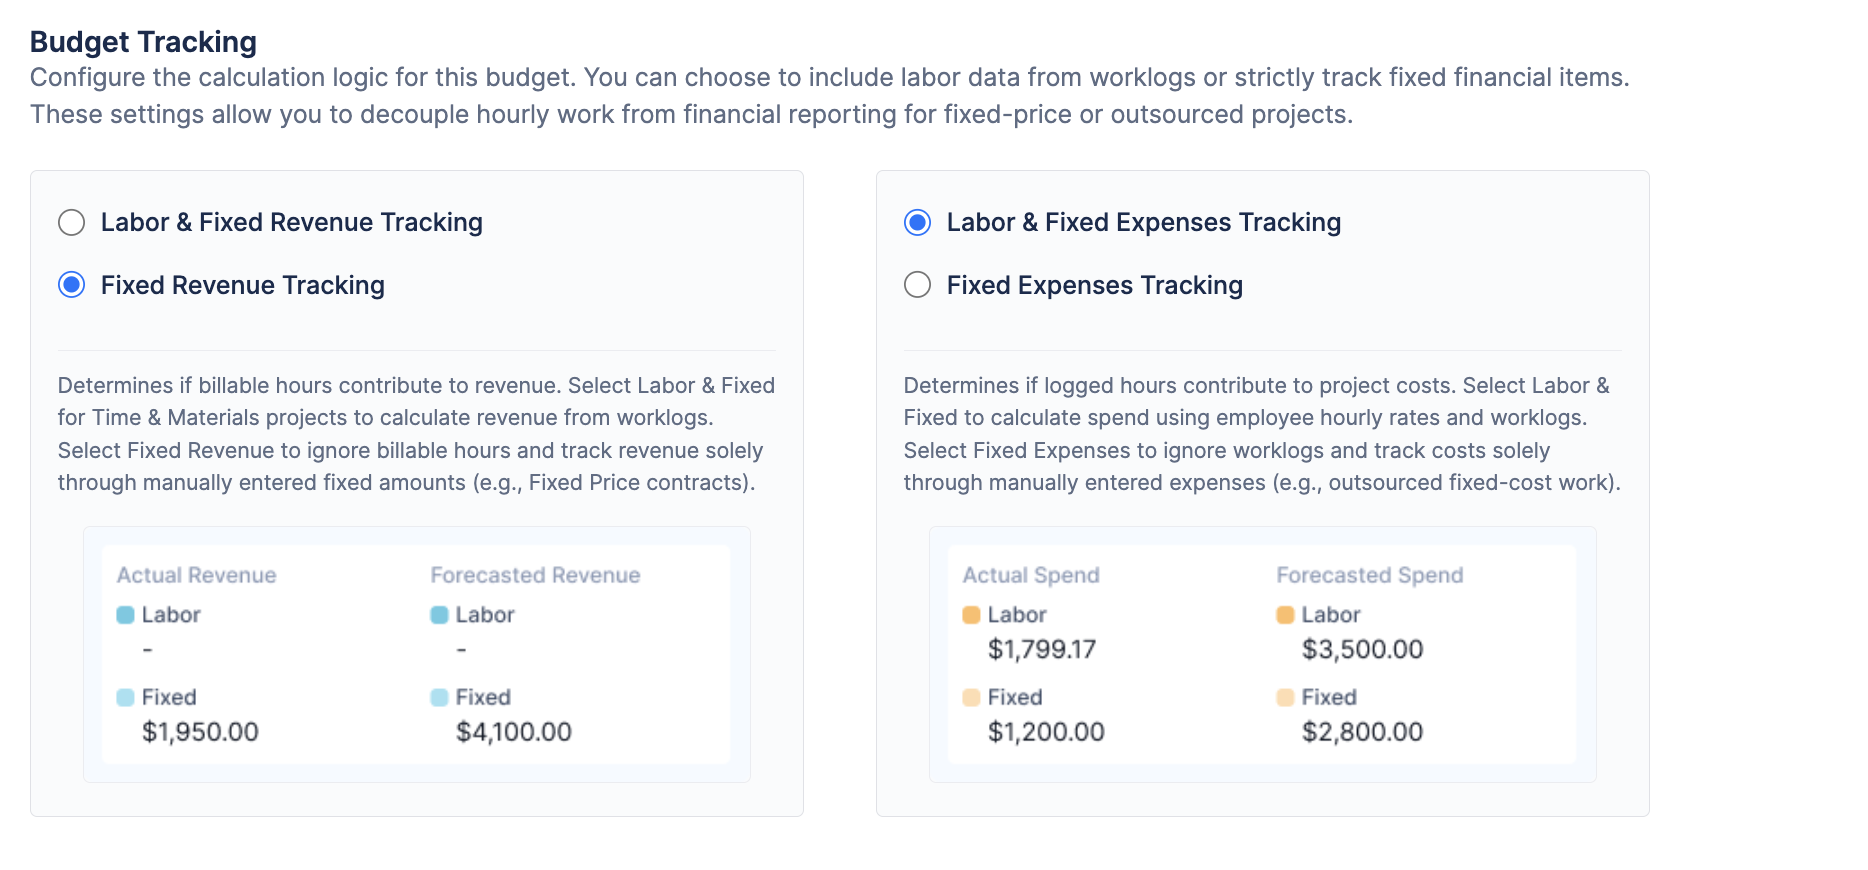
You need the system to ignore revenue calculations to keep your reports clean and focused purely on spending.
-
Navigate to the Configuration → General tab.
-
Under Cost Tracking, select Labor & Fixed Expenses Tracking so the system calculates your team's time and manual purchases.
-
Under Revenue Tracking, select Fixed Revenue Tracking. By choosing this and simply not logging any manual revenue transactions, you effectively disable revenue tracking, keeping your dashboard focused on costs.
Step 3: Define Team Costs
-
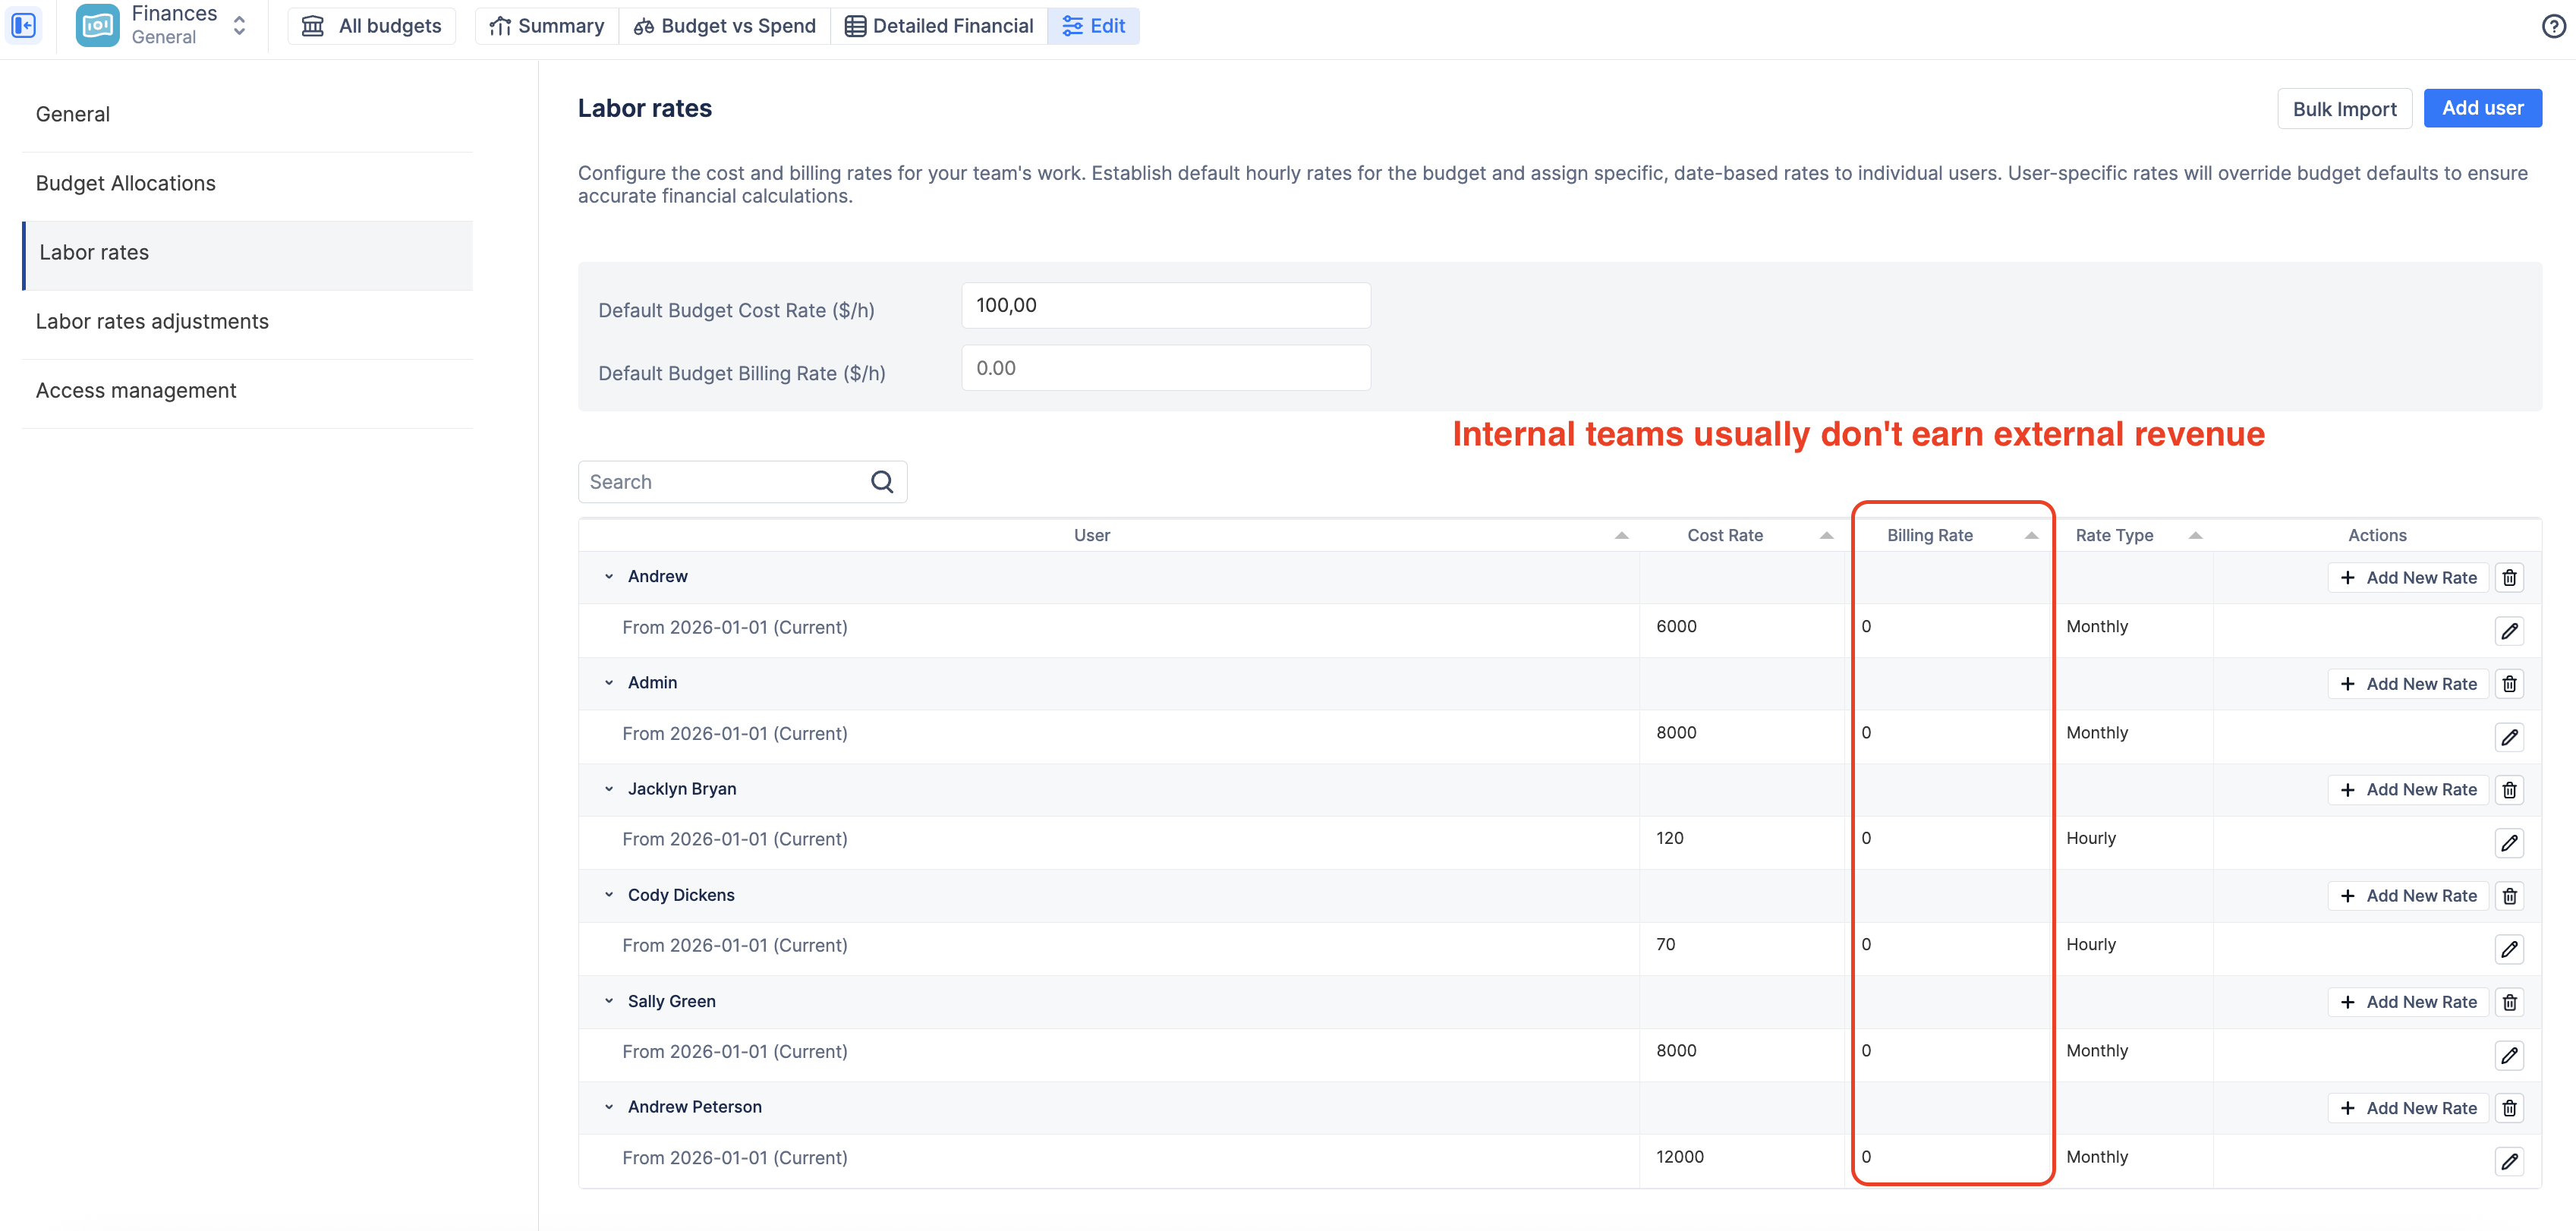
Navigate to the Labor rates tab.
-
Enter the internal Cost Rate for your team members. For internal departments with salaried employees, it is often best to use the Monthly Rate Type so the system can prorate their fixed salary into a daily cost.
-
Note: You can leave the "Billing Rate" fields completely blank, as you are not charging clients.
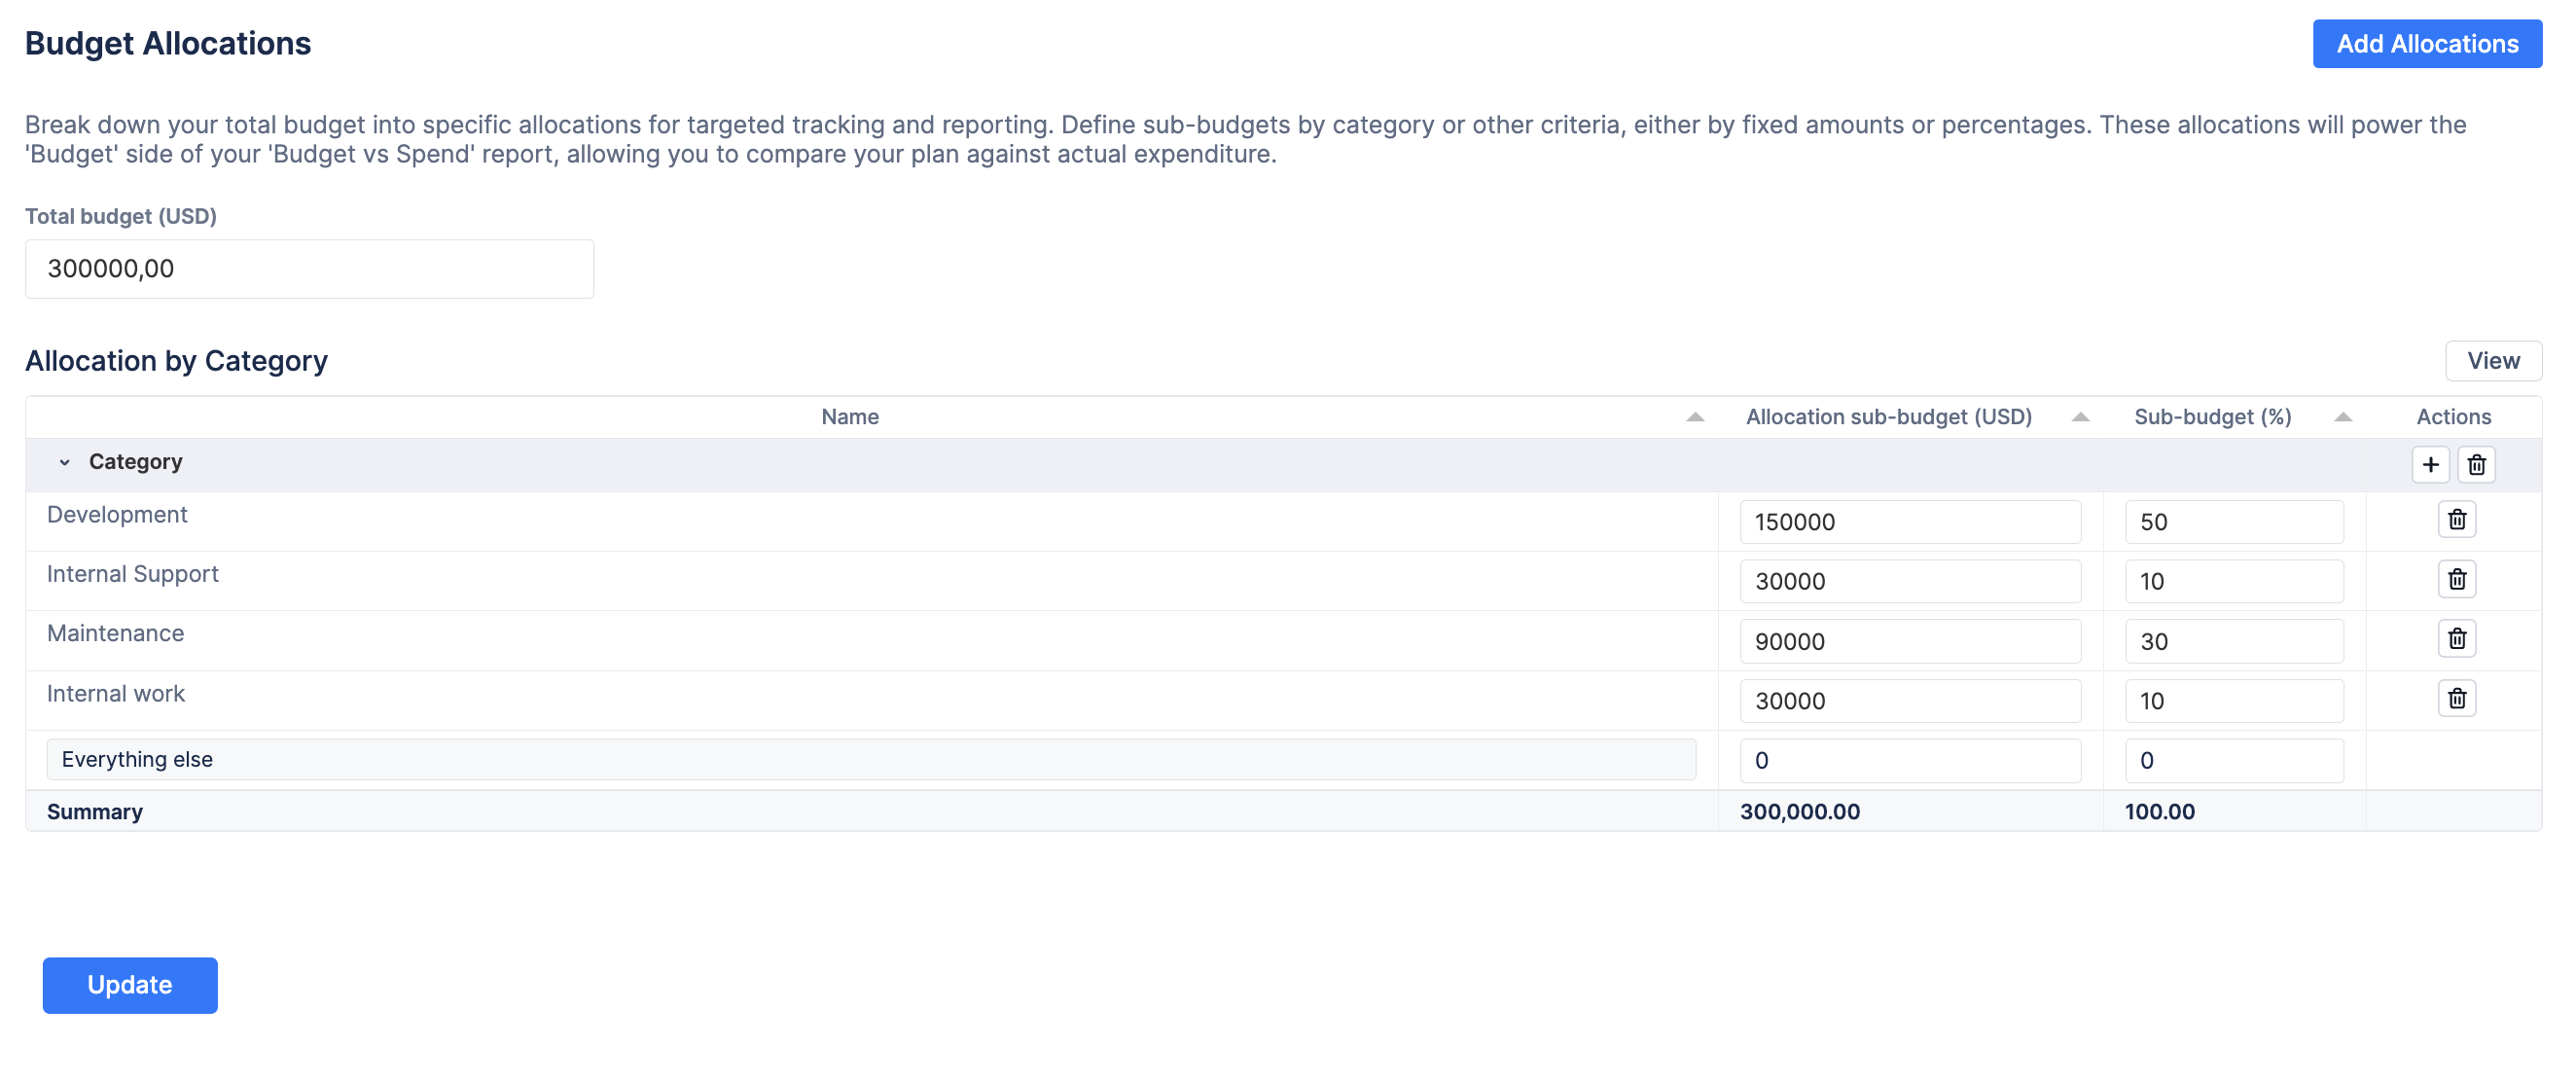
Step 4: Create Spending Targets (Allocations)
A $300,000 budget is hard to manage as a single number. You need to break it down.
-
Navigate to the Budget Allocations tab.
-
Click + Add Allocations and select a dimension like Category.
-
Split your approved budget into manageable buckets. For example: allocate 50% to "Development", 30% to "Maintenance", and leave 20% for "Internal work & support".
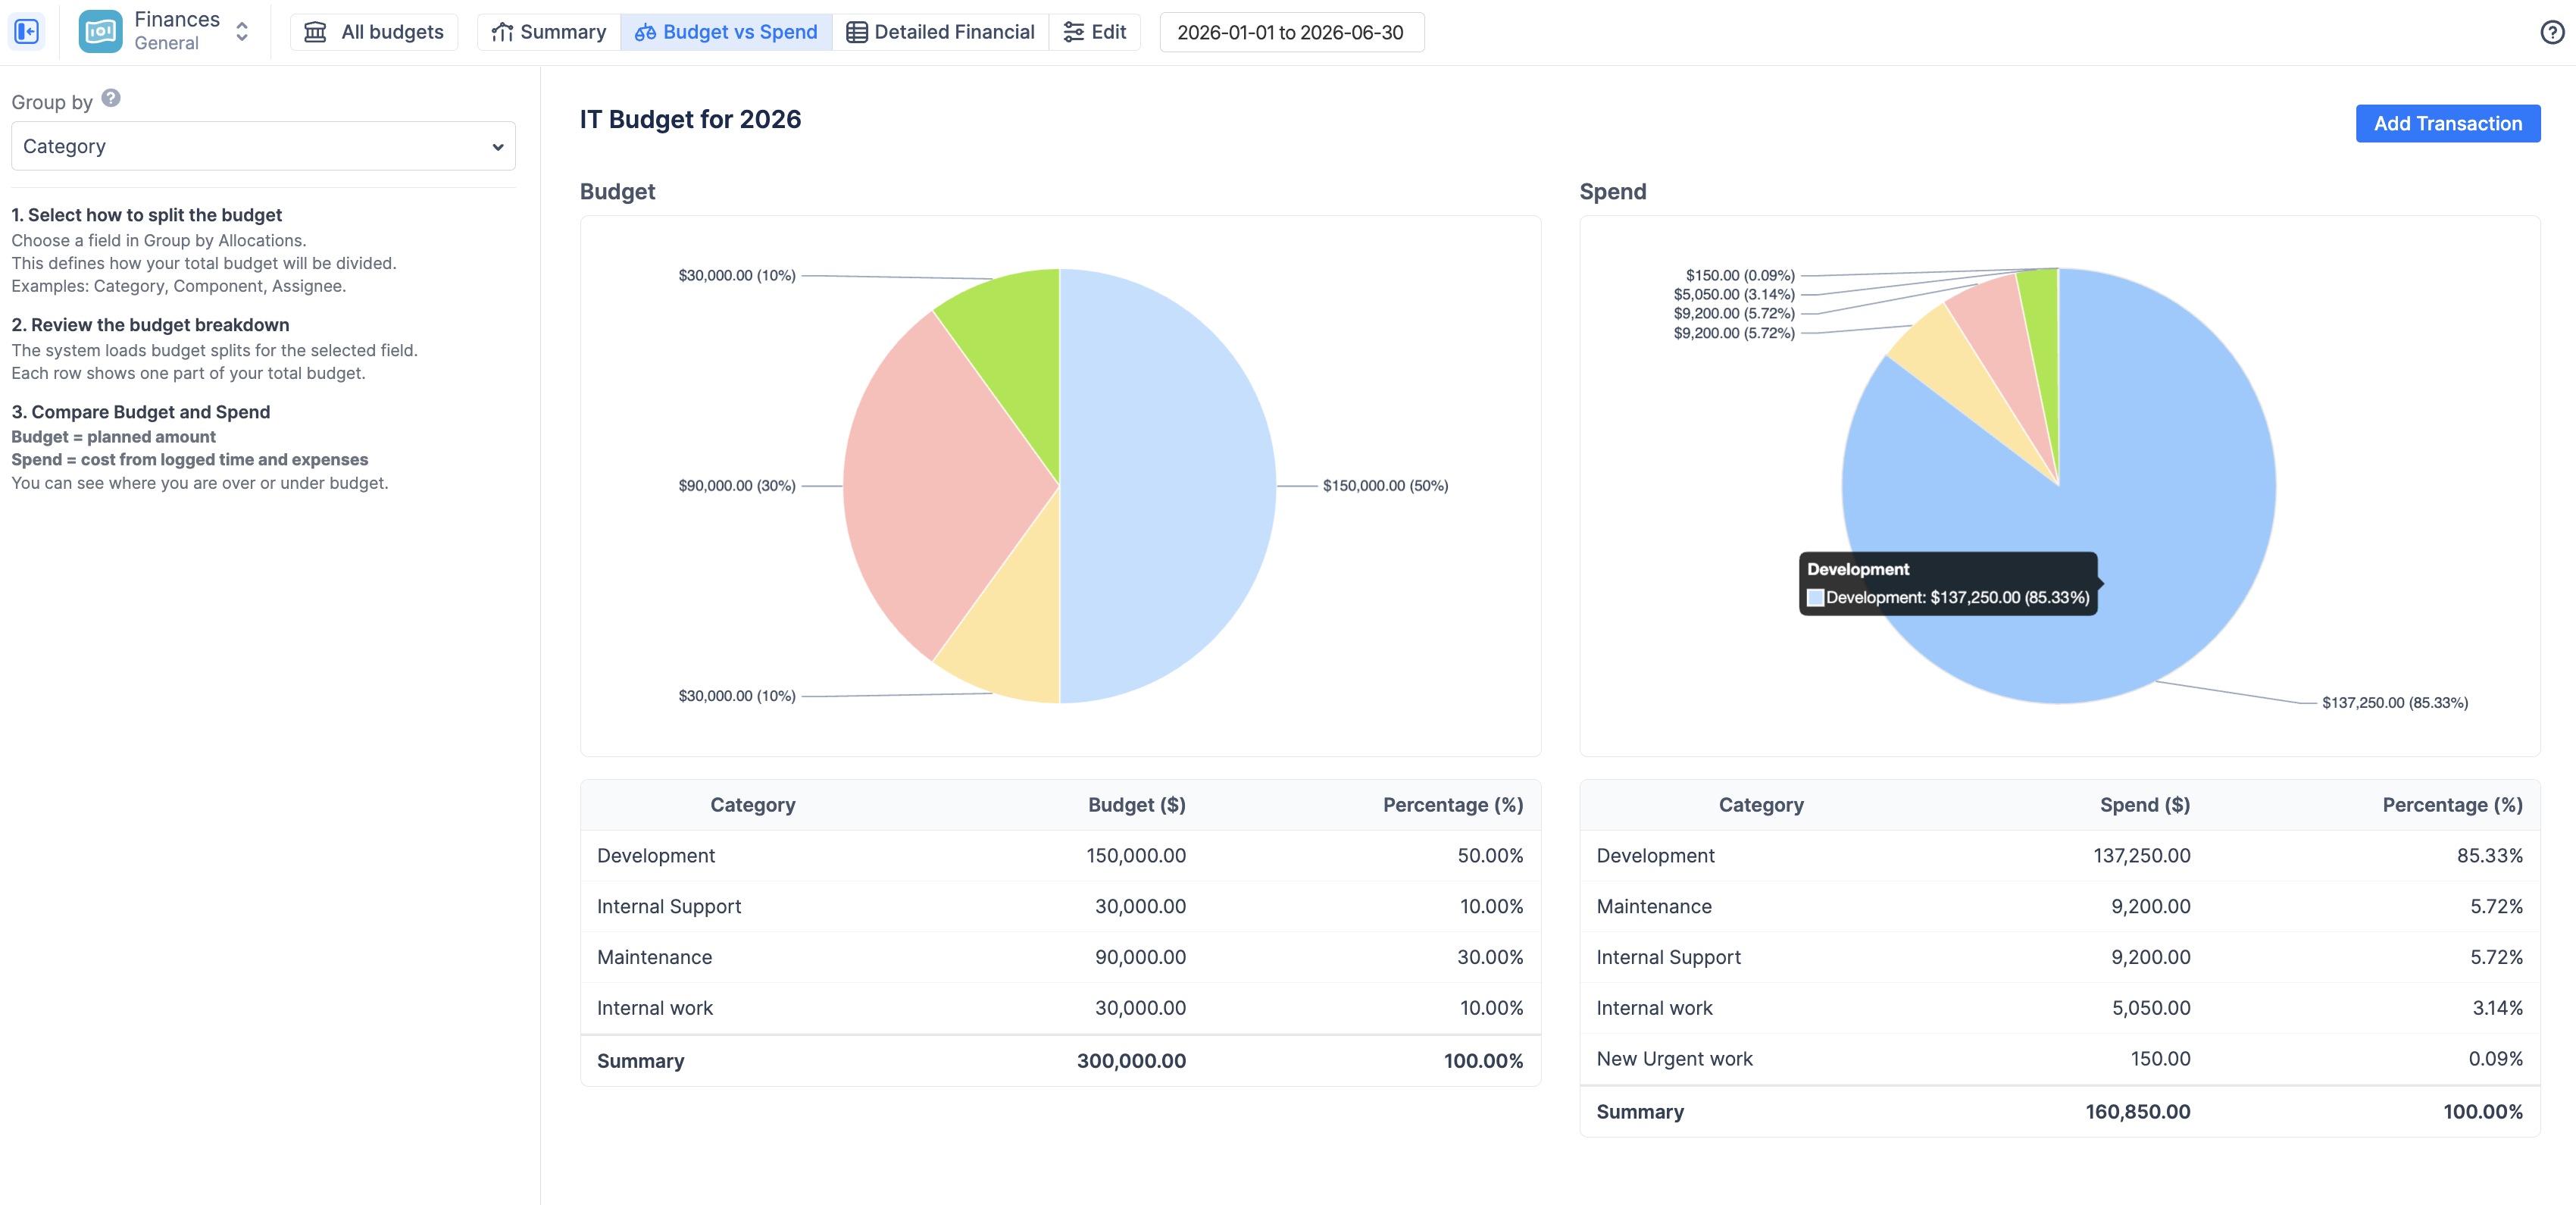
The Payoff: Strict Variance Tracking
With this setup, your Budget vs Spend report becomes your most essential tool for reporting back to leadership.
-
The Plan (Left Chart): This visualizes the exact budget breakdown you promised leadership.
-
The Reality (Right Chart): This visualizes your actual burn rate. The system automatically categorizes your team's logged hours and your manual expenses (like server costs) into this chart.
-
The Actionable Insight: If your target allocation for "Development" was 50%, but the Actual Spend chart shows it consuming over 85% of your costs, you instantly know you need to cut and refocus the priorities to avoid blowing your total budget, even if the overall project isn't out of money yet.
💡 Scenario Recap: The Internal Department
By combining a Manual Budget with strict Allocations, ActivityTimeline gives internal managers the granular visibility needed to protect their budgets and justify their department's spending.
The Key Takeaways:
-
The Setup: Use a Manual Budget to represent your hard cap. Configure only Cost Rates for your team, utilizing Monthly rates for salaried staff.
-
The Action: Mute revenue noise by selecting Fixed Revenue Tracking and adding zero revenue transactions. Divide your budget using Budget Allocations.
-
The Value: The Budget vs Spend pie charts provide an immediate, presentation-ready comparison of your approved departmental budget versus your actual operating costs.
Related Features for Internal Departments:
-
Monthly Labor Rates: As mentioned in Step 3, assigning a Monthly Cost Rate allows the system to automatically prorate a fixed employee salary into a daily operating cost, providing a highly accurate daily burn rate on your Summary Dashboard without relying on hourly calculations.
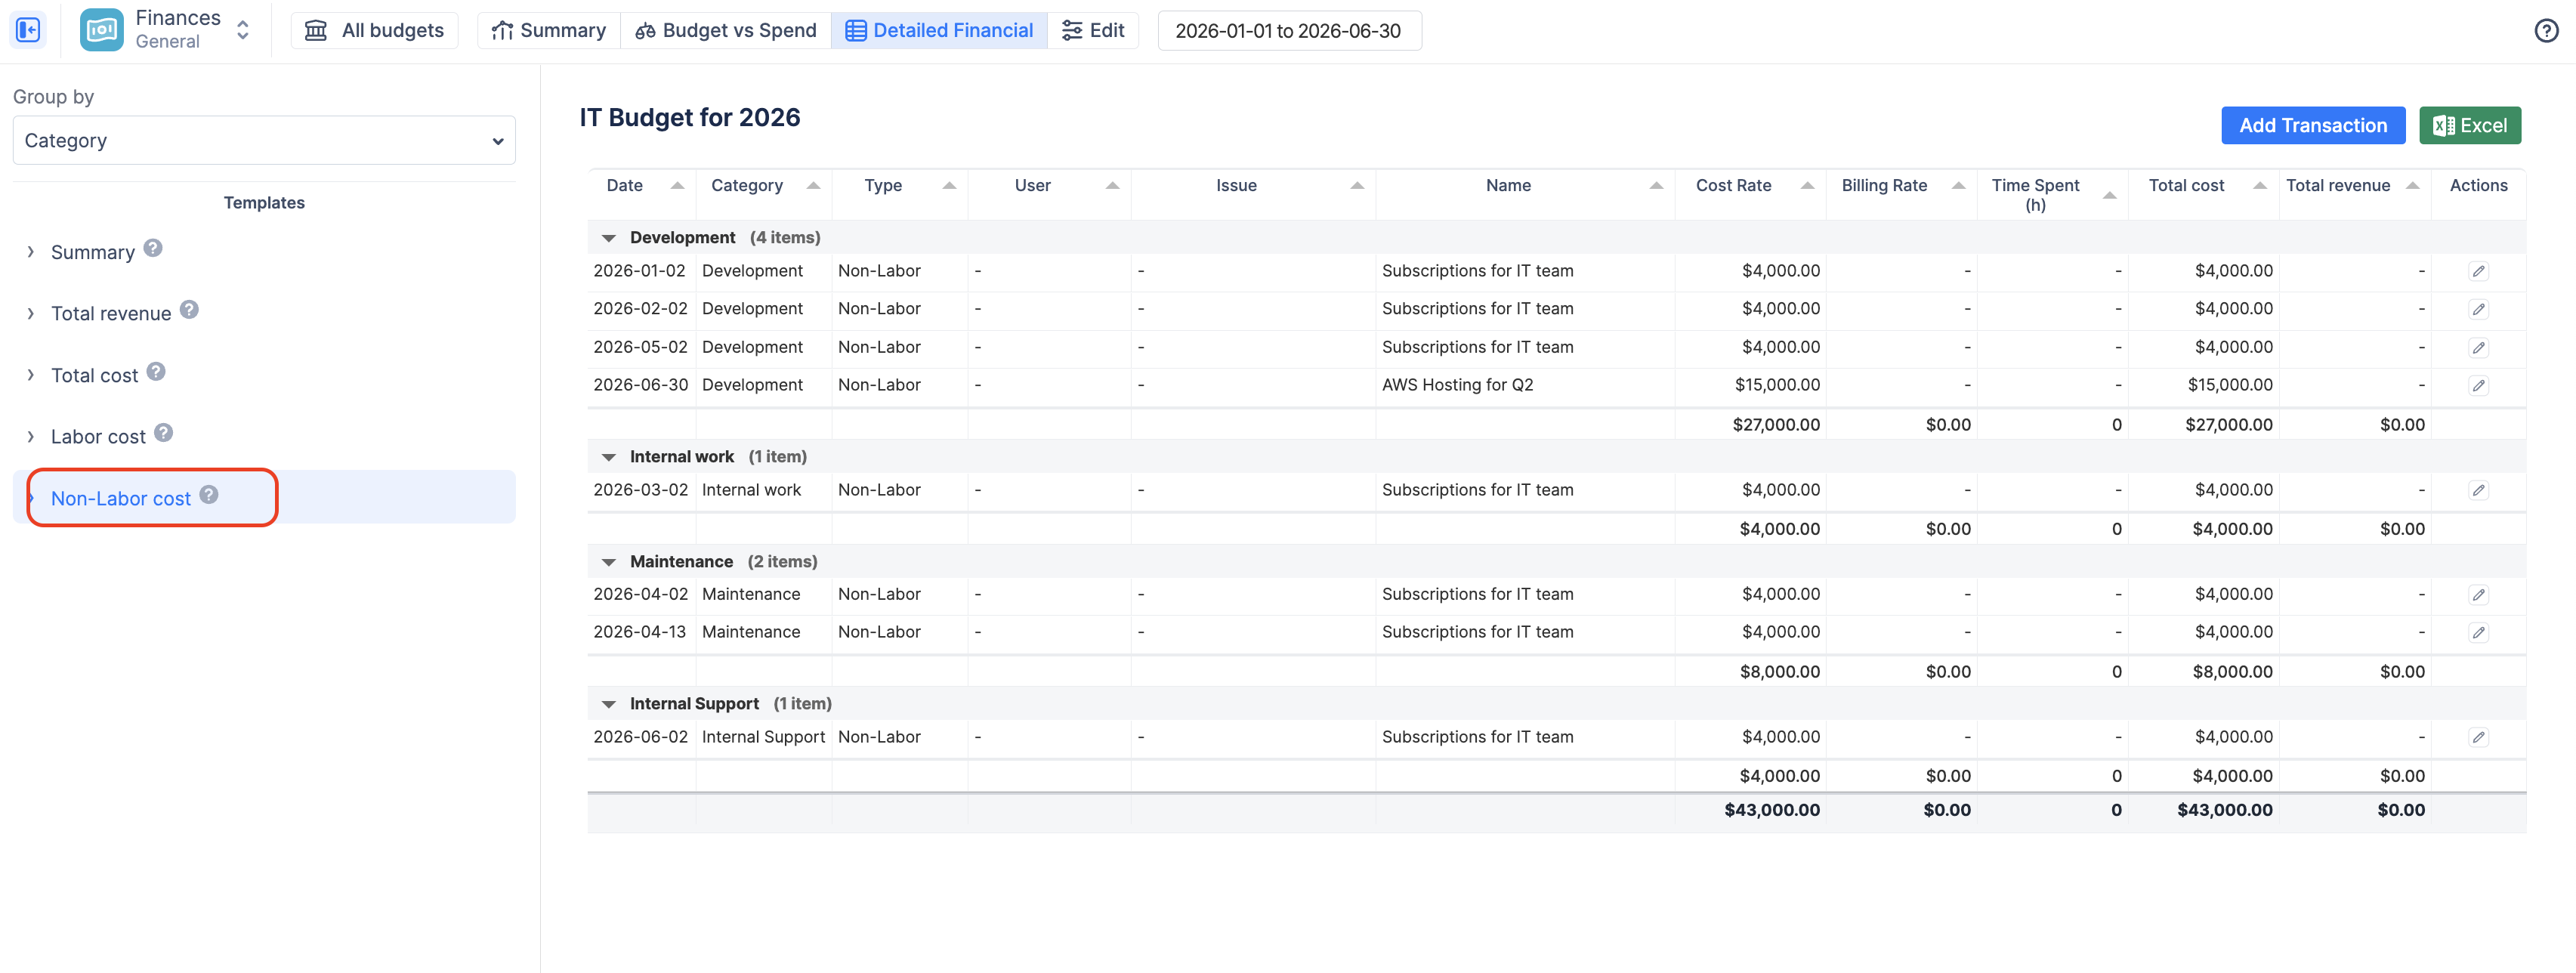
-
Non-Labor Cost Template: In the Detailed Financial
tab, use the "Non-Labor cost" template on the left panel to instantly filter out employee salaries. This gives you a clean list of just your departmental purchases, vendor invoices, and subscriptions to audit against your expense budget.