
The Situation
A new Epic, initiative, release, or customer project is expected to require capacity from a specific team.
You know which team will deliver the work, but it is too early to decide which individual team members will complete each task.
Assigning work to named users too early creates unnecessary detail and may result in frequent reassignment. At the same time, leaving the work completely unplanned makes the team appear more available than it really is.
The Primary Goal
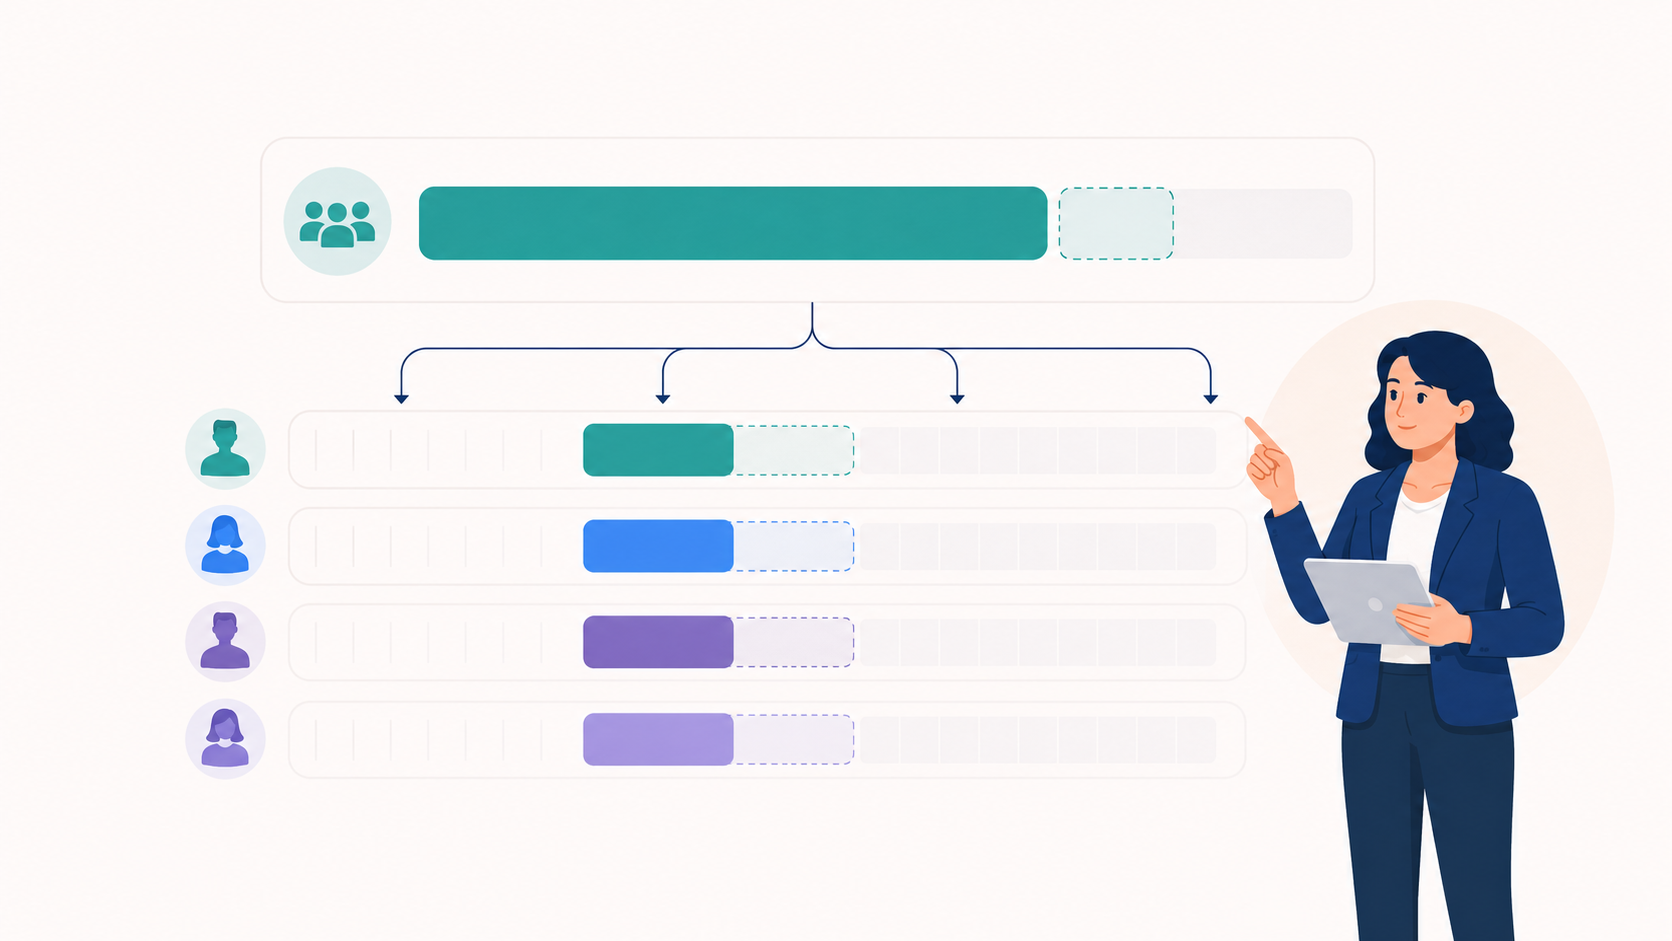
Reserve capacity at the team level, confirm that the team can accept the work, and distribute it to individual team members when delivery details become clearer.
What You’ll Use
|
Feature |
Purpose |
|---|---|
|
Plan work at a high level across one or more teams |
|
|
Schedule work before individual assignees are known |
|
|
Connect team-level planning with individual allocation |
|
|
See work that still needs to be distributed |
|
|
Review all team and individual commitments |
|
|
See how much capacity the team has left |
|
|
Verify team capacity across the selected period |
Before You Begin
Make sure that:
-
the relevant team exists in ActivityTimeline;
-
all expected team members belong to the team;
-
users have accurate workload and holiday schemes;
-
known vacations, holidays, and days off are included;
-
Jira issues have estimates if they should contribute to the workload;
-
the relevant Jira projects are enabled and synchronized.
Team capacity is calculated from the combined capacity of its members. Incorrect membership, workload schemes, or time-off data may make the team appear more or less available than it really is.
Step 1: Choose the Team and Planning Period
Open ActivityTimeline → Planner.
Switch from the default Users view to Teams.
Select the team or teams that may be responsible for the upcoming work.
Choose a planning period that matches the expected initiative:
-
Week or Two Weeks for short-term planning;
-
Month or Two Months for upcoming releases;
-
Quarter for larger initiatives;
-
Half a Year for portfolio or long-term planning.
The Teams view shows the workload and availability of entire teams without requiring you to review every individual timeline.
Use this view to answer the first question:
Which team has enough capacity to accept the work?
Learn more: Team Panel
Step 2: Check the Team’s Remaining Availability
Before reserving additional capacity, review the team’s current commitments.
Click the cog icon on the Team Panel workload indicator and select Total Team Availability.
This mode considers:
-
each team member’s personal capacity;
-
Jira work already scheduled for team members;
-
work scheduled directly on the Team Panel;
-
vacations, holidays, sick leave, and days off;
-
other planned activities that reduce availability.
Hover over the workload indicator to review the team’s available and utilized capacity for the selected period.
Check whether the team has enough remaining capacity for the new work.
For example, if a team has 400 available hours during the month but already has 300 hours planned, only 100 hours remain for additional work.
Do not reserve the full 100 hours automatically. Consider whether the team needs a buffer for support requests, meetings, incidents, or other unplanned activities.
Step 3: Reserve Capacity at the Team Level
Choose the planning method based on what is already known about the future work.
Schedule an Existing Jira Issue
Use this option when the Epic, initiative, or issue already exists in Jira.
You can assign the issue to the team in several ways:
-
drag the issue from the Issues Panel onto the Team Panel;
-
open the issue in ActivityTimeline and select the team instead of an individual user;
-
set the Team field in Jira and synchronize the issue with ActivityTimeline.
Once assigned at the team level, the issue appears on the Team Panel and its estimate contributes to team workload.
Learn more: ActivityTimeline Team Field for Jira
Create a Booking
Use a Booking when you need to reserve a specific amount of team capacity but no Jira issue is ready.
For example:
-
allocate part of the team to maintenance work;
-
protect capacity for a planned release;
-
reserve time for an internal initiative.
Create the Booking on the Team Panel and define its dates and required daily capacity.
Create a Placeholder
Use a Placeholder when the work is tentative or the estimate may still change.
For example:
-
an initiative is waiting for approval;
-
the project scope is not finalized;
-
the team is only being considered as one possible delivery option;
-
the Jira work breakdown has not yet been created.
The Placeholder reserves capacity without requiring you to finalize the Jira plan.
Bookings and Placeholders can be created directly on the Team Panel together with Jira issues and Notes.
Step 4: Monitor Team-Level Commitments
After adding the future work, use the Team Panel workload modes to understand the plan from different perspectives.
Team Panel Workload
This mode shows only work scheduled directly on the Team Panel.
Use it to answer:
How much work is still planned at the team level and has not yet been distributed to individual users?
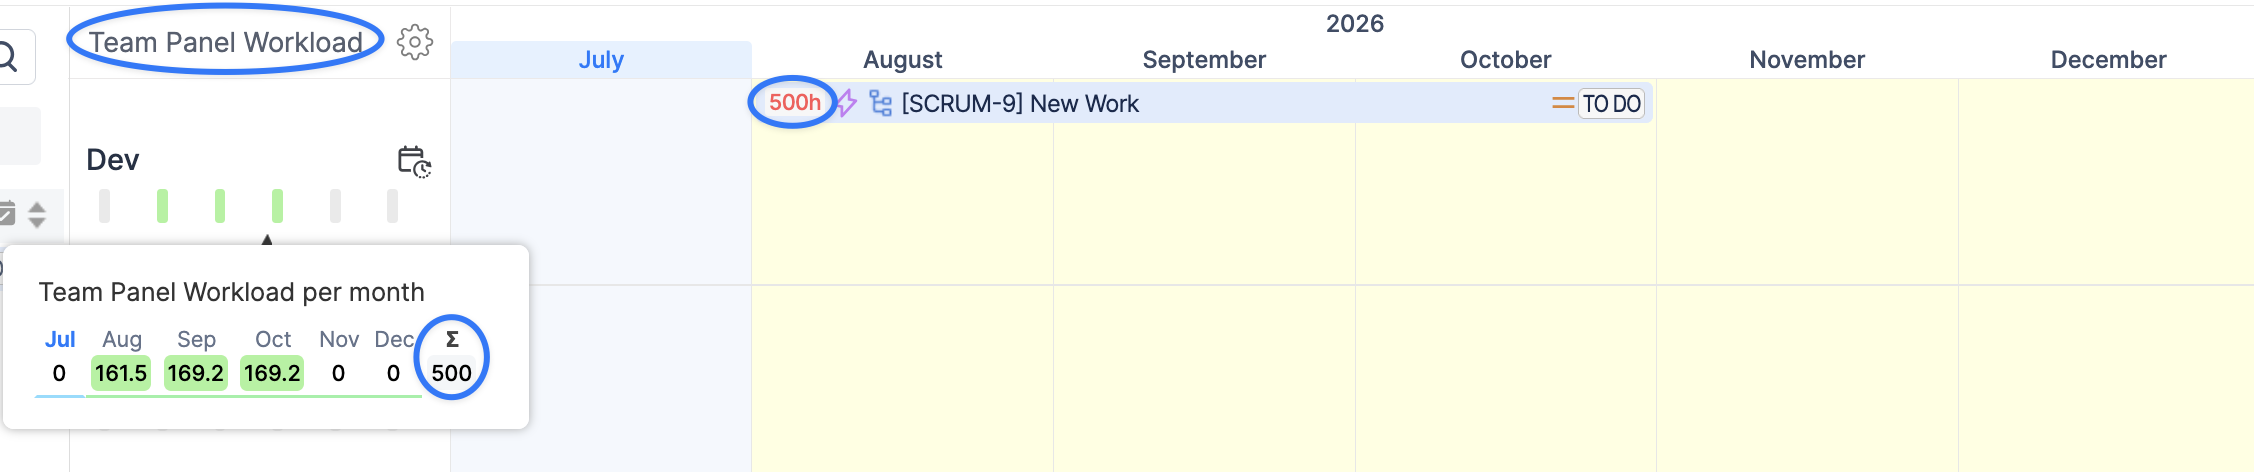
This is the most useful mode during early-stage planning.
Total Team Workload
This mode includes:
-
work scheduled directly on the Team Panel;
-
work already assigned to individual team members.
Use it to answer:
How much work has the team committed to in total?
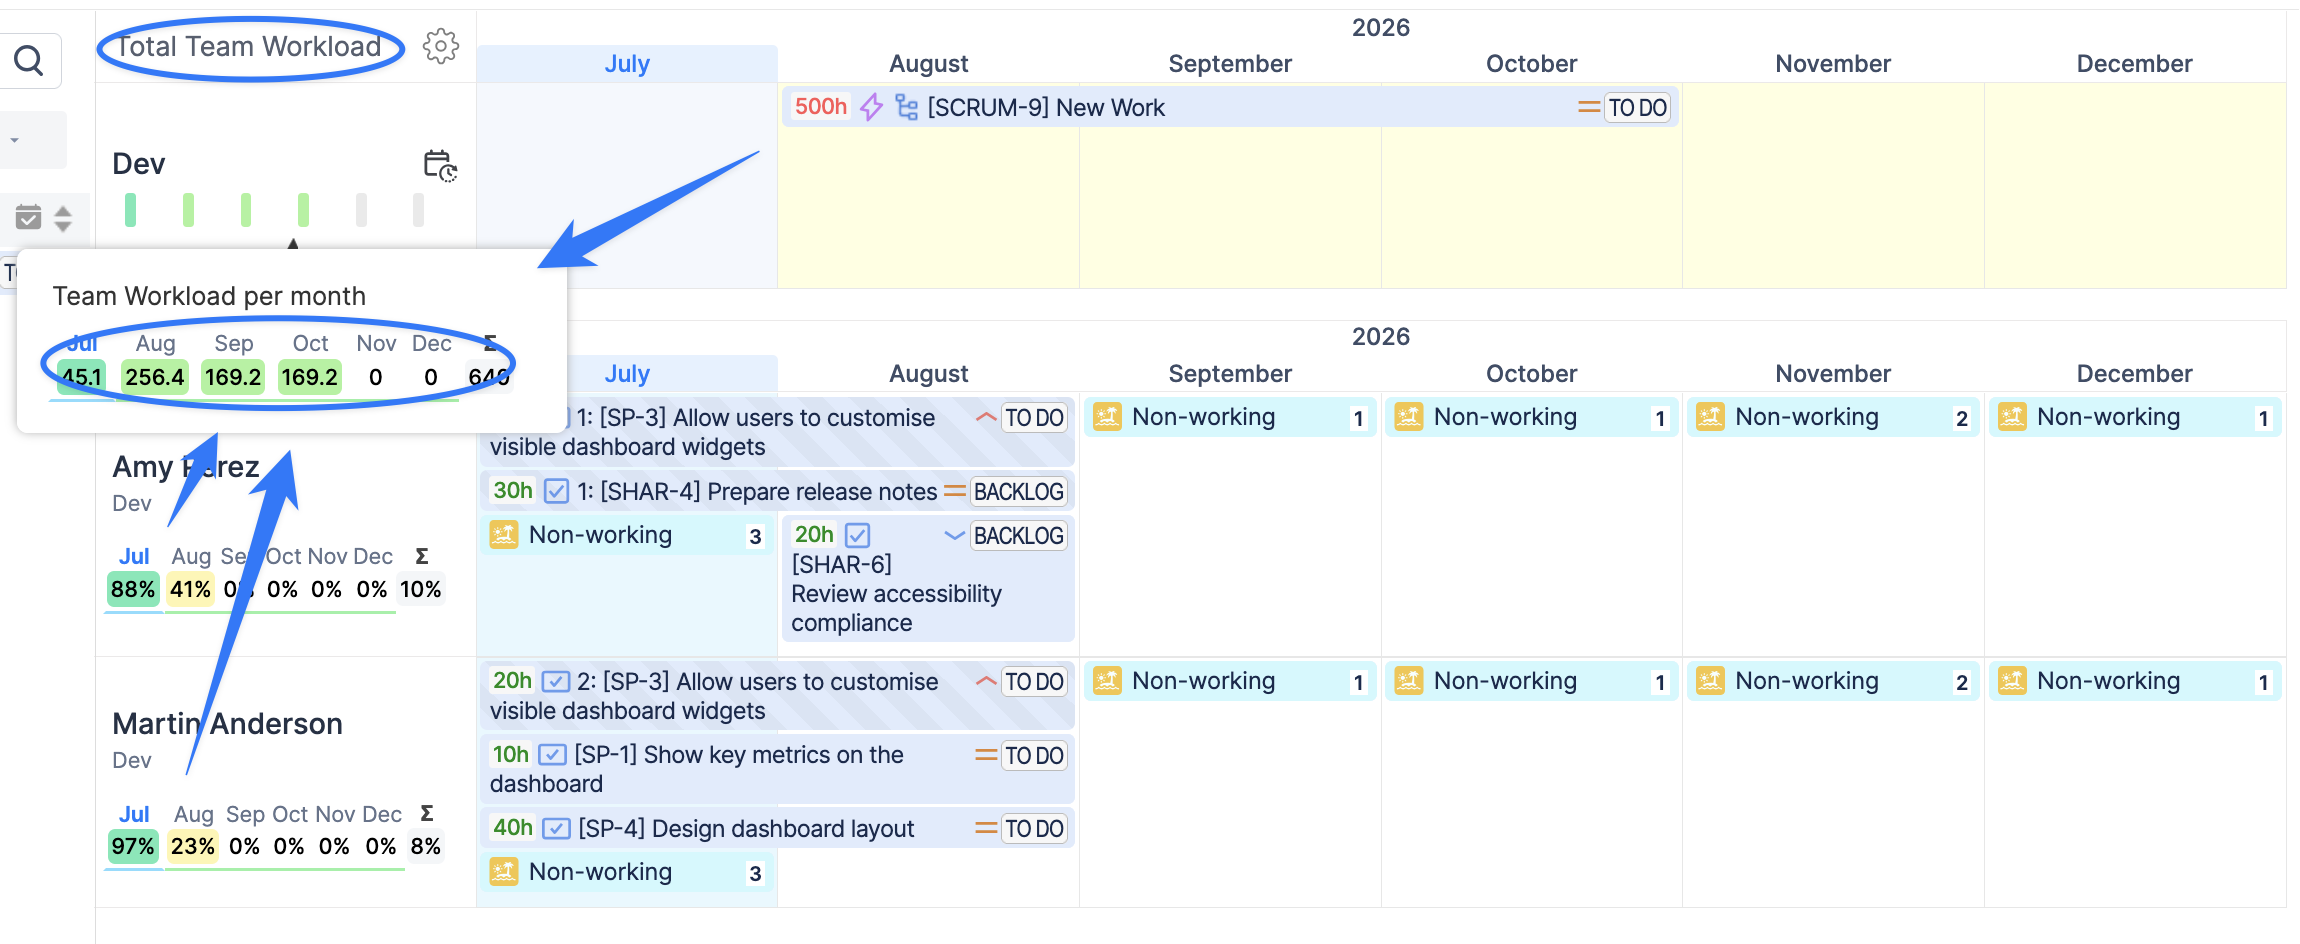
This mode becomes especially useful when part of the initiative has already been distributed to users while the remaining work is still planned at the team level.
Total Team Availability
This mode shows how much capacity remains after team-level work, individual assignments, and non-working time are considered.
Use it to answer:
Can the team accept more work during this period?
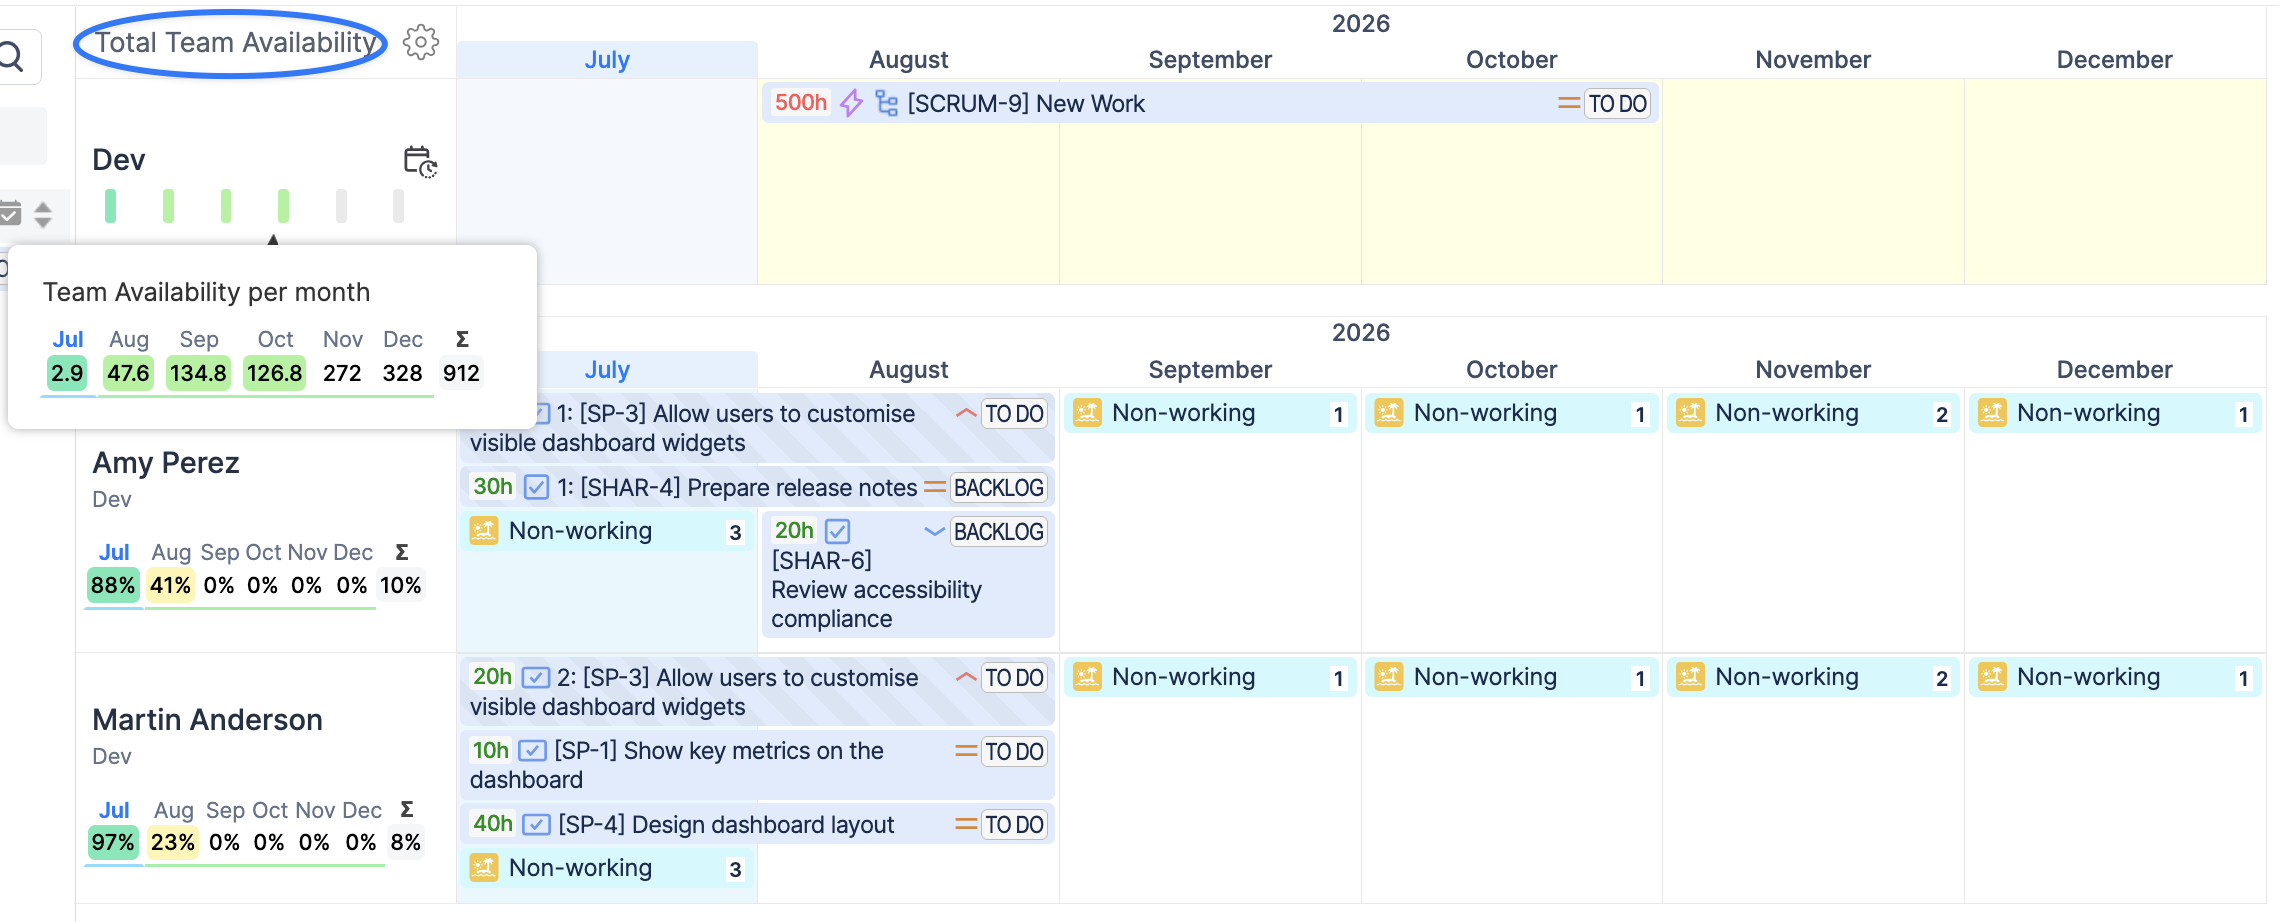
Learn more: Team Panel Workload Modes
Step 5: Compare Multiple Teams
If more than one team could deliver the work, select several teams in the Planner.
Compare their:
-
total available capacity;
-
existing commitments;
-
workload during the required period;
-
remaining availability;
-
ability to meet the expected delivery dates.
When selecting a team, do not consider capacity alone.
Also review:
-
whether the team has the required skills;
-
whether the team is already committed to higher-priority work;
-
whether the new initiative overlaps with releases or operational responsibilities;
-
whether another team could take part of the scope.
Once you identify the most suitable team, assign or move the planned work to that Team Panel.
Step 6: Distribute Work to Individual Team Members
When the scope, timing, and responsibilities become clearer, switch to Team with Users view.
This view displays:
-
the Team Panel;
-
all team members;
-
team-level workload;
-
each person’s individual workload and availability.
Review the availability of individual team members before assigning the work.
To move from team-level planning to individual execution:
-
Select a team-level Jira issue.
-
Update the assignment from the team to the responsible user or simply dragndrop it.
-
Confirm or adjust the scheduled dates.
-
Review the user’s workload indicator.
-
Repeat for the remaining work.
Once the issue is assigned to an individual, it appears on that user’s timeline instead of the Team Panel.
ActivityTimeline displays the issue at only one level at a time. This prevents the same estimate from being counted both as team-level and individual workload.
If several people need to contribute to one issue, split it into Issue Parts and define a separate assignee, estimate, and schedule for each contribution.
Continue using Team Panel Workload to identify work that still requires individual allocation.
When the Team Panel Workload reaches zero, all team-level work has been distributed.
Step 7: Verify the Team Capacity
Open Reports → Team Capacity Chart.
Configure the chart using:
-
Period: the initiative or planning period;
-
Teams / People: the selected team;
-
Report By: all work;
-
Units: Week or Month.
Include the relevant data sources (default):
-
Jira Issues;
-
Placeholders;
-
Bookings.
The chart shows:
-
total available capacity;
-
utilized capacity;
-
remaining capacity;
-
utilization rate;
-
workload distribution across the selected period.
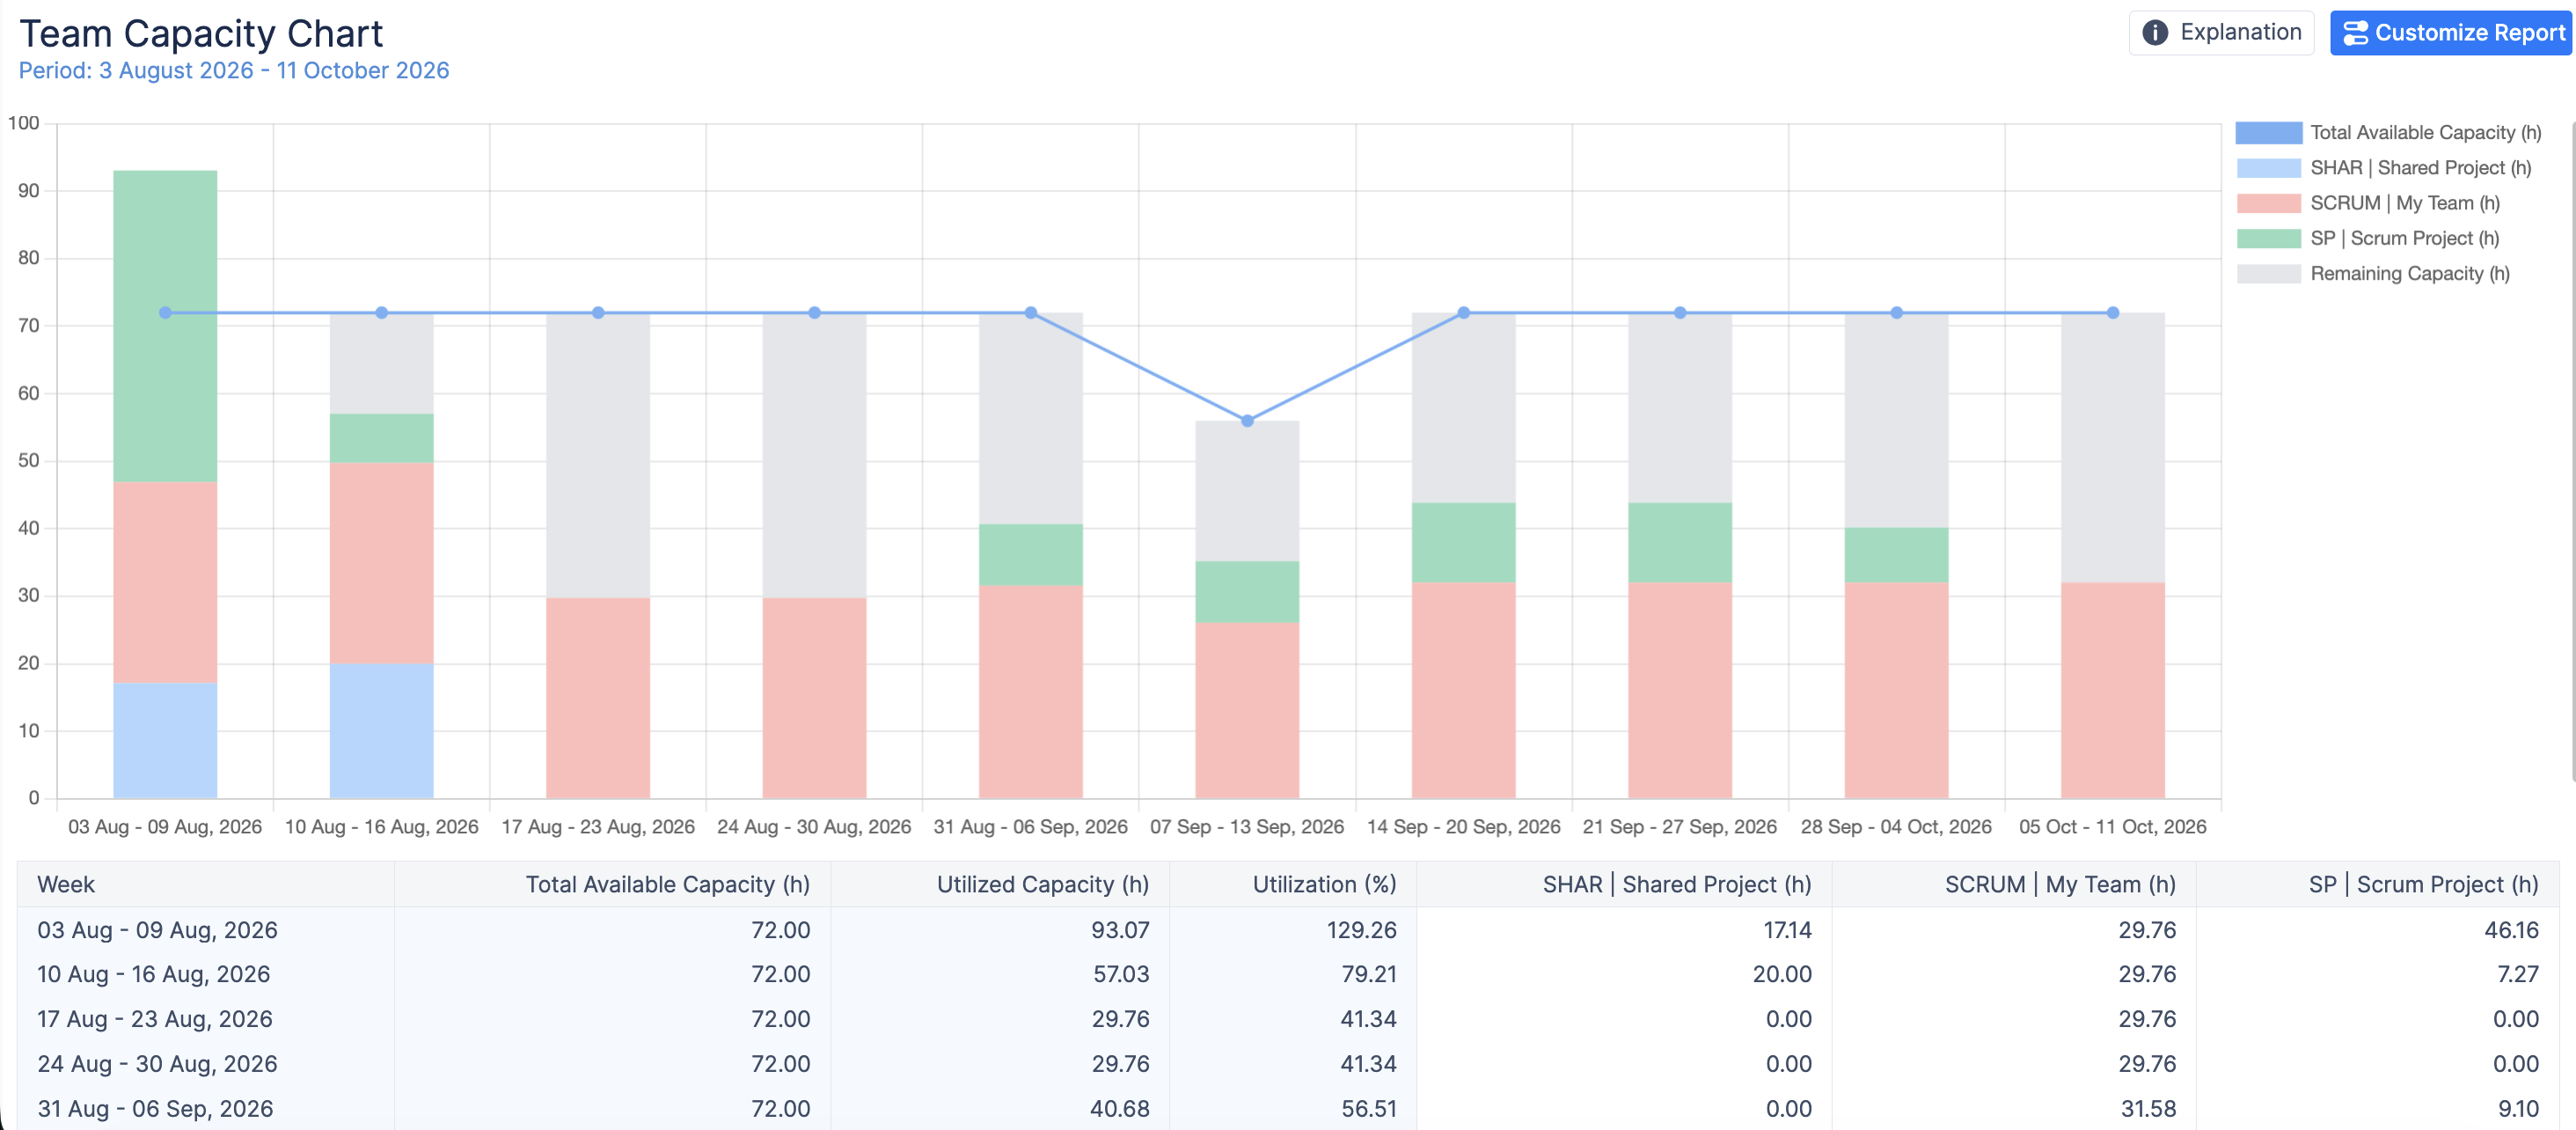
Because the Team Capacity Chart includes work from both the Team Panel and individual team members, you can use it before and after detailed allocation.
Confirm that:
-
the reserved capacity fits within the team’s availability;
-
the team still has an appropriate buffer;
Learn more: Team Capacity Chart
Important: Team-Level Planning vs Individual Planning
Team-level planning is intended for high-level capacity reservation.
It shows how much work the team has accepted, but it does not replace individual planning when execution begins.
Use:
-
Teams view when you need to decide which team should deliver the work;
-
Team with Users view when you are ready to distribute the work;
-
Users view when detailed individual planning becomes the main focus.
This allows the plan to move gradually from an early commitment to an actionable schedule without assigning people before the necessary information is available.
Expected Result
After completing this workflow, you will have:
-
capacity reserved before individual assignees are known;
-
a realistic view of the team’s total commitments;
-
visibility into work that still needs individual allocation;
-
high-level plans connected with detailed user schedules;
-
no duplicated workload between team and individual timelines;
-
a Team Capacity Chart confirming that the final allocation is realistic.