
What it does
The Planner is the main area for scheduling and capacity planning.
It allows you to:
-
assign Jira work items to people or teams,
-
schedule work across time,
-
add vacations, bookings, and other events,
-
see workload and availability.
This is where most planning decisions are made.
Required Permissions
-
Administrator - Can see all teams and users.
-
Manager - Can see all teams and users.
-
Power Team Lead - Can see all teams and users.
-
Team Lead - Can see only Teams he/she belongs to or manages.
-
Power Employee - Can see all teams and users.
-
Employee - Can see only Teams he/she belongs to.
-
Limited Employee - Can see his/her timeline only.
How it works
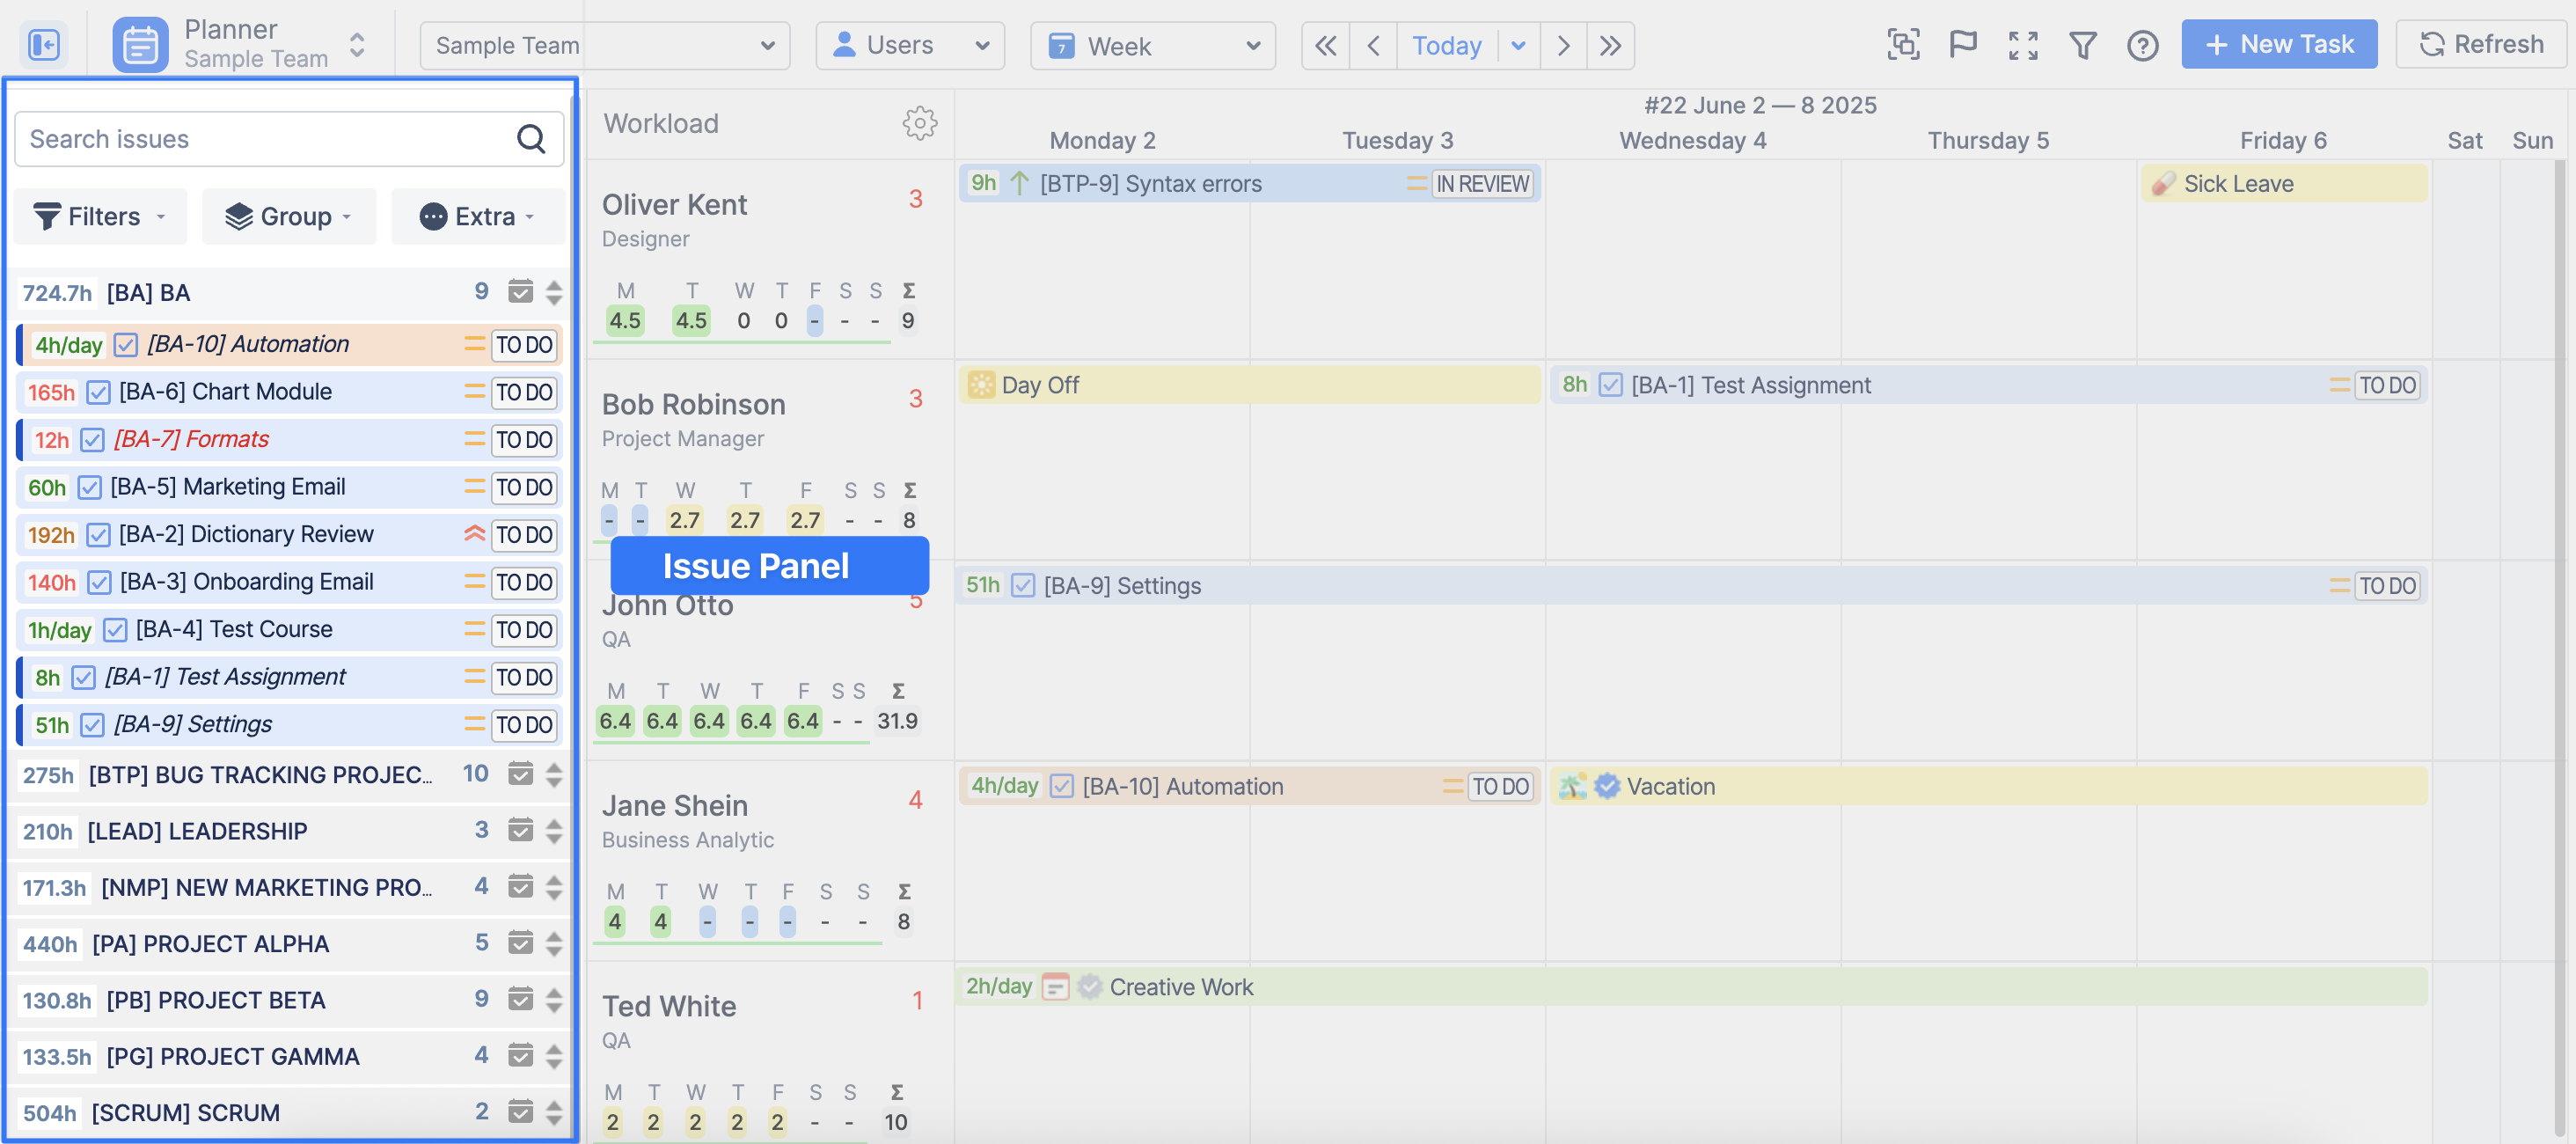
Planner has two main areas:
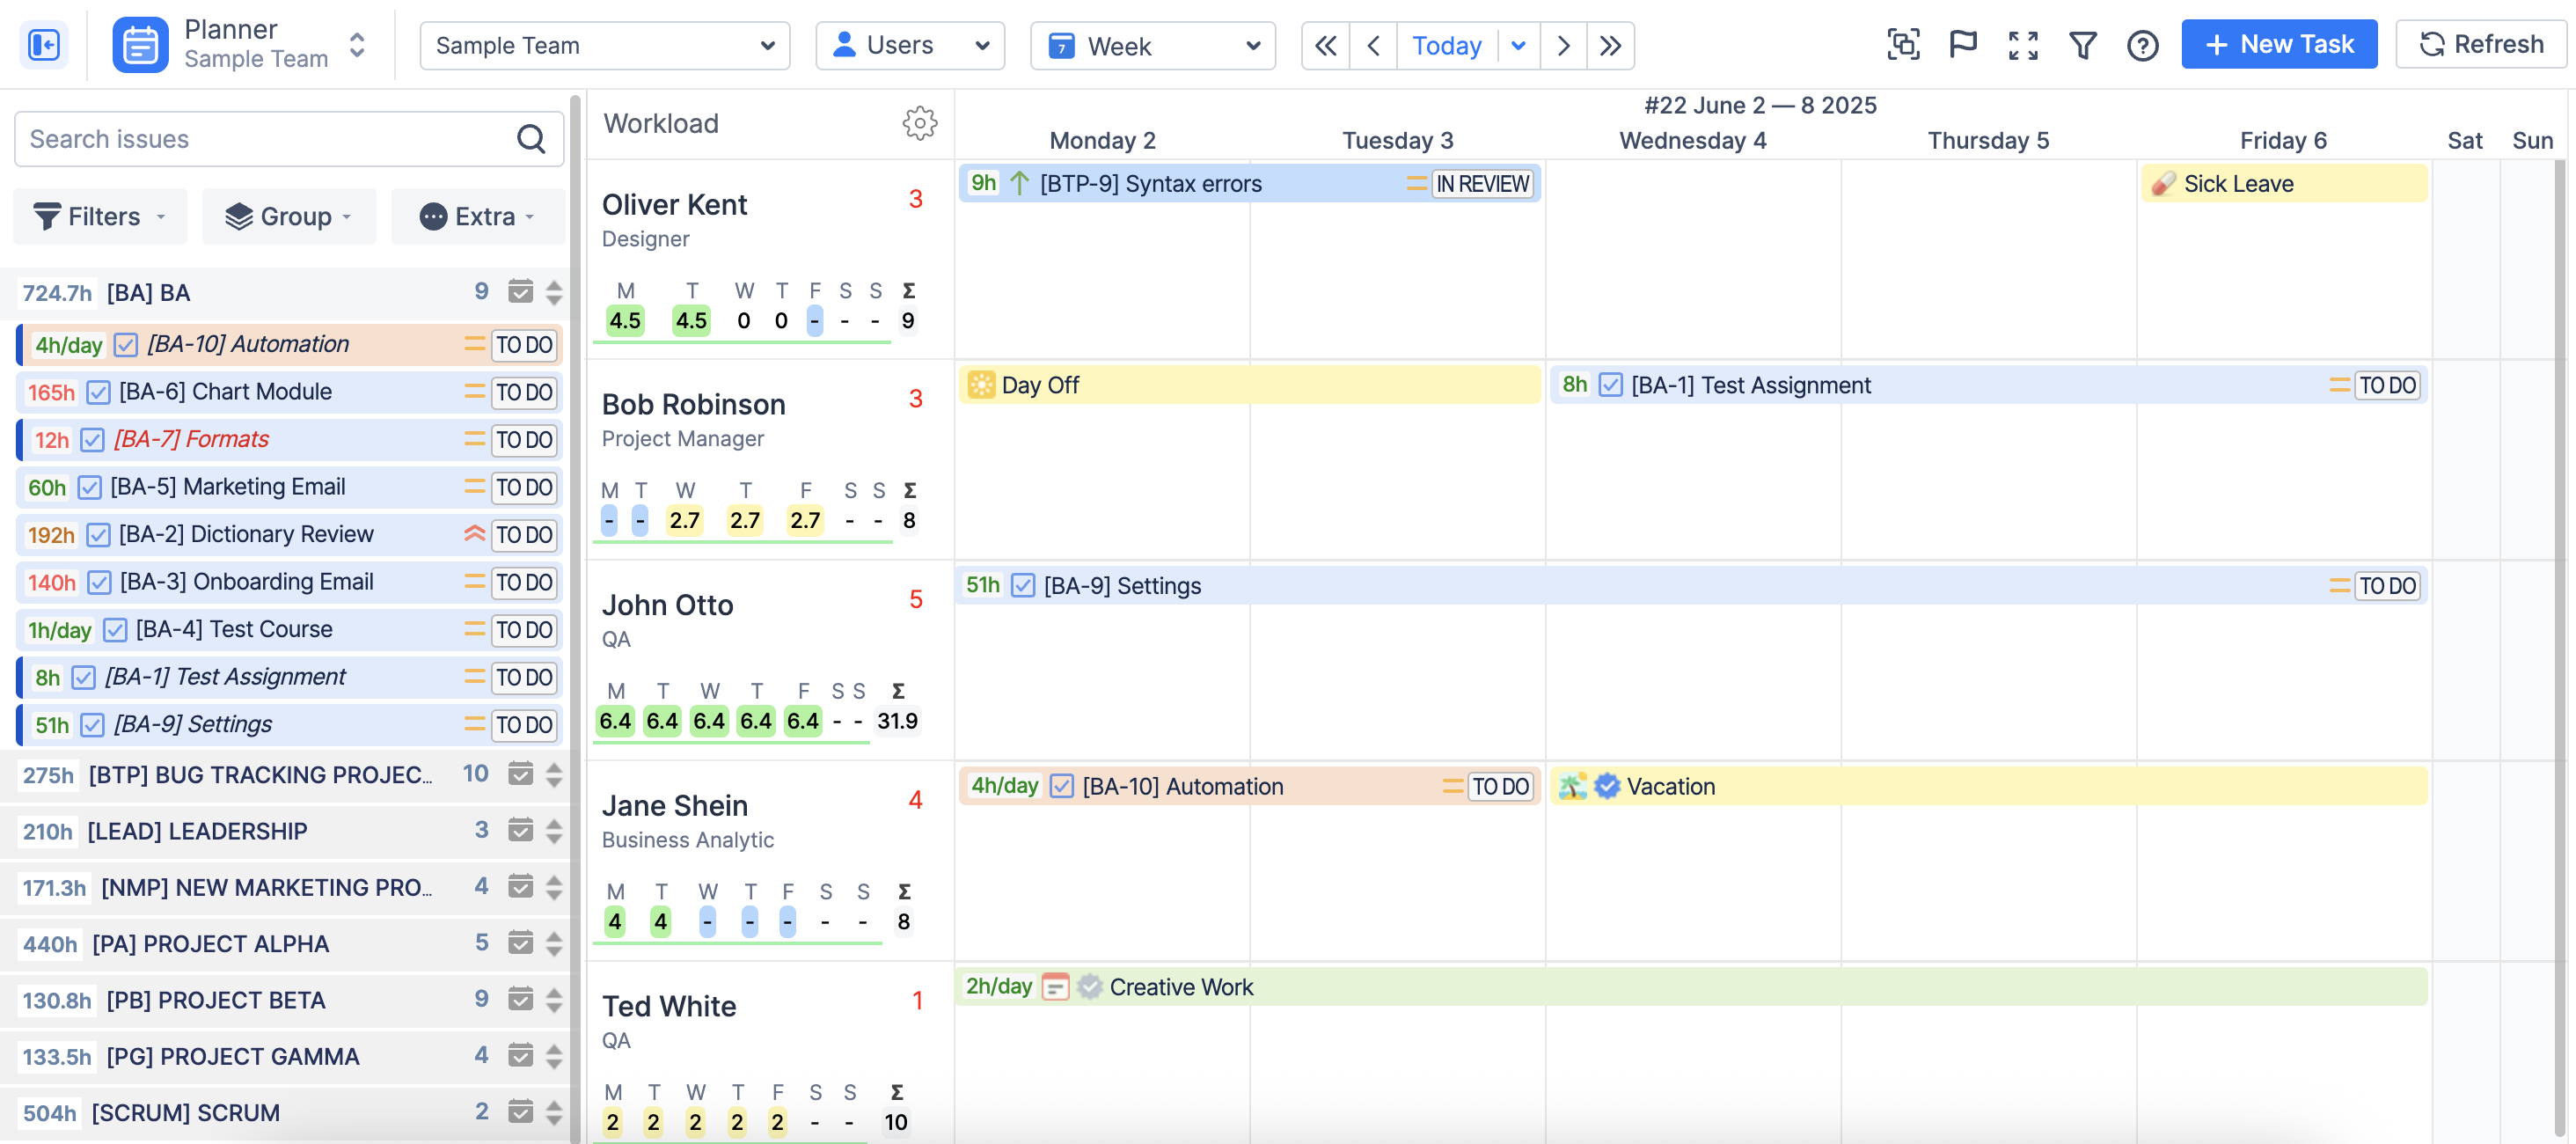
-
Issues Panel (left) — list of Jira tasks.
-
Timeline (right) — calendar view of work.
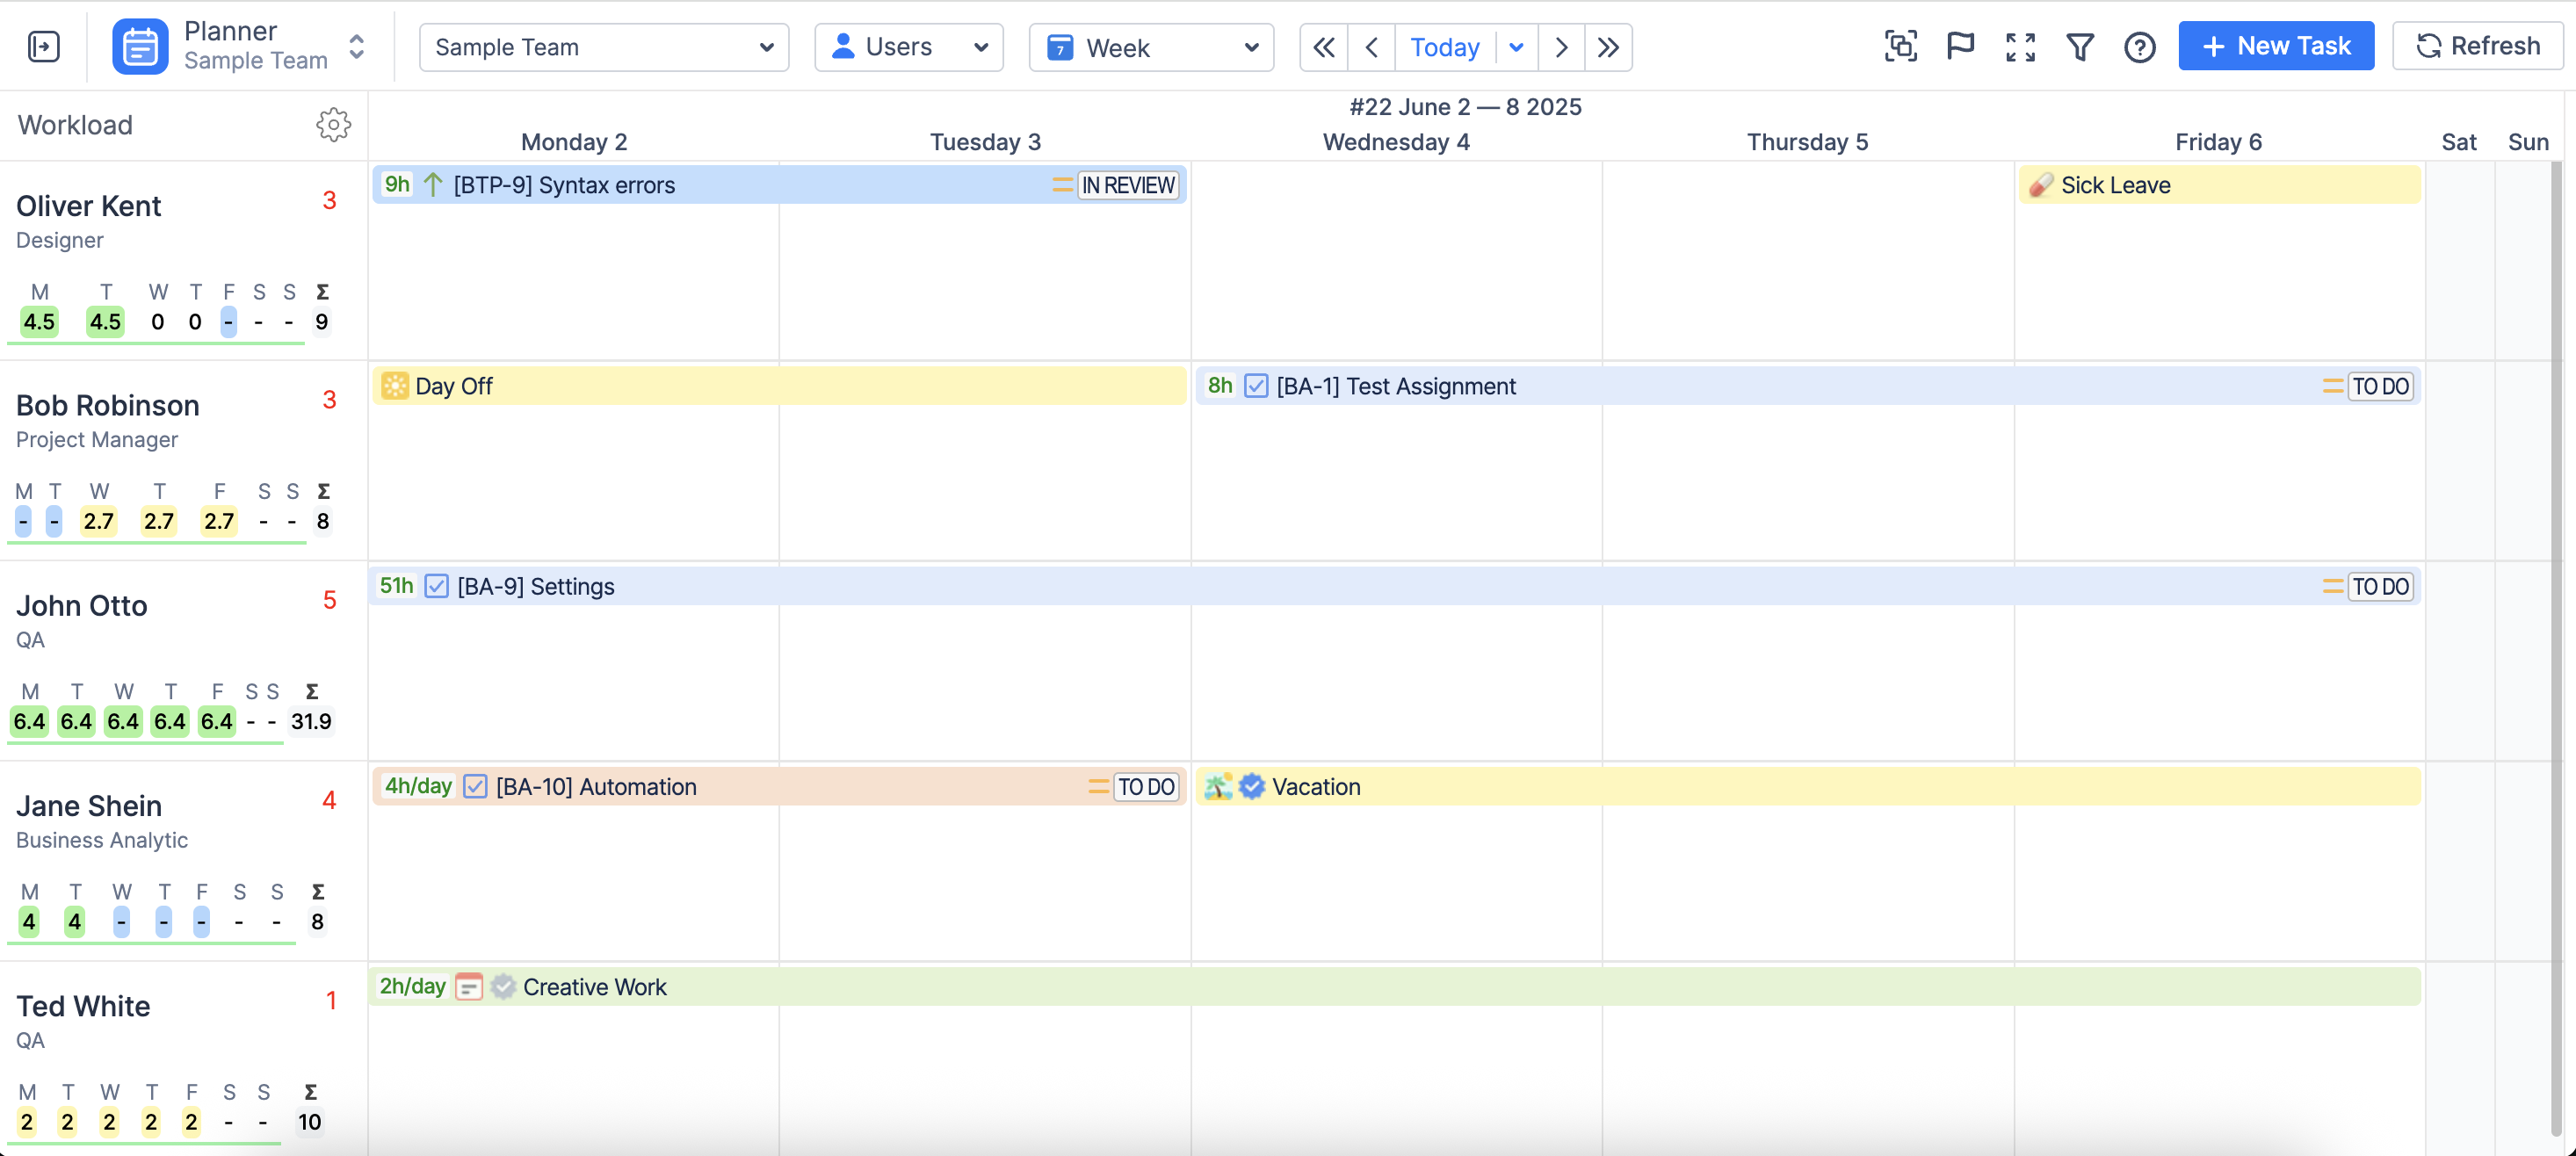
Each row represents a person or a team.
Each column represents time (days, weeks, months).
Issue Panel
On the Issues Panel as well as on the timeline each Jira work item appears in a separate blue bar. It displays key details about the issue directly on the timeline, so you don’t need to open it to understand what’s going on.
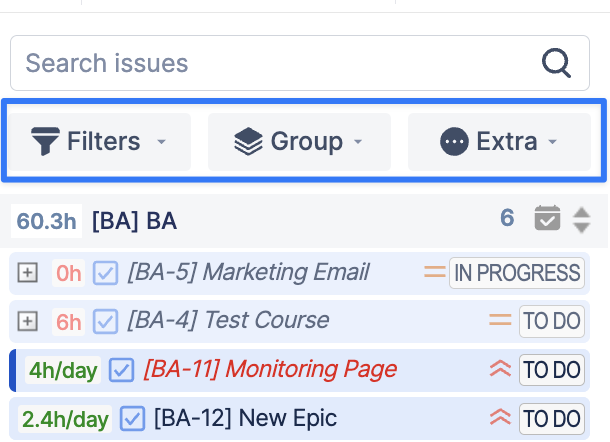
With Issue Panel you can:
-
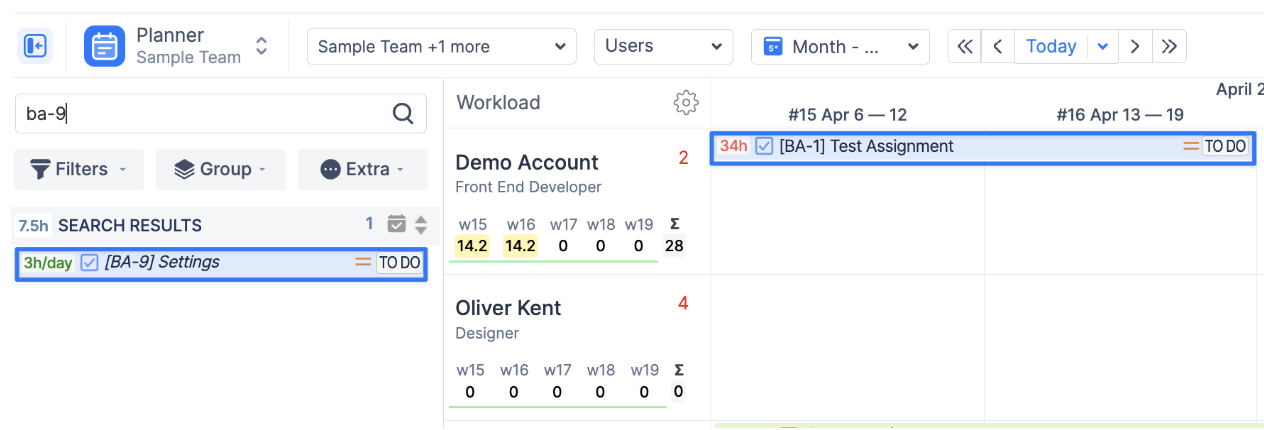
search for Jira issues,
-
filter and group issues,
-
sort results,
-
use the Extra tab for additional data.
All about Filters, Group, and Extra tab you can find on Left Issues Panel page.
Timeline Panel
The Timeline Panel is the main working area of the Planner. It is organized in a grid:
-
Rows → represent users or teams
-
Columns → represent time (days, weeks, months)
-
Bars → represent work (Jira issues or custom events)
This structure allows you to see the full plan at a glance.
Several timeline options are available from the Period dropdown list: Week, Two Weeks, Month-Daily, Month-Weekly, Two Months, Quarter, Half a Year, Year, and etc.
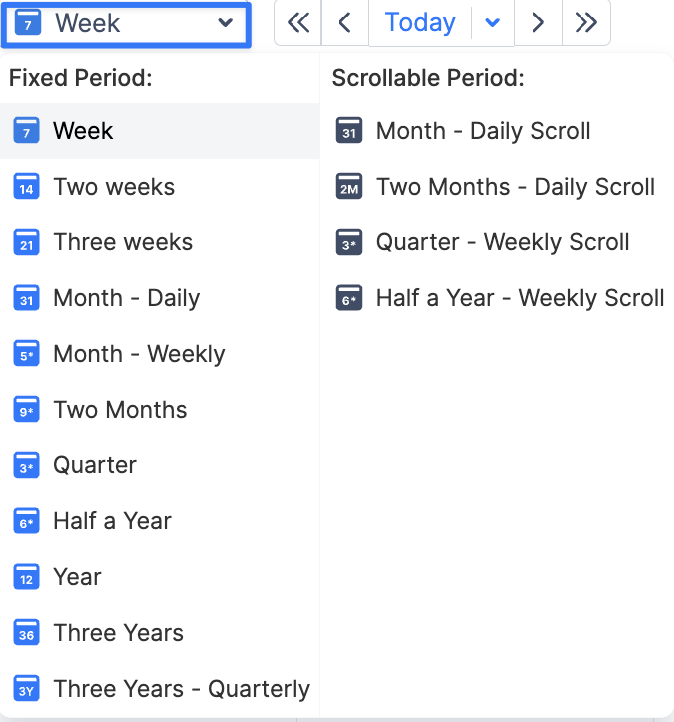
In the example below, Week and Month Daily options are selected. Each column represents a unit of time (day, week, or month), depending on the selected view.
Timeline includes tools to control what you see. For example:
-
Filters — It helps to filter Jira tasks and Custom events.
-
Aggregated view — Group or simplify data.
-
Milestone panel — Represents high-level data like releases, demos, deadlines, events, sprints etc.
-
Saved dashboards — Quickly return to useful views.

These controls help you focus on the right information. To learn more visit: Planner - Capacity Planning .
Interacting with the Planner
Planner is not just a view — it is fully interactive. You can:
-
Move or reschedule, drag the card
-
Adjust duration, resize the card
-
Open item for more details, click the card
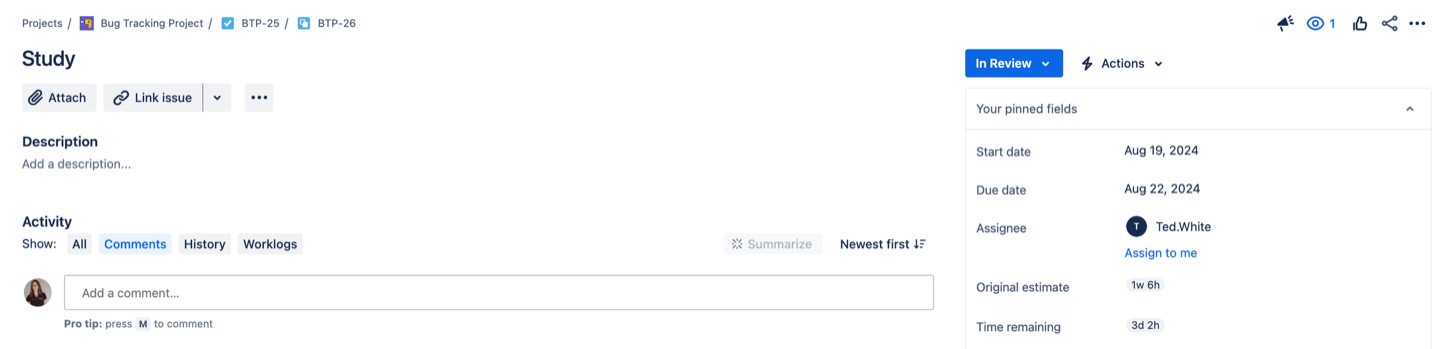
Issue/ Event Bar vs Card
-
Issue Bar — always visible on the Timeline and in the Issues Panel. The bar gives a quick overview of the task, including key information such as name, status, and estimate.
-
Issue Card — appears when you click the issue bar and shows detailed information.

Click once the bar → the card opens.
Once opened, the issue card shows additional information such as:
-
status and assignee
-
estimates (original, remaining, time spent)
-
start and end dates
-
quick action buttons (Open, Estimate, Schedule, Split, Log Work)
You can configure what information is shown in the Issue Bar and Issue Card.
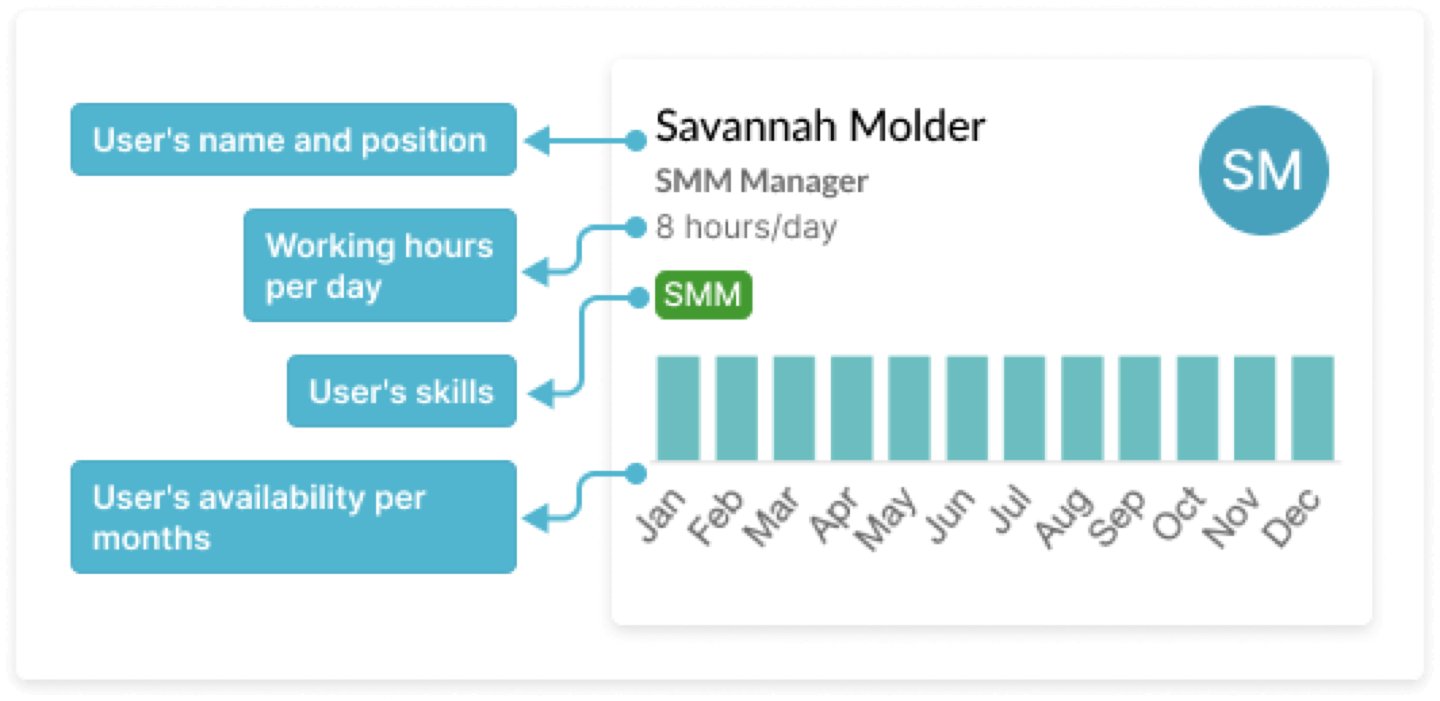
Personal Info and User Card
ActivityTimeline lets you view additional user details, such as skills and position, in the User Card on the Planner page.
In Planner, click on a user’s name or position to open the User Card with additional details.
A card will appear with additional information about that person. Administrators can add and manage user characteristics, including skills, positions directly in ActivityTimeline Configurations.
The User Card includes the following information:
-
User's name and position
-
Working hours per day
-
User's skills
-
User's availability per months.
For more details on configuring user characteristics, see: User Management
Adding Work to the Timeline
So far, you’ve seen how to view and adjust work on the Timeline.
The next step is understanding how work appears there in the first place.
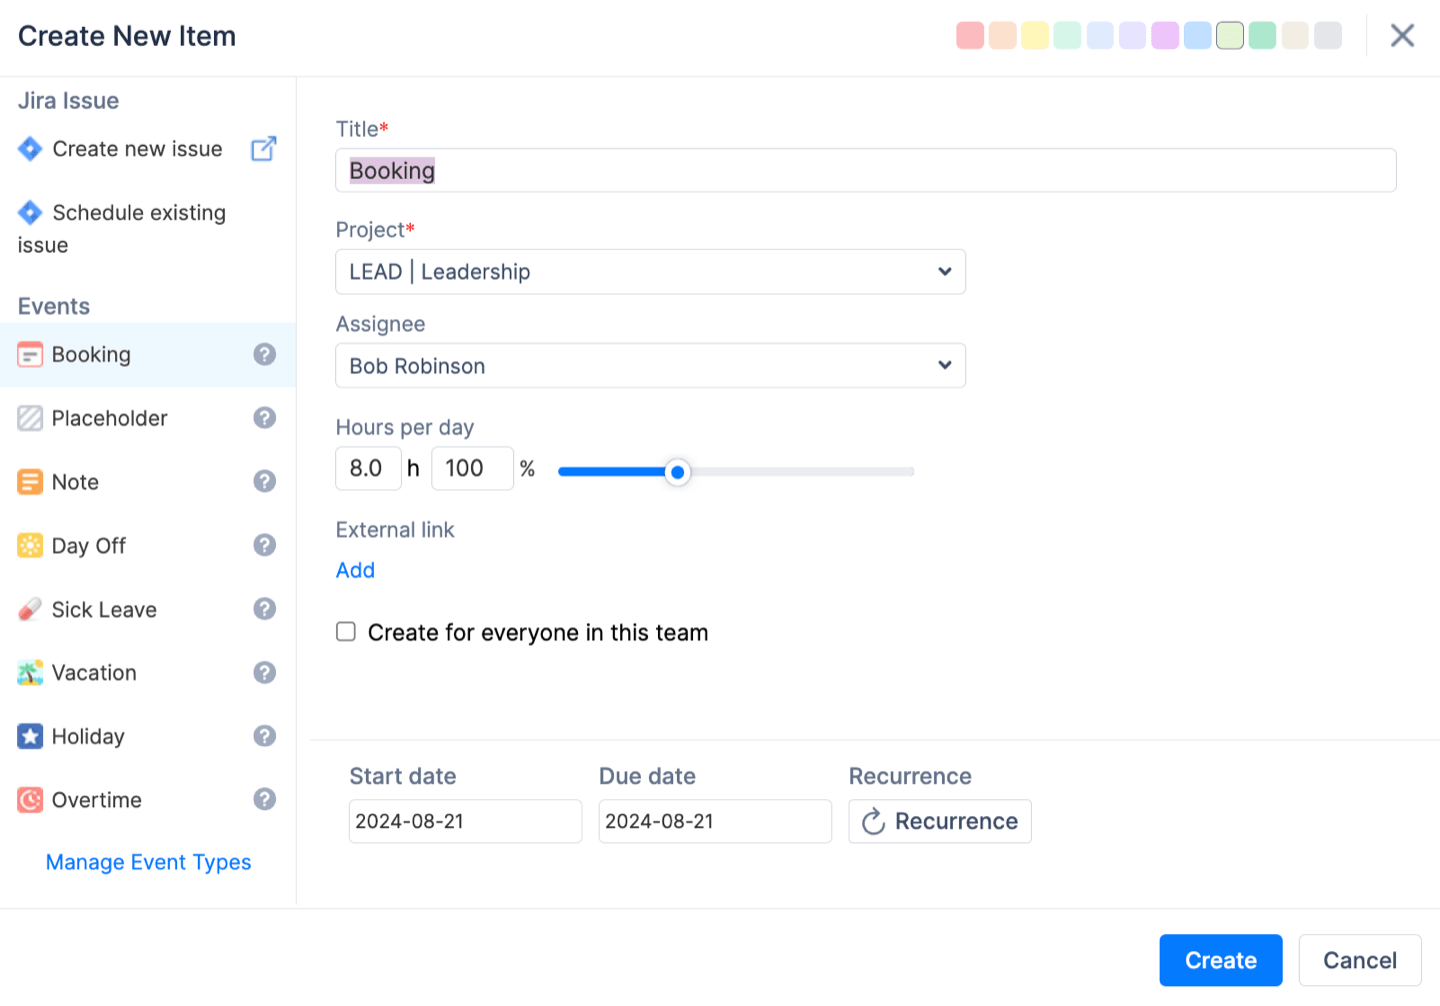
Creating Jira work items and Custom Events
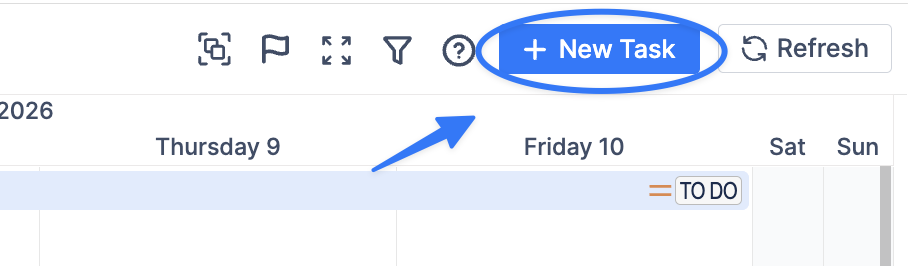
You can create new items either by clicking New Task at the top right corner or directly on the Timeline of the user or team.
Any Jira issues created or updated in ActivityTimeline are automatically synchronized with Jira.
In addition to Jira issues, you can use custom events to plan activities that are not tracked as tasks.
Typical examples include:
-
meetings or bookings,
-
vacations,
-
business trips,
-
sick leave,
-
days off.
Custom events help you represent availability and non-project activities, so your planning stays realistic and complete. To learn how to create and configure custom events, see: Create and Manage Custom Events.
Scheduling and Assigning Work
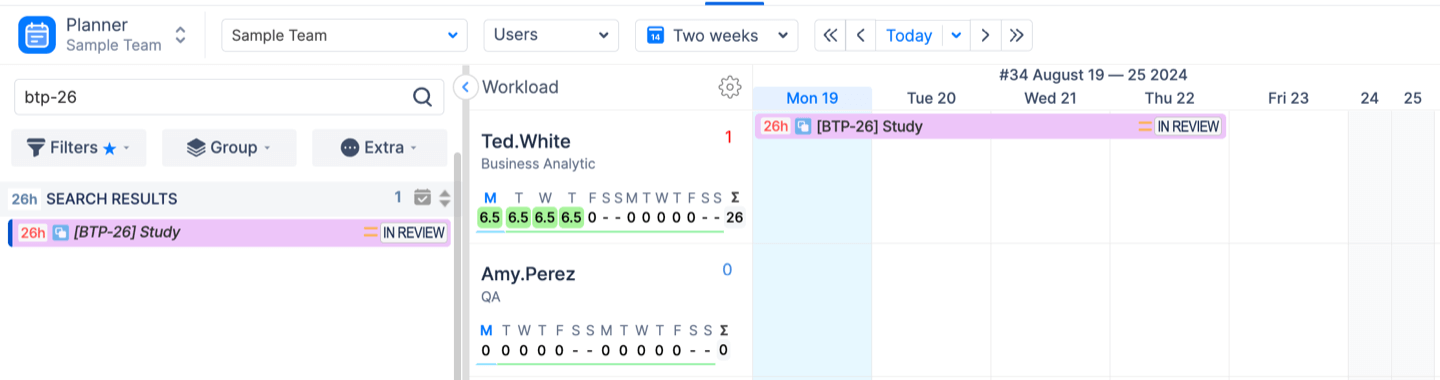
To assign and schedule an existing Jira issue:
-
Open the Issues Panel on the left side
-
Find the task you want to plan
-
Drag and drop the task onto the Timeline for the user responsible for completing it.
Once placed on the Timeline:
-
the task is assigned to that user,
-
it is scheduled across the selected dates,
-
and it becomes part of their workload.
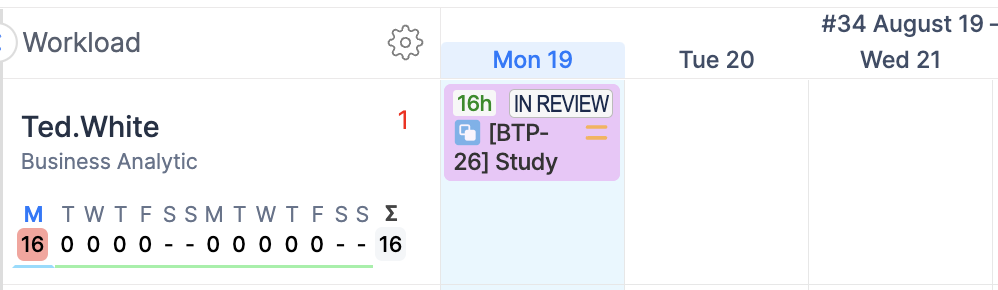
For example, the screenshot below demonstrates the task which is assigned to Ted White, Business Analytics.
When you schedule a task in ActivityTimeline the system automatically sets Assignee, Start Date and End Date in the corresponding Jira issue if configured.
ActivityTimeline and Jira stay synchronized automatically.
If you make changes in Jira (for example, updating dates or assignee):
-
click the Refresh button in the top-right corner of ActivityTimeline,
-
or wait for automatic synchronization (runs every 10 minutes).
Once synchronized, the Timeline will reflect the latest updates.
Individual Workload Indicator
In ActivityTimeline, workload is the total amount of work assigned to a user within a selected time period.
It is based on:
-
scheduled Jira issues (using remaining or daily estimates),
-
custom events (such as bookings or placeholders).
The workload indicator is displayed directly under each user on the Timeline.
It helps you quickly understand whether a person is:
-
Green — balanced
-
Light green — underloaded
-
Red — overloaded
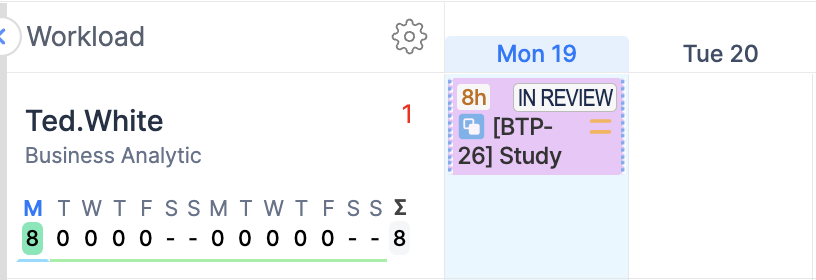
Example. If a user has tasks estimated at 16 hours per day, the indicator will turn red, showing overload. Move or resize tasks on the Timeline to balance the workload.
The workload indicator can display different types of information depending on the selected mode:
-
Workload — planned work based on estimates
-
Availability — remaining available capacity
-
Number of Issues — total tasks assigned
-
Worklogs — actual logged time
You can switch between these modes depending on what you want to analyze. For more details, see: Workload Indicator
Planning in ActivityTimeline follows a simple flow:
Add work → Schedule it → Adjust based on workload
Why This Matters
The Planner is the core of ActivityTimeline because it brings people, work, and time together in one place. Instead of relying on spreadsheets or disconnected tools, Planner gives you a single, visual source of truth for your team’s schedule.
To explore all Planner features in detail, see the full documentation: Planner - Capacity Planning.